Box2d 物理画线,Cocos Creator 3.8
一个简易的画线刚体Demo
效果
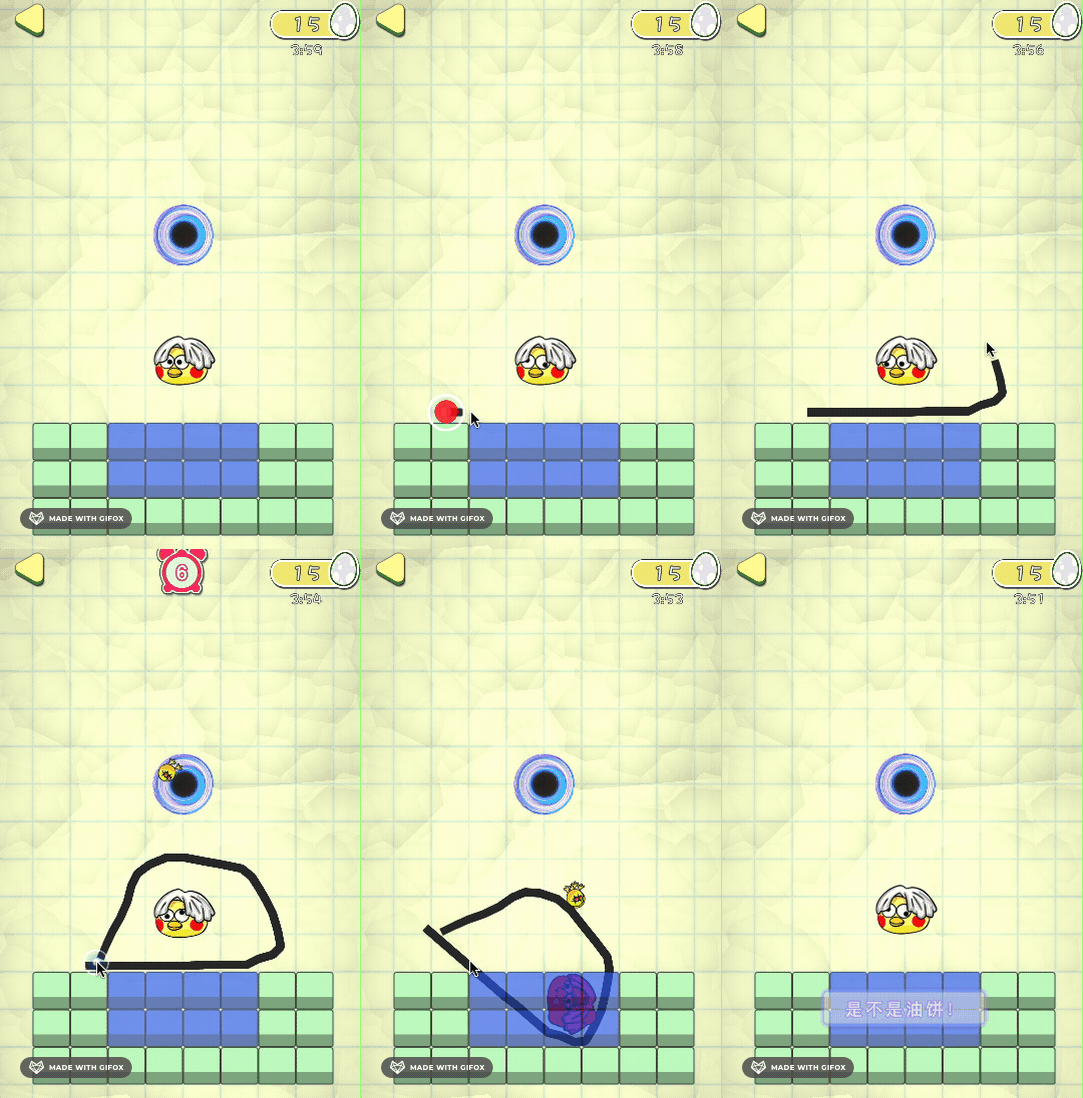
抱歉,放错图了,以上是 孙二喵 iwae https://forum.cocos.org/t/topic/142673[1] 的效果图。本Demo是根据文章的思路,合成的代码。首先,感谢孙二喵的技术分享。
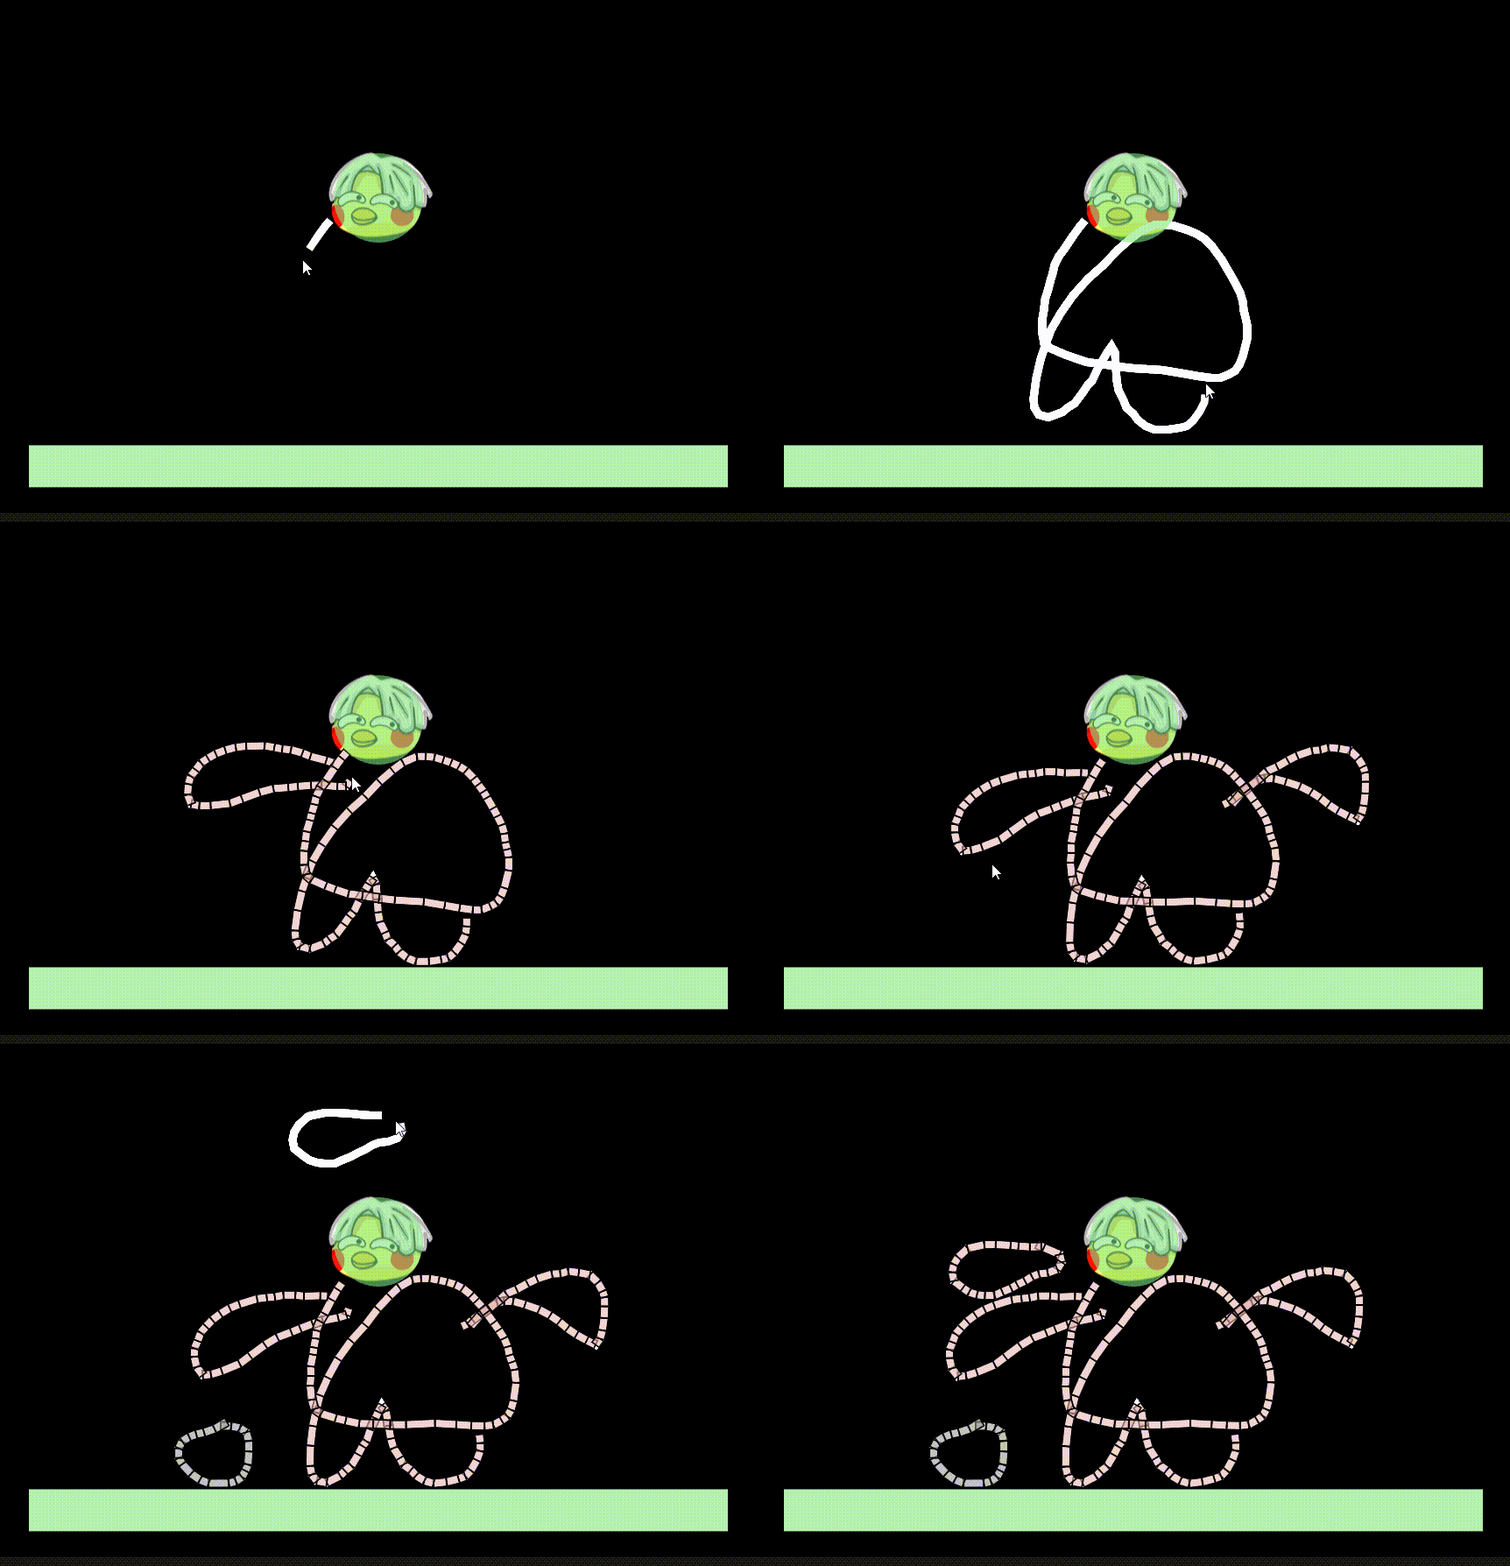
以下是最终效果图
使用
版本 Cocos Creator 3.8.1
-
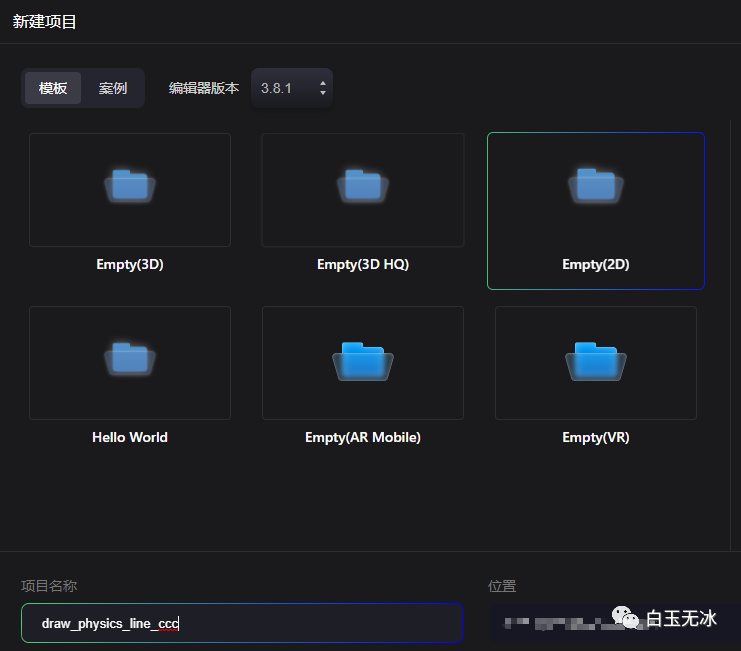
创建一个 Empty(2D)项目
-
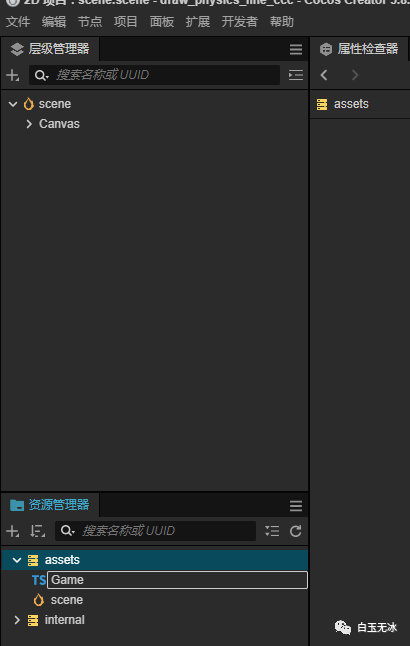
保存场景,新建一个 Game.ts脚本,把代码复制进去(代码在最后面)
-
拖入 Game.ts脚本至场景中
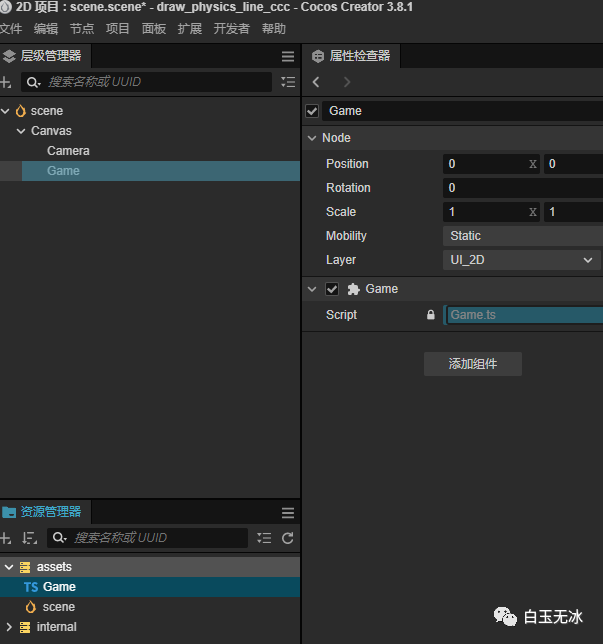
-
(可选)在场景中添加一些静态刚体和碰撞体
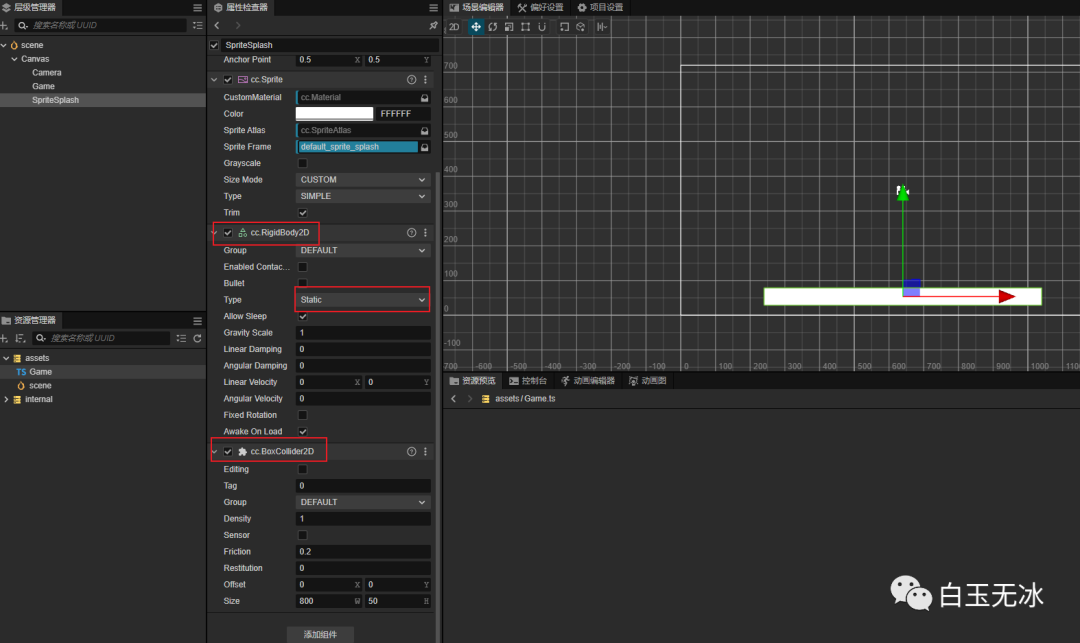
-
运行预览
原理
坐标转换
触点坐标转到节点坐标
-
getUILocation -
UITransform.convertToNodeSpaceAR
推荐阅读纯干货!一文搞懂 Cocos Creator 3.0 坐标转换原理
https://mp.weixin.qq.com/s/mV5EY4NMrpgCP9XFocrcGA
计算碰撞体
首先问题分解:已知:
-
两个点的坐标 -
线宽
求:
-
围成该线段的四个点的坐标
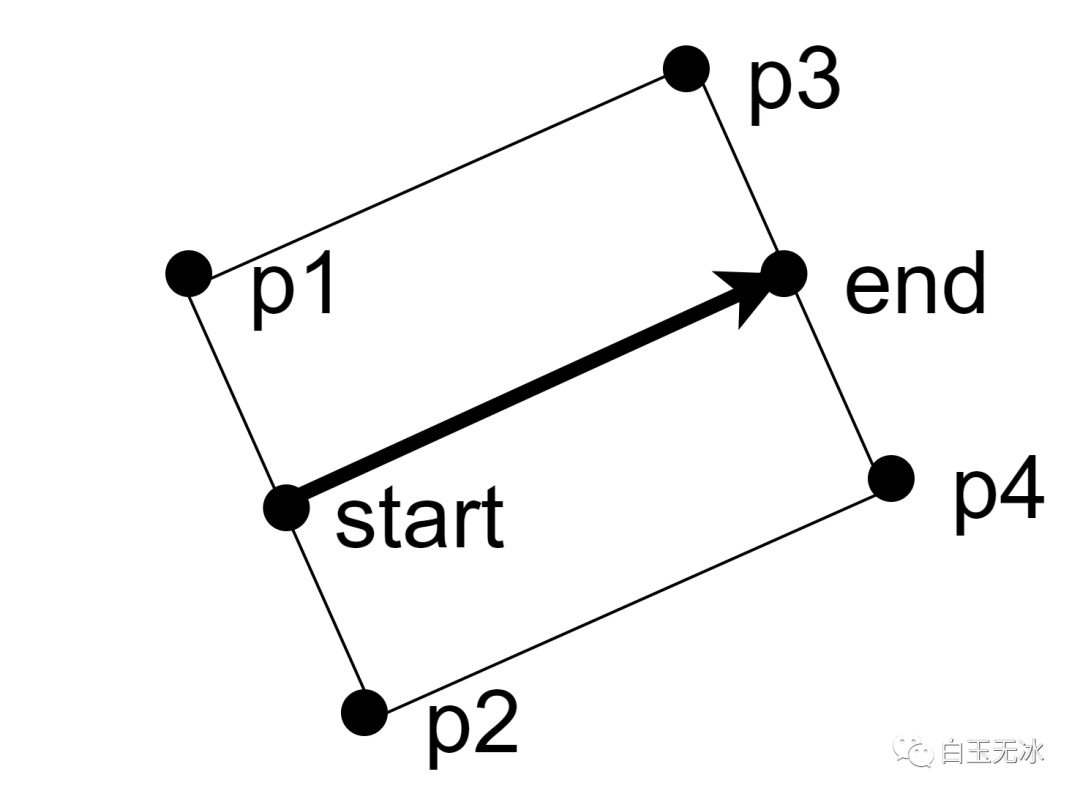
回顾一下,2D中的旋转的矩阵是:
旋转90度的矩阵为
旋转-90度的矩阵为
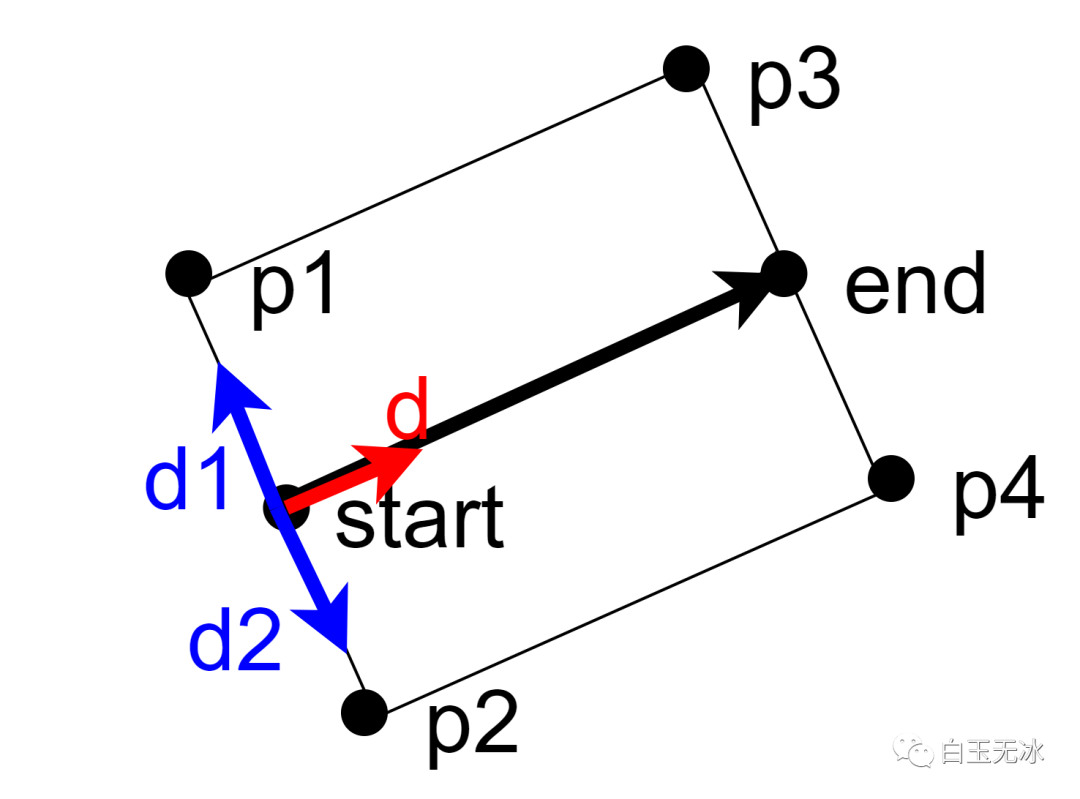
先计算方向向量,然后2个垂直方向的向量,分别乘以我们线段一半的宽度,最后起始点和结束点分别加上这2个向量,4个路径点
//方向向量
d = (end - start).normalize();
//垂直向量1
d1 = R_1 * d = (d.y,-d.x)
//垂直向量2
d2 = R_2 * d = (-d.y,d.x)
//求4个点
p1 = start + d1 * widhtHalf
p2 = start + d2 * widhtHalf
p3 = end + d1 * widhtHalf
p4 = end + d2 * widhtHalf
代码
import { _decorator, Component, EventTouch, find, Node, macro, Graphics, v2, Vec2, UITransform, v3, Color, RigidBody2D, PolygonCollider2D, PhysicsSystem2D } from 'cc';
const { ccclass, property } = _decorator;

const __tempV2 = v2()
const __tempV3 = v3()

type TypePoint = {
    x: number,
    y: number
}

@ccclass('Game')
export class Game extends Component {

    private _canvasNode: Node
    start() {
        macro.ENABLE_MULTI_TOUCH = false;
        PhysicsSystem2D.instance.debugDrawFlags = 1;
        this._canvasNode = find("Canvas")
        this._canvasNode.on(Node.EventType.TOUCH_START, this.onTouchStart, this)
        this._canvasNode.on(Node.EventType.TOUCH_MOVE, this.onTouchMove, this)
        this._canvasNode.on(Node.EventType.TOUCH_END, this.onTouchEnd, this)
        this._canvasNode.on(Node.EventType.TOUCH_CANCEL, this.onTouchEnd, this)
    }

    private getUIPos(pos: Vec2) {
        __tempV3.set(pos.x, pos.y, 0)
        this._curGraphics.node.getComponent(UITransform).convertToNodeSpaceAR(__tempV3, __tempV3)
        pos.set(__tempV3.x, __tempV3.y)
        return pos;
    }

    private _curGraphics: Graphics;
    private onTouchStart(evt: EventTouch) {
        evt.getUILocation(__tempV2)
        this._pointList.length = 0;
        const node = new Node()
        node.layer = this._canvasNode.layer;
        this._canvasNode.addChild(node);
        this._curGraphics = node.addComponent(Graphics)
        this._curGraphics.strokeColor = Color.WHITE;
        this._curGraphics.lineWidth = 10;
        const { x, y } = this.getUIPos(__tempV2)
        this._curGraphics.moveTo(x, y)
        this._pointList.push({ x, y })
    }

    private _preK: number = 0
    private _pointList: TypePoint[] = []
    private onTouchMove(evt: EventTouch) {
        evt.getUILocation(__tempV2)
        const { x, y } = this.getUIPos(__tempV2)
        const { x: preX, y: preY } = this._pointList[this._pointList.length - 1];
        const diffX = x - preX;
        const diffY = y - preY;
        const dis = (Math.abs(diffX) + Math.abs(diffY))
        if (dis >= this._curGraphics.lineWidth) {
            const d = 0.001
            const curK = Math.abs(diffX) < d ? (Number.MAX_SAFE_INTEGER * Math.sign(diffX) * Math.sign(diffY)) : (diffY / diffX)
            if (this._pointList.length > 1) {
                const diffK = curK - this._preK;
                if (Math.abs(diffK) < d) {
                    // 斜率相同去掉前一个点
                    this._pointList.pop()
                }
            }
            this._pointList.push({ x, y })
            this._curGraphics.lineTo(x, y)
            this._curGraphics.stroke();
            this._preK = curK;
        }
    }

    private onTouchEnd(evt: EventTouch) {
        console.log(this._pointList.length)
        if (this._pointList.length > 1) {
            this._curGraphics.addComponent(RigidBody2D);
            for (let index = 0; index < this._pointList.length - 1; index++) {
                const start = this._pointList[index];
                const end = this._pointList[index + 1];
                const poly = this._curGraphics.addComponent(PolygonCollider2D);
                const d = v2(end.x - start.x, end.y - start.y).normalize();
                const widhtHalf = this._curGraphics.lineWidth / 2;
                const p1 = v2(d.y, -d.x).multiplyScalar(widhtHalf).add2f(start.x, start.y)
                const p2 = v2(-d.y, d.x).multiplyScalar(widhtHalf).add2f(start.x, start.y)
                const p3 = v2(d.y, -d.x).multiplyScalar(widhtHalf).add2f(end.x, end.y)
                const p4 = v2(-d.y, d.x).multiplyScalar(widhtHalf).add2f(end.x, end.y)
                poly.points = [p1, p2, p4, p3];
                poly.apply()
            }
        } else {
            this._curGraphics.node.destroy();
        }
        this._curGraphics = null;
    }
}
小结
简单来说,画线刚体就是根据路径点和线宽去生成碰撞体。
参考资料
https://forum.cocos.org/t/topic/142673: https://forum.cocos.org/t/topic/142673
“点赞“ ”在看” 鼓励一下 ▼
▼
评论
