牛逼,竟然可以用 Python 操作 Word 文档,这么多的骚操作!

pip install pypiwin32
from win32com.client import Dispatch


app = Dispatch('Word.Application')
# 新建word文档
doc = app.Documents.Add()
app.Visible = 1
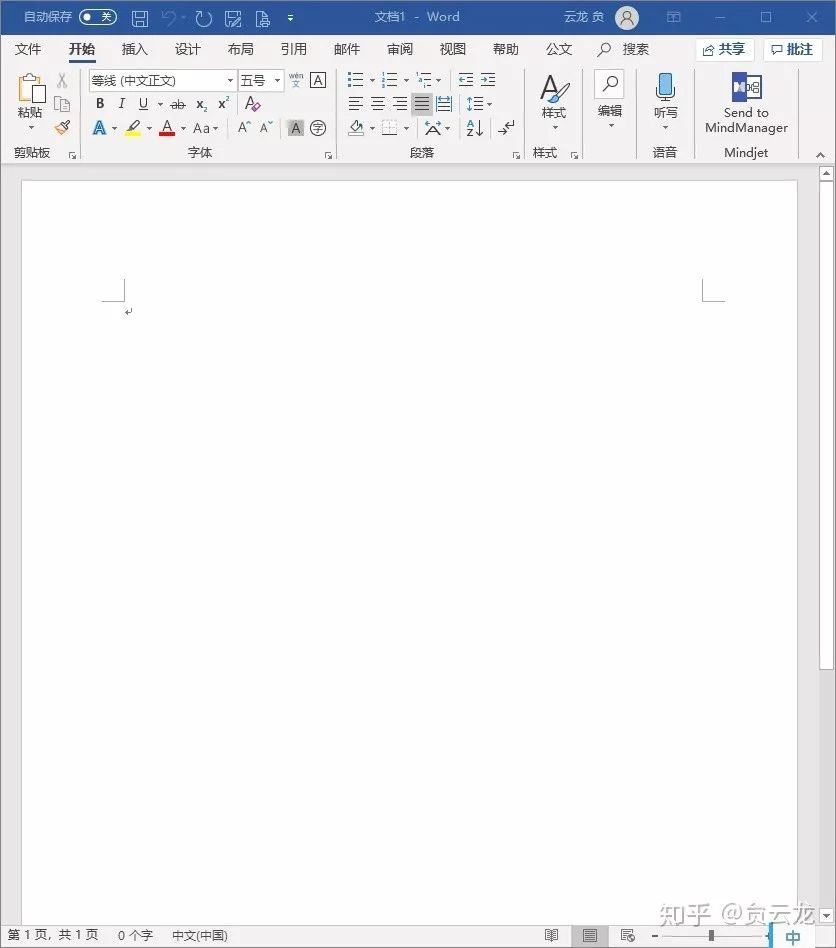
# 运行下句代码后,s获得新建文档的光标焦点,也就是图中的回车符前
s = app.Selection
# 用“Hello, World!“替换s代表的范围的文本
s.Text = 'Hello, world!'
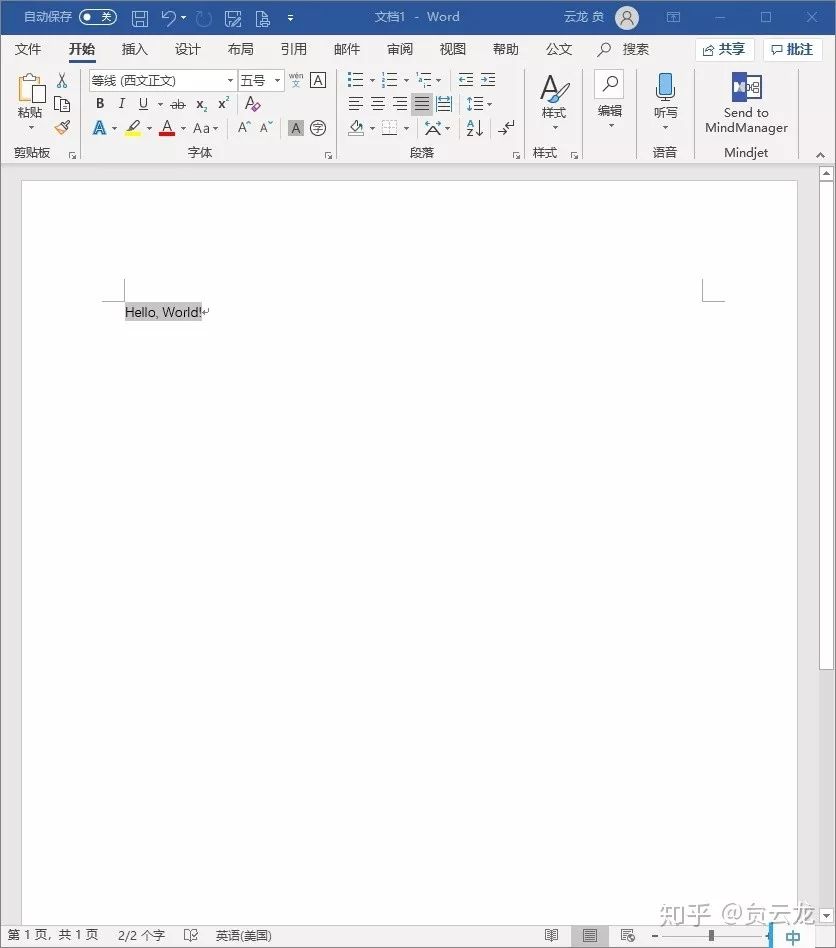
s.Text可以查看或者设置s选择区域的文本。Word对象模型中很多对象都有默认属性,Text就是Selection的默认属性,类似python的__str__方法。运行s()调用s的默认属性,此处等于于运行了s.Text。s()

# 如何获得
app = win32com.client.Dispatch('Word.Application')
# 如何获得

# 新建文档
doc = app.Documents.Add()
# 打开已有文档
doc = app.Documents.Open('你的Word文件路径')
如何获得
s = app.Selection
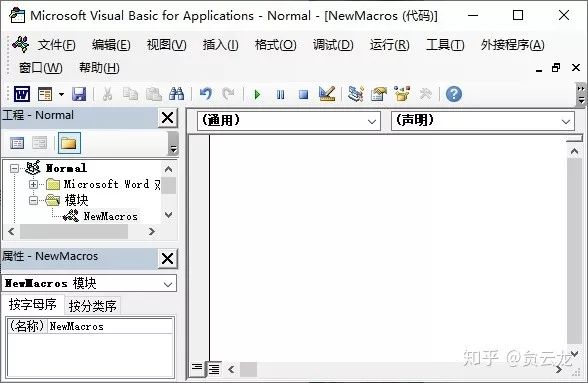
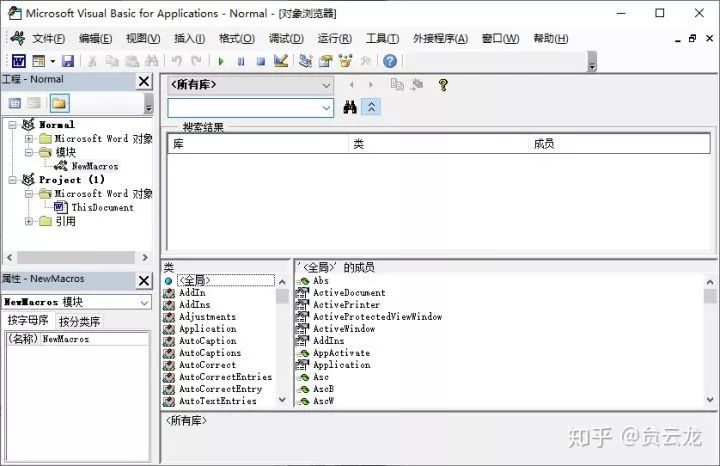

如何使用Selection输入
# 替换当前选择
s.Text = 'Hello, world!'
# 输入
s.TypeText('Hello, world!')
# 把当前选择复制到剪贴板
s.Copy()
# 粘贴剪贴板中的内容
s.Paste()
Text:输入的文本(前例中选区为'Hello, world!');TypeText:文本后的插入点(前例中选区为!后的插入点)。如何变更Selection
# 使用Start,End指定字符范围
s.Start = 0
s.End = n
# s从第0个字符(第1个字符前的插入点)到第n个字符。
# 汉字是每字为1字符

# 相当于按下Delete键
s.Delete()
# 相当于按下Ctrl+A
s.WholeStory()
# 向左移动
s.MoveLeft()
# 向右移动2个字符,第1个参数是移动单位WdUnits,见下图
s.MoveRight(1, 2)
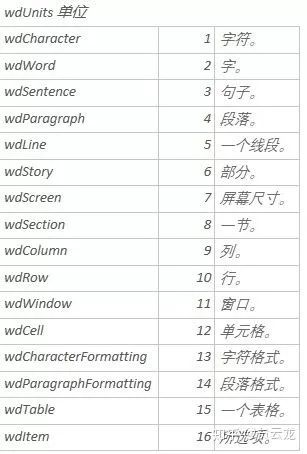

如何获得
r = doc.Range()
# 或
r = s.Range()
如何使用
如何获得
font = s.Font
# 或
font = r.Font
如何使用
# 字体设置为仿宋,电脑上必须安装有该字体
font.Name = '仿宋'
# 字号设置为三号
font.Size = 16
ParagraphFormat对象:段落格式。用来设置段落格式,包括对齐、缩进、行距、边框底纹等。
如何获得
pf = s.ParagraphFormat
# 或
pf = r.ParagraphFormat
如何使用
# 左、中、右 对齐分别为0, 1, 2,其他对齐方式见.NET 文档中的ParagraphFormat
pf.Alignment = 0
# 单倍、1.5倍、双倍行距分别为0, 1, 2,其他见ParagraphFormat文档
pf.LineSpacingRule = 0
# 指定段落的左缩进值为21磅。
pf.LeftIndent = 21
如何获得
ps = doc.PageSetup
# 或
ps = s.PageSetup
# 或
ps = r.PageSetup
如何使用
# 上边距79磅
ps.TopMargin = 79
# 页面大小,A3、A4分别为6,7
ps.PageSize = 7
如何获得
# 只能通过文档获得
styles = doc.Styles
如何使用
# 返回正文样式
normal = styles(-1)

# 修改正文样式的字体字号
normal.Font.Name = '仿宋'
normal.Font.Size = 16
app = win32com.client.Dispatch('word.application')
app.Visible='True'
# 让word程序可见,这样在交互命令行做的修改就可以实时显示
doc = app.Documents.Open('你的桌面路径/test.docx')
# word文件放在桌面方便手动修改
from win32com.client import Dispatch #需要安装的是pypiwin32模块


app=Dispatch('Word.Application')
doc = app.Documents.Open('你的word文档路径')

# 页面设置
cm_to_points = 28.35 # 1厘米为28.35磅
# 国家公文格式标准要求是上边距版心3.7cm
# 但是如果简单的把上边距设置为3.7cm
# 则因为文本的第一行本身有行距
# 会导致实际版心离上边缘较远,上下边距设置为3.3cm
# 是经过实验的,可以看看公文标准的图示
# 版心指的是文字与边缘距离
doc.PageSetup.TopMargin = 3.3*cm_to_points
# 上边距3.3厘米
doc.PageSetup.BottomMargin = 3.3*cm_to_points
# 下边距3.3厘米
doc.PageSetup.LeftMargin = 2.8*cm_to_points
# 左边距2.8厘米
doc.PageSetup.RightMargin = 2.6*cm_to_points
# 右边距2.6厘米

# 设置正常样式的字体
# 是为了后面指定行和字符网格时
# 按照这个字体标准进行
doc.Styles(-1).Font.Name = '仿宋'
# word中的“正常”样式字体为仿宋
doc.Styles(-1).Font.NameFarEast = '仿宋'
# word中的“正常”样式字体为仿宋
doc.Styles(-1).Font.NameAscii = '仿宋'
# word中的“正常”样式字体为仿宋
doc.Styles(-1).Font.NameOther = '仿宋'
# word中的“正常”样式字体为仿宋
doc.Styles(-1).Font.Size = 16
# word中的“正常”样式字号为三号

doc.PageSetup.LayoutMode = 1
# 指定行和字符网格
doc.PageSetup.CharsLine = 28
# 每行28个字
doc.PageSetup.LinesPage = 22
# 每页22行,会自动设置行间距

# 页码设置
doc.PageSetup.FooterDistance = 2.8*cm_to_points
# 页码距下边缘2.8厘米
doc.PageSetup.OddAndEvenPagesHeaderFooter = 0
# 首页页码相同
doc.PageSetup.OddAndEvenPagesHeaderFooter = 0
# 页脚奇偶页相同
w = doc.windows(1)
# 获得文档的第一个窗口
w.view.seekview = 4
# 获得页眉页脚视图
s = w.selection
# 获取窗口的选择对象
s.headerfooter.pagenumbers.startingnumber = startingnumber
# 设置起始页码
s.headerfooter.pagenumbers.NumberStyle = 0
# 设置页码样式为单纯的阿拉伯数字
s.WholeStory()
# 扩选到整个部分(会选中整个页眉页脚)
s.Delete()
#按下删除键,这两句是为了清除原来的页码
s.headerfooter.pagenumbers.Add(4)
# 添加页面外侧页码
s.MoveLeft(1, 2)
# 移动到页码左边,移动了两个字符距离
s.TypeText('— ')
# 给页码左边加上一字线,注意不是减号
s.MoveRight()
#移动到页码末尾,移动了一个字符距离
# 默认参数是1(字符)
s.TypeText(' —')
s.WholeStory()
# 扩选到整个页眉页脚部分,此处是必要的
# 否则s只是在输入一字线后的一个光标,没有选择区域
s.Font.Name = '宋体'
s.Font.Size = 14
#页码字号为四号
s.paragraphformat.rightindent = 21
#页码向左缩进1字符(21磅)
s.paragraphformat.leftindent = 21
# 页码向右缩进1字符(21磅)
doc.Styles('页眉').ParagraphFormat.Borders(-3).LineStyle = 0
# 页眉无底边框横线
Python通过win32实现office自动化
https://blog.csdn.net/lzl001/article/details/8435048

引用Microsoft Word 对象的技术及实现
https://www.docin.com/p-1333941826.html

Word组件对象模型
https://blog.csdn.net/wishfly/article/details/39959349
恋习Python 关注恋习Python,Python都好练 好文章,我在看❤️
评论
