7个学妹看见都惊呆的Python小项目!【附源码】
要制作一个计算器,首先需要知道它由哪些部分组成。示意如下图所示。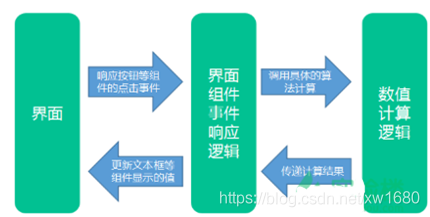
从结构上来说,一个简单的图形界面,需要由界面组件、组件的事件监听器(响应各类事件的逻辑)和具体的事件处理逻辑组成。界面实现的主要工作是创建各个界面组件对象,对其进行初始化,以及控制各组件之间的层次关系和布局。
3. 示例效果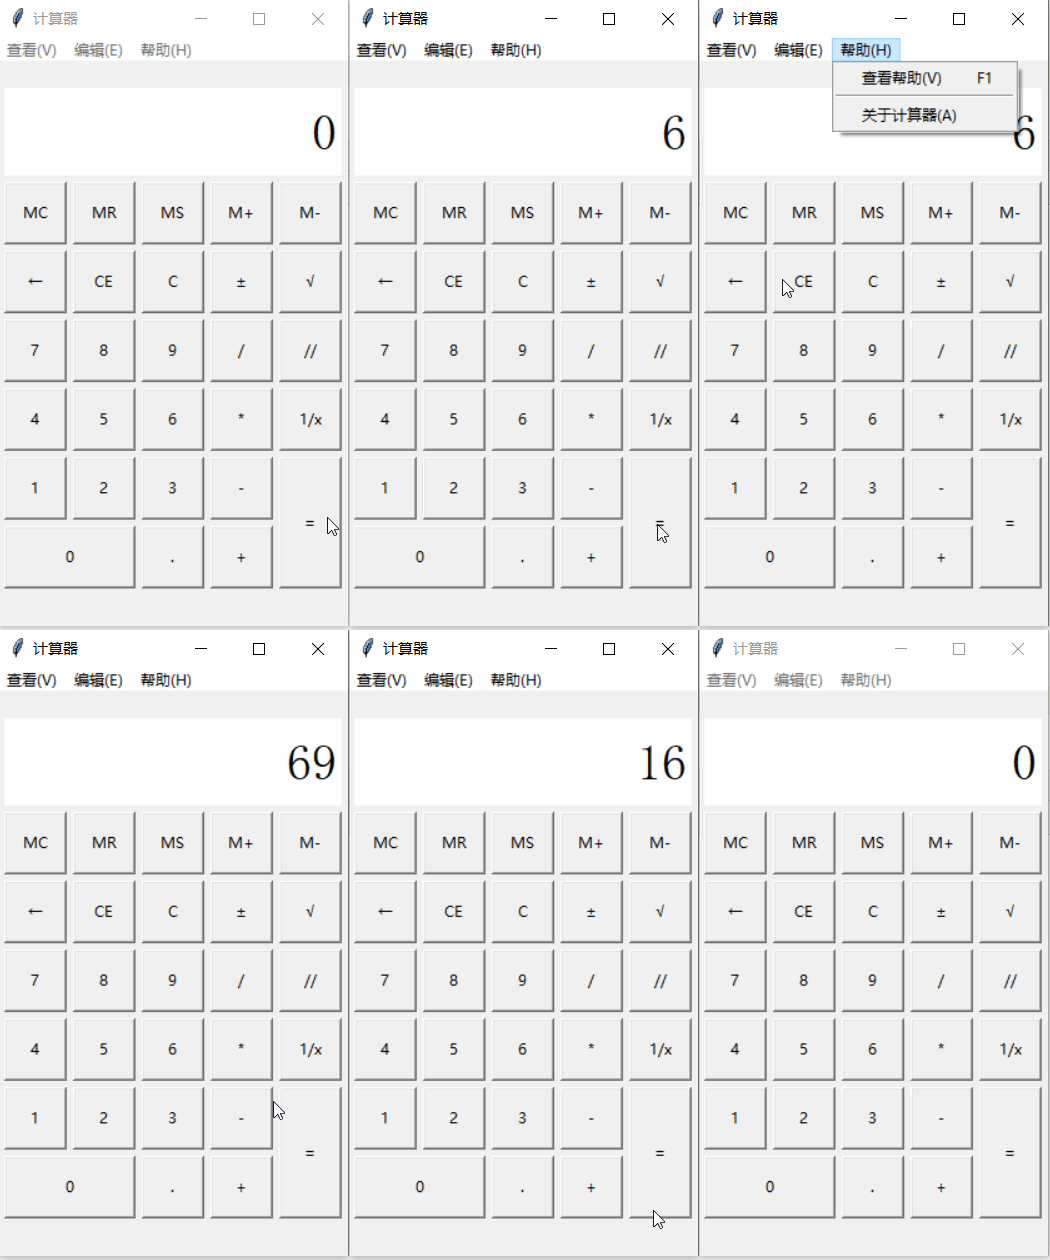
4. 示例源码
import tkinterimport mathimport tkinter.messageboxclass Calculator(object):# 界面布局方法def __init__(self):# 创建主界面,并且保存到成员属性中self.root = tkinter.Tk()self.root.minsize(280, 450)self.root.maxsize(280, 470)self.root.title('计算器')# 设置显式面板的变量self.result = tkinter.StringVar()self.result.set(0)# 设置一个全局变量 运算数字和f符号的列表self.lists = []# 添加一个用于判断是否按下运算符号的标志self.ispresssign = False# 界面布局self.menus()self.layout()self.root.mainloop()# 计算器菜单界面摆放def menus(self):# 添加菜单# 创建总菜单allmenu = tkinter.Menu(self.root)# 添加子菜单filemenu = tkinter.Menu(allmenu, tearoff=0)# 添加选项卡filemenu.add_command(label='标准型(T) Alt+1', command=self.myfunc)filemenu.add_command(label='科学型(S) Alt+2', command=self.myfunc)filemenu.add_command(label='程序员(P) Alt+3', command=self.myfunc)filemenu.add_command(label='统计信息(A) Alt+4', command=self.myfunc)# 添加分割线filemenu.add_separator()# 添加选项卡filemenu.add_command(label='历史记录(Y) Ctrl+H', command=self.myfunc)filemenu.add_command(label='数字分组(I)', command=self.myfunc)# 添加分割线filemenu.add_separator()# 添加选项卡filemenu.add_command(label='基本(B) Ctrl+F4', command=self.myfunc)filemenu.add_command(label='单位转换(U) Ctrl+U', command=self.myfunc)filemenu.add_command(label='日期计算(D) Ctrl+E', command=self.myfunc)menu1 = tkinter.Menu(filemenu, tearoff=0)menu1.add_command(label='抵押(M)', command=self.myfunc)menu1.add_command(label='汽车租赁(V)', command=self.myfunc)menu1.add_command(label='油耗(mpg)(F)', command=self.myfunc)menu1.add_command(label='油耗(l/100km)(U)', command=self.myfunc)filemenu.add_cascade(label='工作表(W)', menu=menu1)allmenu.add_cascade(label='查看(V)', menu=filemenu)# 添加子菜单2editmenu = tkinter.Menu(allmenu, tearoff=0)# 添加选项卡editmenu.add_command(label='复制(C) Ctrl+C', command=self.myfunc)editmenu.add_command(label='粘贴(V) Ctrl+V', command=self.myfunc)# 添加分割线editmenu.add_separator()# 添加选项卡menu2 = tkinter.Menu(filemenu, tearoff=0)menu2.add_command(label='复制历史记录(I)', command=self.myfunc)menu2.add_command(label='编辑(E) F2', command=self.myfunc)menu2.add_command(label='取消编辑(N) Esc', command=self.myfunc)menu2.add_command(label='清除(L) Ctrl+Shift+D', command=self.myfunc)editmenu.add_cascade(label='历史记录(H)', menu=menu2)allmenu.add_cascade(label='编辑(E)', menu=editmenu)# 添加子菜单3helpmenu = tkinter.Menu(allmenu, tearoff=0)# 添加选项卡helpmenu.add_command(label='查看帮助(V) F1', command=self.myfunc)# 添加分割线helpmenu.add_separator()# 添加选项卡helpmenu.add_command(label='关于计算器(A)', command=self.myfunc)allmenu.add_cascade(label='帮助(H)', menu=helpmenu)self.root.config(menu=allmenu)# 计算器主界面摆放def layout(self):# 显示屏result = tkinter.StringVar()result.set(0)show_label = tkinter.Label(self.root, bd=3, bg='white', font=('宋体', 30), anchor='e', textvariable=self.result)show_label.place(x=5, y=20, width=270, height=70)# 功能按钮MCbutton_mc = tkinter.Button(self.root, text='MC', command=self.wait)button_mc.place(x=5, y=95, width=50, height=50)# 功能按钮MRbutton_mr = tkinter.Button(self.root, text='MR', command=self.wait)button_mr.place(x=60, y=95, width=50, height=50)# 功能按钮MSbutton_ms = tkinter.Button(self.root, text='MS', command=self.wait)button_ms.place(x=115, y=95, width=50, height=50)# 功能按钮M+button_mjia = tkinter.Button(self.root, text='M+', command=self.wait)button_mjia.place(x=170, y=95, width=50, height=50)# 功能按钮M-button_mjian = tkinter.Button(self.root, text='M-', command=self.wait)button_mjian.place(x=225, y=95, width=50, height=50)# 功能按钮←button_zuo = tkinter.Button(self.root, text='←', command=self.dele_one)button_zuo.place(x=5, y=150, width=50, height=50)# 功能按钮CEbutton_ce = tkinter.Button(self.root, text='CE', command=lambda: self.result.set(0))button_ce.place(x=60, y=150, width=50, height=50)# 功能按钮Cbutton_c = tkinter.Button(self.root, text='C', command=self.sweeppress)button_c.place(x=115, y=150, width=50, height=50)# 功能按钮±button_zf = tkinter.Button(self.root, text='±', command=self.zf)button_zf.place(x=170, y=150, width=50, height=50)# 功能按钮√button_kpf = tkinter.Button(self.root, text='√', command=self.kpf)button_kpf.place(x=225, y=150, width=50, height=50)# 数字按钮7button_7 = tkinter.Button(self.root, text='7', command=lambda: self.pressnum('7'))button_7.place(x=5, y=205, width=50, height=50)# 数字按钮8button_8 = tkinter.Button(self.root, text='8', command=lambda: self.pressnum('8'))button_8.place(x=60, y=205, width=50, height=50)# 数字按钮9button_9 = tkinter.Button(self.root, text='9', command=lambda: self.pressnum('9'))button_9.place(x=115, y=205, width=50, height=50)# 功能按钮/button_division = tkinter.Button(self.root, text='/', command=lambda: self.presscalculate('/'))button_division.place(x=170, y=205, width=50, height=50)# 功能按钮%button_remainder = tkinter.Button(self.root, text='//', command=lambda: self.presscalculate('//'))button_remainder.place(x=225, y=205, width=50, height=50)# 数字按钮4button_4 = tkinter.Button(self.root, text='4', command=lambda: self.pressnum('4'))button_4.place(x=5, y=260, width=50, height=50)# 数字按钮5button_5 = tkinter.Button(self.root, text='5', command=lambda: self.pressnum('5'))button_5.place(x=60, y=260, width=50, height=50)# 数字按钮6button_6 = tkinter.Button(self.root, text='6', command=lambda: self.pressnum('6'))button_6.place(x=115, y=260, width=50, height=50)# 功能按钮*button_multiplication = tkinter.Button(self.root, text='*', command=lambda: self.presscalculate('*'))button_multiplication.place(x=170, y=260, width=50, height=50)# 功能按钮1/xbutton_reciprocal = tkinter.Button(self.root, text='1/x', command=self.ds)button_reciprocal.place(x=225, y=260, width=50, height=50)# 数字按钮1button_1 = tkinter.Button(self.root, text='1', command=lambda: self.pressnum('1'))button_1.place(x=5, y=315, width=50, height=50)# 数字按钮2button_2 = tkinter.Button(self.root, text='2', command=lambda: self.pressnum('2'))button_2.place(x=60, y=315, width=50, height=50)# 数字按钮3button_3 = tkinter.Button(self.root, text='3', command=lambda: self.pressnum('3'))button_3.place(x=115, y=315, width=50, height=50)# 功能按钮-button_subtraction = tkinter.Button(self.root, text='-', command=lambda: self.presscalculate('-'))button_subtraction.place(x=170, y=315, width=50, height=50)# 功能按钮=button_equal = tkinter.Button(self.root, text='=', command=lambda: self.pressequal())button_equal.place(x=225, y=315, width=50, height=105)# 数字按钮0button_0 = tkinter.Button(self.root, text='0', command=lambda: self.pressnum('0'))button_0.place(x=5, y=370, width=105, height=50)# 功能按钮.button_point = tkinter.Button(self.root, text='.', command=lambda: self.pressnum('.'))button_point.place(x=115, y=370, width=50, height=50)# 功能按钮+button_plus = tkinter.Button(self.root, text='+', command=lambda: self.presscalculate('+'))button_plus.place(x=170, y=370, width=50, height=50)# 计算器菜单功能def myfunc(self):tkinter.messagebox.showinfo('', '预留接口,学成之后,你是不是有冲动添加该功能.')# 数字方法def pressnum(self, num):# 全局化变量# 判断是否按下了运算符号if self.ispresssign == False:passelse:self.result.set(0)# 重置运算符号的状态self.ispresssign = Falseif num == '.':num = '0.'# 获取面板中的原有数字oldnum = self.result.get()# 判断界面数字是否为0if oldnum == '0':self.result.set(num)else:# 连接上新按下的数字newnum = oldnum + num# 将按下的数字写到面板中self.result.set(newnum)# 运算函数def presscalculate(self, sign):# 保存已经按下的数字和运算符号# 获取界面数字num = self.result.get()self.lists.append(num)# 保存按下的操作符号self.lists.append(sign)# 设置运算符号为按下状态self.ispresssign = True# 获取运算结果def pressequal(self):# 获取所有的列表中的内容(之前的数字和操作)# 获取当前界面上的数字curnum = self.result.get()# 将当前界面的数字存入列表self.lists.append(curnum)# 将列表转化为字符串calculatestr = ''.join(self.lists)# 使用eval执行字符串中的运算即可endnum = eval(calculatestr)# 将运算结果显示在界面中self.result.set(str(endnum)[:10])if self.lists != 0:self.ispresssign = True# 清空运算列表self.lists.clear()# 暂未开发说明def wait(self):tkinter.messagebox.showinfo('', '更新中......')# ←按键功能def dele_one(self):if self.result.get() == '' or self.result.get() == '0':self.result.set('0')returnelse:num = len(self.result.get())if num > 1:strnum = self.result.get()strnum = strnum[0:num - 1]self.result.set(strnum)else:self.result.set('0')# ±按键功能def zf(self):strnum = self.result.get()if strnum[0] == '-':self.result.set(strnum[1:])elif strnum[0] != '-' and strnum != '0':self.result.set('-' + strnum)# 1/x按键功能def ds(self):dsnum = 1 / int(self.result.get())self.result.set(str(dsnum)[:10])if self.lists != 0:self.ispresssign = True# 清空运算列表self.lists.clear()# C按键功能def sweeppress(self):self.lists.clear()self.result.set(0)# √按键功能def kpf(self):strnum = float(self.result.get())endnum = math.sqrt(strnum)if str(endnum)[-1] == '0':self.result.set(str(endnum)[:-2])else:self.result.set(str(endnum)[:10])if self.lists != 0:self.ispresssign = True# 清空运算列表self.lists.clear()# 实例化对象my_calculator = Calculator()
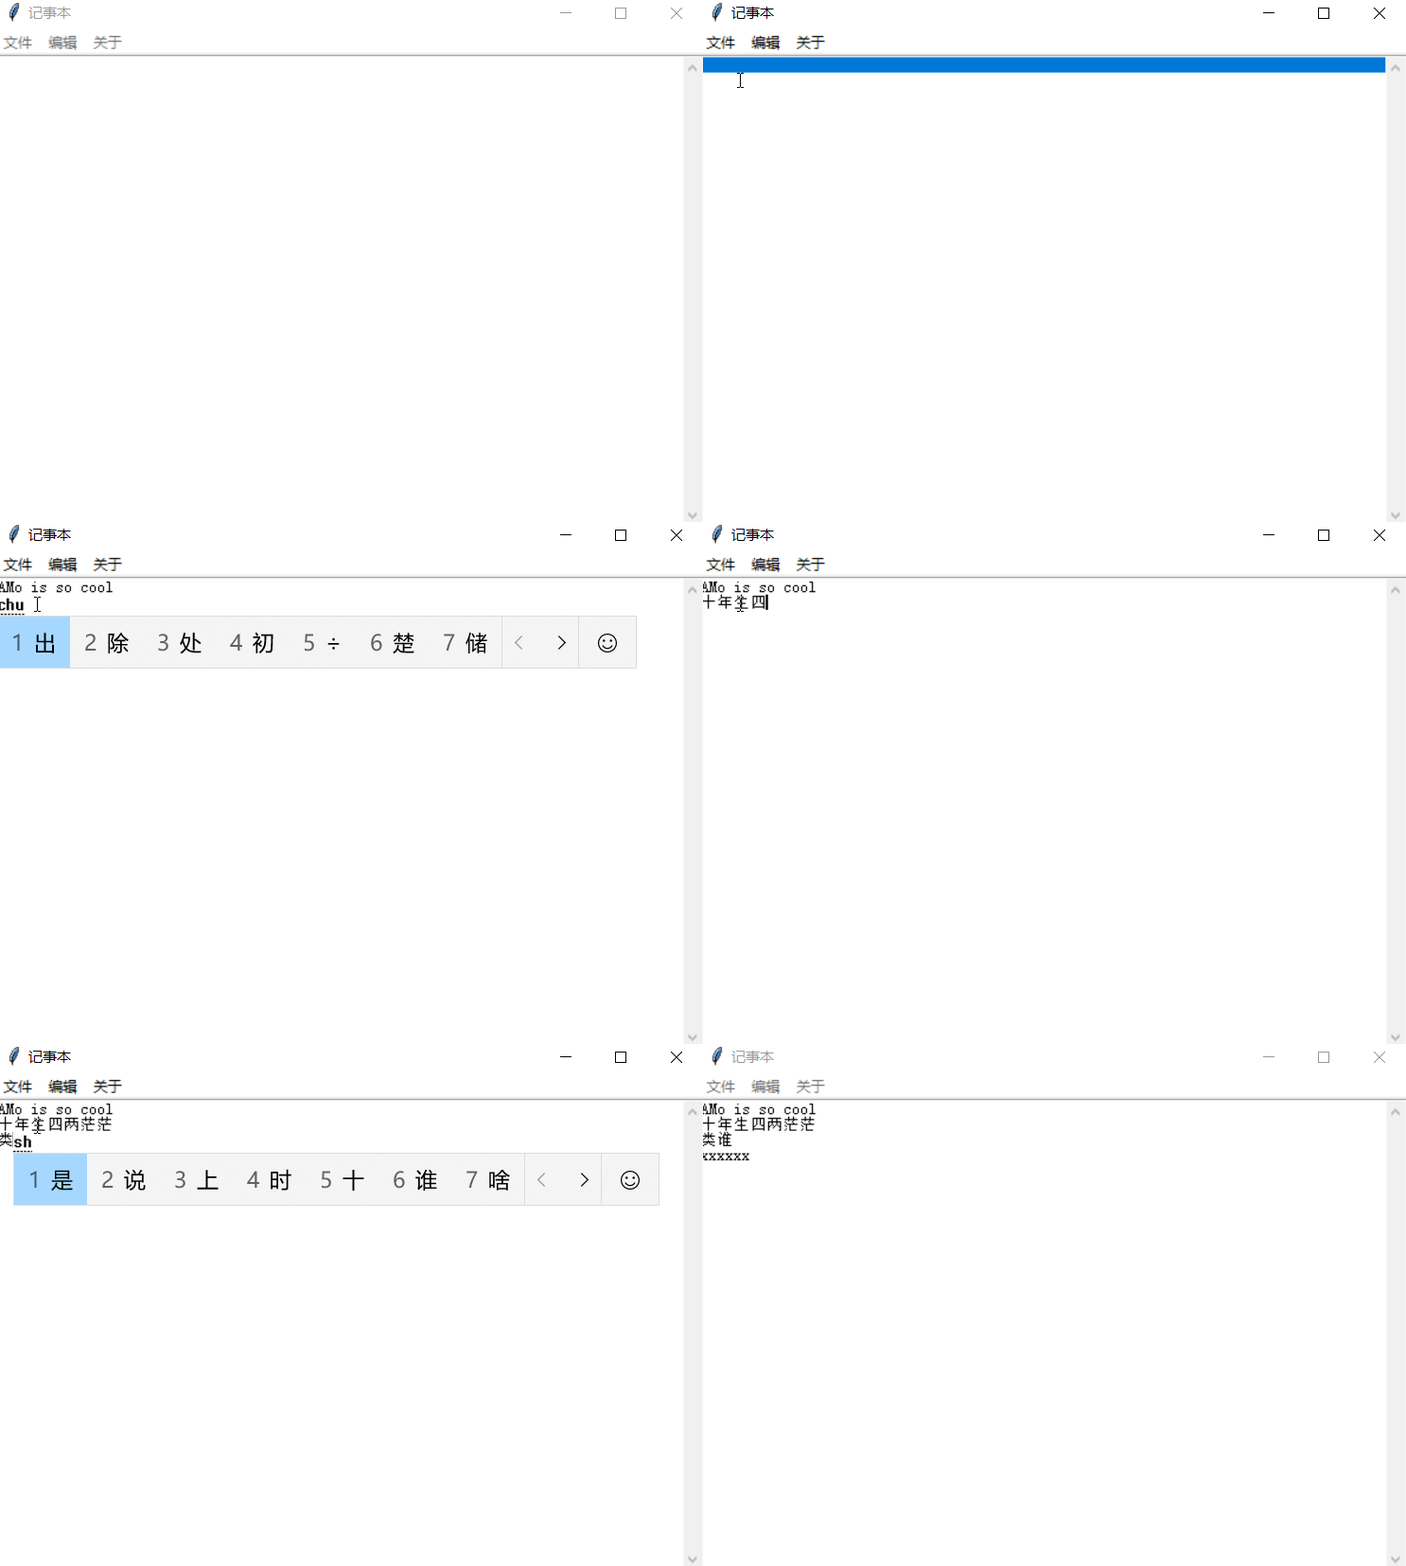
2、记事本
from tkinter import *from tkinter.filedialog import *from tkinter.messagebox import *import osfilename = ""def author():showinfo(title="作者", message="Python")def power():showinfo(title="版权信息", message="课堂练习")def mynew():global top, filename, textPadtop.title("未命名文件")filename = NonetextPad.delete(1.0, END)def myopen():global filenamefilename = askopenfilename(defaultextension=".txt")if filename == "":filename = Noneelse:top.title("记事本" + os.path.basename(filename))textPad.delete(1.0, END)f = open(filename, 'r')textPad.insert(1.0, f.read())f.close()def mysave():global filenametry:f = open(filename, 'w')msg = textPad.get(1.0, 'end')f.write(msg)f.close()except:mysaveas()def mysaveas():global filenamef = asksaveasfilename(initialfile="未命名.txt", defaultextension=".txt")filename = ffh = open(f, 'w')msg = textPad.get(1.0, END)fh.write(msg)fh.close()top.title("记事本 " + os.path.basename(f))def cut():global textPadtextPad.event_generate("<>" )def copy():global textPadtextPad.event_generate("<>" )def paste():global textPadtextPad.event_generate("<>" )def undo():global textPadtextPad.event_generate("<>" )def redo():global textPadtextPad.event_generate("<>" )def select_all():global textPad# textPad.event_generate("<>") textPad.tag_add("sel", "1.0", "end")def find():t = Toplevel(top)t.title("查找")t.geometry("260x60+200+250")t.transient(top)Label(t, text="查找:").grid(row=0, column=0, sticky="e")v = StringVar()e = Entry(t, width=20, textvariable=v)e.grid(row=0, column=1, padx=2, pady=2, sticky="we")e.focus_set()c = IntVar()Checkbutton(t, text="不区分大小写", variable=c).grid(row=1, column=1, sticky='e')Button(t, text="查找所有", command=lambda: search(v.get(), c.get(),textPad, t, e)).grid(row=0, column=2, sticky="e" + "w", padx=2,pady=2)def close_search():textPad.tag_remove("match", "1.0", END)t.destroy()t.protocol("WM_DELETE_WINDOW", close_search)def mypopup(event):# global editmenueditmenu.tk_popup(event.x_root, event.y_root)def search(needle, cssnstv, textPad, t, e):textPad.tag_remove("match", "1.0", END)count = 0if needle:pos = "1.0"while True:pos = textPad.search(needle, pos, nocase=cssnstv, stopindex=END)if not pos:breaklastpos = pos + str(len(needle))textPad.tag_add("match", pos, lastpos)count += 1pos = lastpostextPad.tag_config('match', fg='yellow', bg="green")e.focus_set()t.title(str(count) + "个被匹配")top = Tk()top.title("记事本")top.geometry("600x400+100+50")menubar = Menu(top)# 文件功能filemenu = Menu(top)filemenu.add_command(label="新建", accelerator="Ctrl+N", command=mynew)filemenu.add_command(label="打开", accelerator="Ctrl+O", command=myopen)filemenu.add_command(label="保存", accelerator="Ctrl+S", command=mysave)filemenu.add_command(label="另存为", accelerator="Ctrl+shift+s", command=mysaveas)menubar.add_cascade(label="文件", menu=filemenu)# 编辑功能editmenu = Menu(top)editmenu.add_command(label="撤销", accelerator="Ctrl+Z", command=undo)editmenu.add_command(label="重做", accelerator="Ctrl+Y", command=redo)editmenu.add_separator()editmenu.add_command(label="剪切", accelerator="Ctrl+X", command=cut)editmenu.add_command(label="复制", accelerator="Ctrl+C", command=copy)editmenu.add_command(label="粘贴", accelerator="Ctrl+V", command=paste)editmenu.add_separator()editmenu.add_command(label="查找", accelerator="Ctrl+F", command=find)editmenu.add_command(label="全选", accelerator="Ctrl+A", command=select_all)menubar.add_cascade(label="编辑", menu=editmenu)# 关于 功能aboutmenu = Menu(top)aboutmenu.add_command(label="作者", command=author)aboutmenu.add_command(label="版权", command=power)menubar.add_cascade(label="关于", menu=aboutmenu)top['menu'] = menubar# shortcutbar = Frame(top, height=25, bg='light sea green')# shortcutbar.pack(expand=NO, fill=X)# Inlabe = Label(top, width=2, bg='antique white')# Inlabe.pack(side=LEFT, anchor='nw', fill=Y)textPad = Text(top, undo=True)textPad.pack(expand=YES, fill=BOTH)scroll = Scrollbar(textPad)textPad.config(yscrollcommand=scroll.set)scroll.config(command=textPad.yview)scroll.pack(side=RIGHT, fill=Y)# 热键绑定textPad.bind("" , mynew)textPad.bind("" , mynew)textPad.bind("" , myopen)textPad.bind("" , myopen)textPad.bind("" , mysave)textPad.bind("" , mysave)textPad.bind("" , select_all)textPad.bind("" , select_all)textPad.bind("" , find)textPad.bind("" , find)textPad.bind("" , mypopup)top.mainloop()
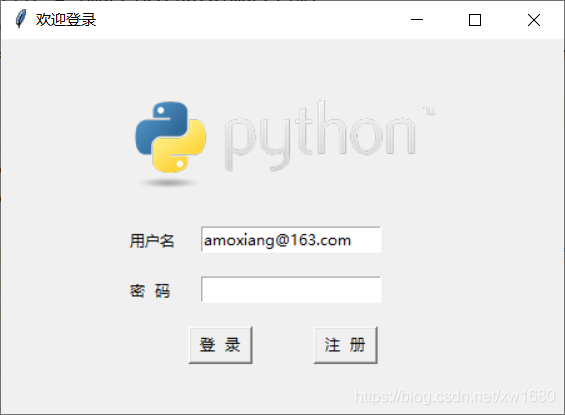
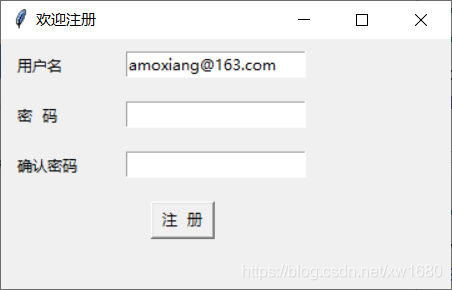
3、登录和注册
import tkinter as tkimport pickleimport tkinter.messageboxfrom PIL import Image, ImageTk# 设置窗口---最开始的母体窗口window = tk.Tk() # 建立一个窗口window.title('欢迎登录')window.geometry('450x300') # 窗口大小为300x200# 画布canvas = tk.Canvas(window, height=200, width=900)# 加载图片im = Image.open("images/01.png")image_file = ImageTk.PhotoImage(im)# image_file = tk.PhotoImage(file='images/01.gif')image = canvas.create_image(100, 40, anchor='nw', image=image_file)canvas.pack(side='top')# 两个文字标签,用户名和密码两个部分tk.Label(window, text='用户名').place(x=100, y=150)tk.Label(window, text='密 码').place(x=100, y=190)var_usr_name = tk.StringVar() # 讲文本框的内容,定义为字符串类型var_usr_name.set('amoxiang@163.com') # 设置默认值var_usr_pwd = tk.StringVar()# 第一个输入框-用来输入用户名的。# textvariable 获取文本框的内容entry_usr_name = tk.Entry(window, textvariable=var_usr_name)entry_usr_name.place(x=160, y=150)# 第二个输入框-用来输入密码的。entry_usr_pwd = tk.Entry(window, textvariable=var_usr_pwd, show='*')entry_usr_pwd.place(x=160, y=190)def usr_login():usr_name = var_usr_name.get()usr_pwd = var_usr_pwd.get()try:with open('usrs_info.pickle', 'rb') as usr_file:usrs_info = pickle.load(usr_file)except FileNotFoundError:with open('usrs_info.pickle', 'wb') as usr_file:usrs_info = {'admin': 'admin'}pickle.dump(usrs_info, usr_file)if usr_name in usrs_info:if usr_pwd == usrs_info[usr_name]:tk.messagebox.showinfo(title='欢迎光临', message=usr_name + ':请进入个人首页,查看最新资讯')else:tk.messagebox.showinfo(message='错误提示:密码不对,请重试')else:is_sign_up = tk.messagebox.askyesno('提示', '你还没有注册,请先注册')print(is_sign_up)if is_sign_up:usr_sign_up()# 注册按钮def usr_sign_up():def sign_to_Mofan_Python():np = new_pwd.get()npf = new_pwd_confirm.get()nn = new_name.get()# 上面是获取数据,下面是查看一下是否重复注册过with open('usrs_info.pickle', 'rb') as usr_file:exist_usr_info = pickle.load(usr_file)if np != npf:tk.messagebox.showerror('错误提示', '密码和确认密码必须一样')elif nn in exist_usr_info:tk.messagebox.showerror('错误提示', '用户名早就注册了!')else:exist_usr_info[nn] = npwith open('usrs_info.pickle', 'wb') as usr_file:pickle.dump(exist_usr_info, usr_file)tk.messagebox.showinfo('欢迎', '你已经成功注册了')window_sign_up.destroy()# 点击注册之后,会弹出这个窗口界面。window_sign_up = tk.Toplevel(window)window_sign_up.title('欢迎注册')window_sign_up.geometry('360x200') # 中间是x,而不是*号# 用户名框--这里输入用户名框。new_name = tk.StringVar()new_name.set('amoxiang@163.com') # 设置的是默认值tk.Label(window_sign_up, text='用户名').place(x=10, y=10)entry_new_name = tk.Entry(window_sign_up, textvariable=new_name)entry_new_name.place(x=100, y=10)# 新密码框--这里输入注册时候的密码new_pwd = tk.StringVar()tk.Label(window_sign_up, text='密 码').place(x=10, y=50)entry_usr_pwd = tk.Entry(window_sign_up, textvariable=new_pwd, show='*')entry_usr_pwd.place(x=100, y=50)# 密码确认框new_pwd_confirm = tk.StringVar()tk.Label(window_sign_up, text='确认密码').place(x=10, y=90)entry_usr_pwd_confirm = tk.Entry(window_sign_up, textvariable=new_pwd_confirm, show='*')entry_usr_pwd_confirm.place(x=100, y=90)btn_confirm_sign_up = tk.Button(window_sign_up, text=' 注 册 ', command=sign_to_Mofan_Python)btn_confirm_sign_up.place(x=120, y=130)# 创建注册和登录按钮btn_login = tk.Button(window, text=' 登 录 ', command=usr_login)btn_login.place(x=150, y=230) # 用place来处理按钮的位置信息。btn_sign_up = tk.Button(window, text=' 注 册 ', command=usr_sign_up)btn_sign_up.place(x=250, y=230)window.mainloop()
游戏开发
1、2048
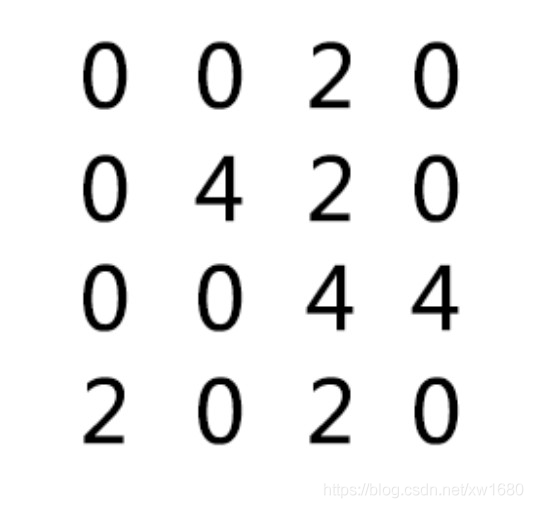
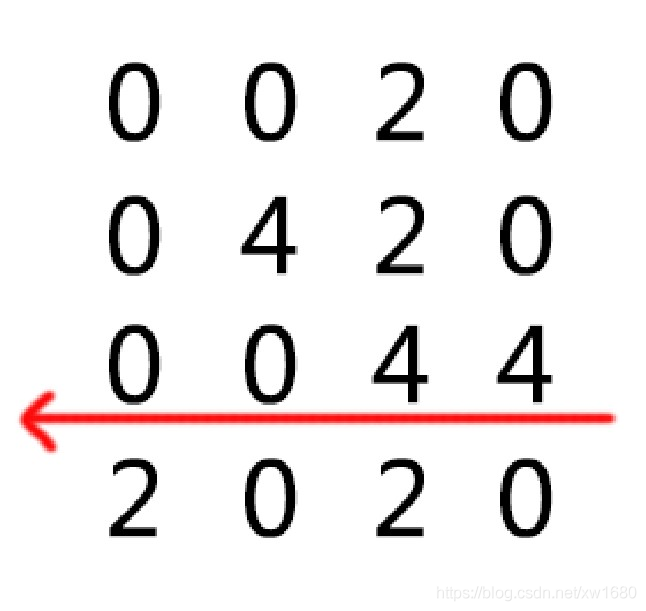
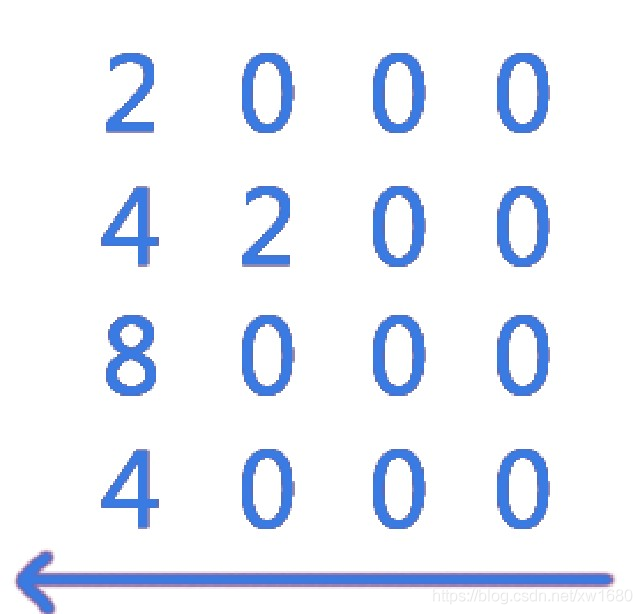
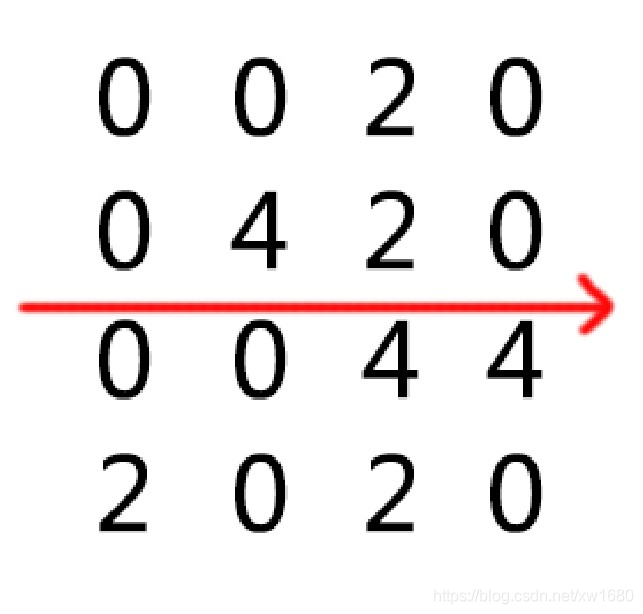
list1:[0,0,2,0]list2:[0,4,2,0]list3:[0,0,4,4]list4:[2,0,2,0]
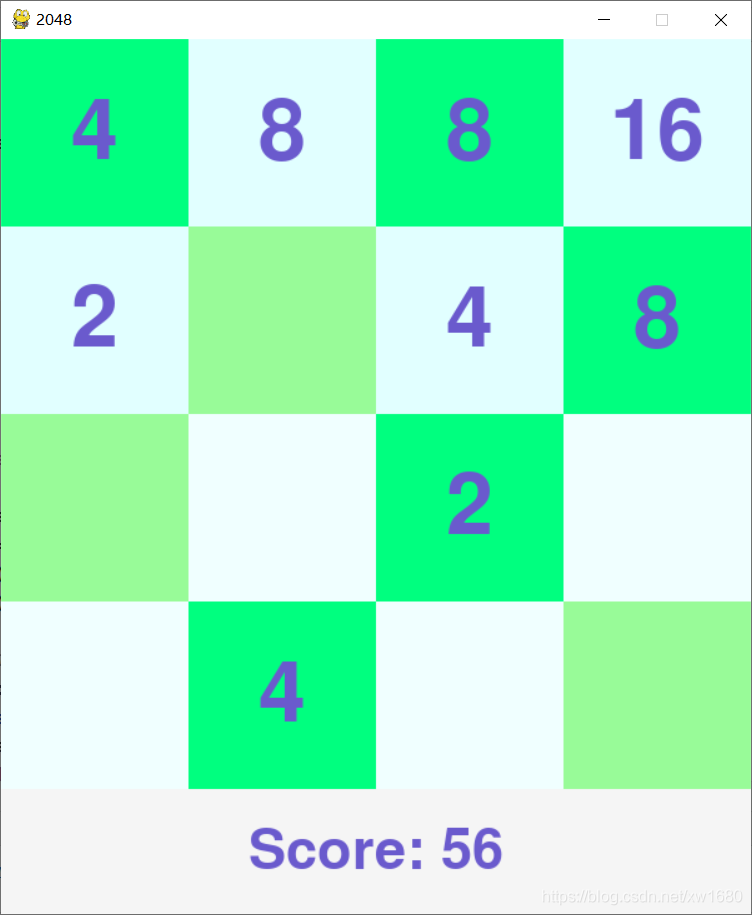
import randomimport sysimport pygamefrom pygame.locals import *PIXEL = 150SCORE_PIXEL = 100SIZE = 4# 地图的类class Map:def __init__(self, size):self.size = sizeself.score = 0self.map = [[0 for i in range(size)] for i in range(size)]self.add()self.add()# 新增2或4,有1/4概率产生4def add(self):while True:p = random.randint(0, self.size * self.size - 1)if self.map[int(p / self.size)][int(p % self.size)] == 0:x = random.randint(0, 3) > 0 and 2 or 4self.map[int(p / self.size)][int(p % self.size)] = xself.score += xbreak# 地图向左靠拢,其他方向的靠拢可以通过适当旋转实现,返回地图是否更新def adjust(self):changed = Falsefor a in self.map:b = []last = 0for v in a:if v != 0:if v == last:b.append(b.pop() << 1)last = 0else:b.append(v)last = vb += [0] * (self.size - len(b))for i in range(self.size):if a[i] != b[i]:changed = Truea[:] = breturn changed# 逆时针旋转地图90度def rotate90(self):self.map = [[self.map[c][r]for c in range(self.size)] for r in reversed(range(self.size))]# 判断游戏结束def over(self):for r in range(self.size):for c in range(self.size):if self.map[r][c] == 0:return Falsefor r in range(self.size):for c in range(self.size - 1):if self.map[r][c] == self.map[r][c + 1]:return Falsefor r in range(self.size - 1):for c in range(self.size):if self.map[r][c] == self.map[r + 1][c]:return Falsereturn Truedef moveUp(self):self.rotate90()if self.adjust():self.add()self.rotate90()self.rotate90()self.rotate90()def moveRight(self):self.rotate90()self.rotate90()if self.adjust():self.add()self.rotate90()self.rotate90()def moveDown(self):self.rotate90()self.rotate90()self.rotate90()if self.adjust():self.add()self.rotate90()def moveLeft(self):if self.adjust():self.add()# 更新屏幕def show(map):for i in range(SIZE):for j in range(SIZE):# 背景颜色块screen.blit(map.map[i][j] == 0 and block[(i + j) % 2]or block[2 + (i + j) % 2], (PIXEL * j, PIXEL * i))# 数值显示if map.map[i][j] != 0:map_text = map_font.render(str(map.map[i][j]), True, (106, 90, 205))text_rect = map_text.get_rect()text_rect.center = (PIXEL * j + PIXEL / 2,PIXEL * i + PIXEL / 2)screen.blit(map_text, text_rect)# 分数显示screen.blit(score_block, (0, PIXEL * SIZE))score_text = score_font.render((map.over() and "Game over with score " or "Score: ") + str(map.score), True, (106, 90, 205))score_rect = score_text.get_rect()score_rect.center = (PIXEL * SIZE / 2, PIXEL * SIZE + SCORE_PIXEL / 2)screen.blit(score_text, score_rect)pygame.display.update()map = Map(SIZE)pygame.init()screen = pygame.display.set_mode((PIXEL * SIZE, PIXEL * SIZE + SCORE_PIXEL))pygame.display.set_caption("2048")block = [pygame.Surface((PIXEL, PIXEL)) for i in range(4)]# 设置颜色block[0].fill((152, 251, 152))block[1].fill((240, 255, 255))block[2].fill((0, 255, 127))block[3].fill((225, 255, 255))score_block = pygame.Surface((PIXEL * SIZE, SCORE_PIXEL))score_block.fill((245, 245, 245))# 设置字体map_font = pygame.font.Font(None, int(PIXEL * 2 / 3))score_font = pygame.font.Font(None, int(SCORE_PIXEL * 2 / 3))clock = pygame.time.Clock()show(map)while not map.over():# 12为实验参数clock.tick(12)for event in pygame.event.get():if event.type == QUIT:sys.exit()# 接收玩家操作pressed_keys = pygame.key.get_pressed()if pressed_keys[K_w] or pressed_keys[K_UP]:map.moveUp()elif pressed_keys[K_s] or pressed_keys[K_DOWN]:map.moveDown()elif pressed_keys[K_a] or pressed_keys[K_LEFT]:map.moveLeft()elif pressed_keys[K_d] or pressed_keys[K_RIGHT]:map.moveRight()show(map)# 游戏结束pygame.time.delay(3000)
2、贪吃蛇
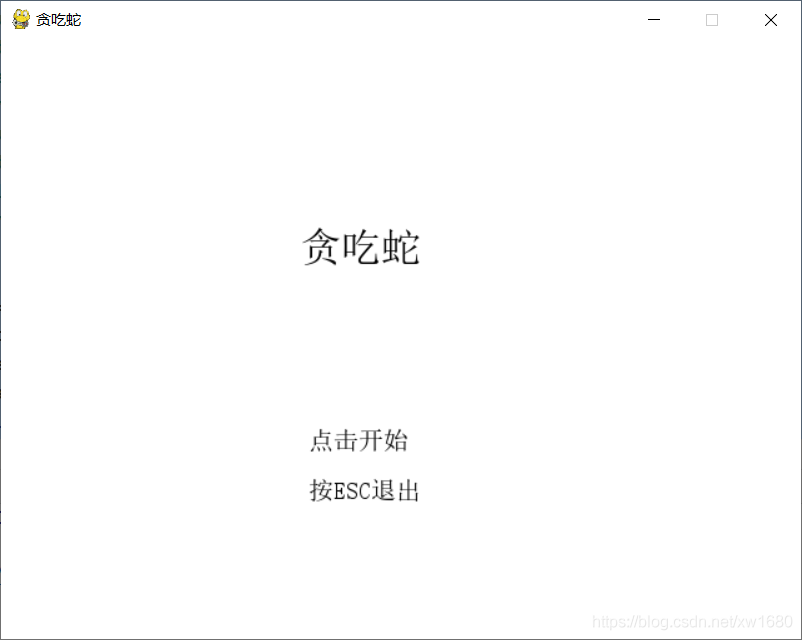
import pygamefrom os import pathfrom sys import exitfrom time import sleepfrom random import choicefrom itertools import productfrom pygame.locals import QUIT, KEYDOWNdef direction_check(moving_direction, change_direction):directions = [['up', 'down'], ['left', 'right']]if moving_direction in directions[0] and change_direction in directions[1]:return change_directionelif moving_direction in directions[1] and change_direction in directions[0]:return change_directionreturn moving_directionclass Snake:colors = list(product([0, 64, 128, 192, 255], repeat=3))[1:-1]def __init__(self):self.map = {(x, y): 0 for x in range(32) for y in range(24)}self.body = [[100, 100], [120, 100], [140, 100]]self.head = [140, 100]self.food = []self.food_color = []self.moving_direction = 'right'self.speed = 4self.generate_food()self.game_started = Falsedef check_game_status(self):if self.body.count(self.head) > 1:return Trueif self.head[0] < 0 or self.head[0] > 620 or self.head[1] < 0 or self.head[1] > 460:return Truereturn Falsedef move_head(self):moves = {'right': (20, 0),'up': (0, -20),'down': (0, 20),'left': (-20, 0)}step = moves[self.moving_direction]self.head[0] += step[0]self.head[1] += step[1]def generate_food(self):self.speed = len(self.body) // 16 if len(self.body) // 16 > 4 else self.speedfor seg in self.body:x, y = segself.map[x // 20, y // 20] = 1empty_pos = [pos for pos in self.map.keys() if not self.map[pos]]result = choice(empty_pos)self.food_color = list(choice(self.colors))self.food = [result[0] * 20, result[1] * 20]def main():key_direction_dict = {119: 'up', # W115: 'down', # S97: 'left', # A100: 'right', # D273: 'up', # UP274: 'down', # DOWN276: 'left', # LEFT275: 'right', # RIGHT}fps_clock = pygame.time.Clock()pygame.init()pygame.mixer.init()snake = Snake()sound = Falseif path.exists('eat.wav'):sound_wav = pygame.mixer.Sound("eat.wav")sound = Truetitle_font = pygame.font.SysFont('simsunnsimsun', 32)welcome_words = title_font.render('贪吃蛇', True, (0, 0, 0), (255, 255, 255))tips_font = pygame.font.SysFont('simsunnsimsun', 20)start_game_words = tips_font.render('点击开始', True, (0, 0, 0), (255, 255, 255))close_game_words = tips_font.render('按ESC退出', True, (0, 0, 0), (255, 255, 255))gameover_words = title_font.render('游戏结束', True, (205, 92, 92), (255, 255, 255))win_words = title_font.render('蛇很长了,你赢了!', True, (0, 0, 205), (255, 255, 255))screen = pygame.display.set_mode((640, 480), 0, 32)pygame.display.set_caption('贪吃蛇')new_direction = snake.moving_directionwhile 1:for event in pygame.event.get():if event.type == QUIT:exit()elif event.type == KEYDOWN:if event.key == 27:exit()if snake.game_started and event.key in key_direction_dict:direction = key_direction_dict[event.key]new_direction = direction_check(snake.moving_direction, direction)elif (not snake.game_started) and event.type == pygame.MOUSEBUTTONDOWN:x, y = pygame.mouse.get_pos()if 213 <= x <= 422 and 304 <= y <= 342:snake.game_started = Truescreen.fill((255, 255, 255))if snake.game_started:snake.moving_direction = new_direction # 在这里赋值,而不是在event事件的循环中赋值,避免按键太快snake.move_head()snake.body.append(snake.head[:])if snake.head == snake.food:if sound:sound_wav.play()snake.generate_food()else:snake.body.pop(0)for seg in snake.body:pygame.draw.rect(screen, [0, 0, 0], [seg[0], seg[1], 20, 20], 0)pygame.draw.rect(screen, snake.food_color, [snake.food[0], snake.food[1], 20, 20], 0)if snake.check_game_status():screen.blit(gameover_words, (241, 310))pygame.display.update()snake = Snake()new_direction = snake.moving_directionsleep(3)elif len(snake.body) == 512:screen.blit(win_words, (33, 210))pygame.display.update()snake = Snake()new_direction = snake.moving_directionsleep(3)else:screen.blit(welcome_words, (240, 150))screen.blit(start_game_words, (246, 310))screen.blit(close_game_words, (246, 350))pygame.display.update()fps_clock.tick(snake.speed)if __name__ == '__main__':main()
3、俄罗斯方块
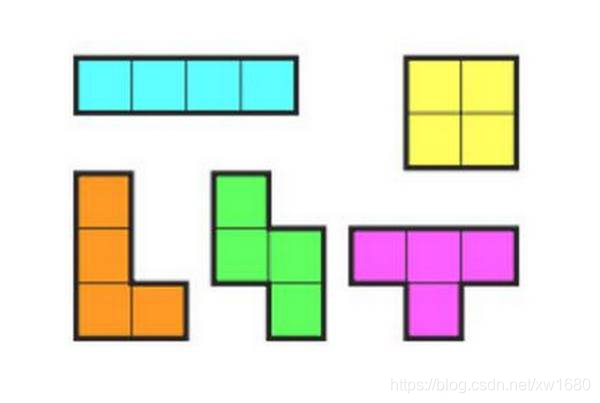
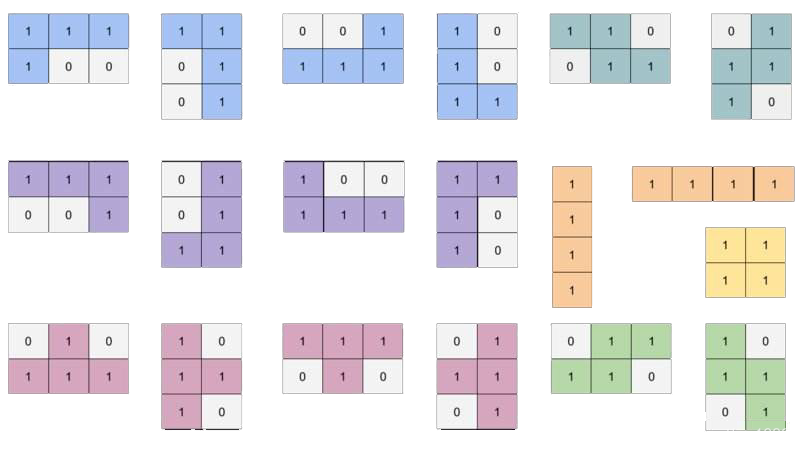
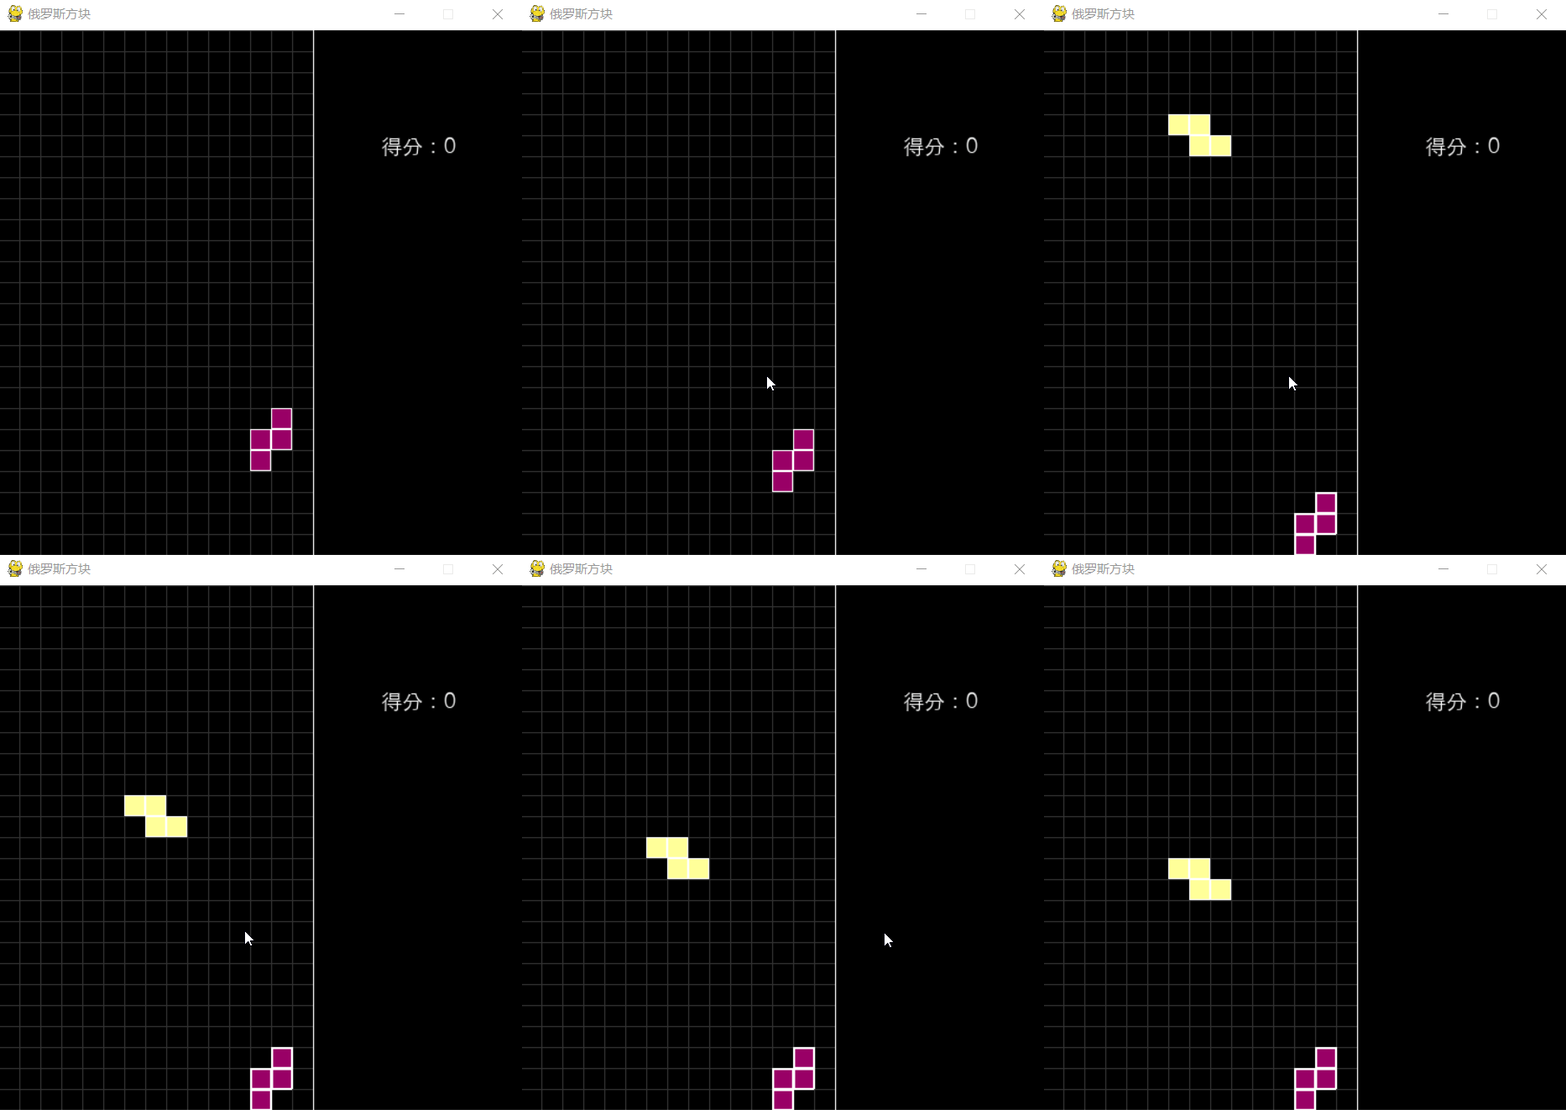
import pygameimport randomimport ospygame.init()GRID_WIDTH = 20GRID_NUM_WIDTH = 15GRID_NUM_HEIGHT = 25WIDTH, HEIGHT = GRID_WIDTH * GRID_NUM_WIDTH, GRID_WIDTH * GRID_NUM_HEIGHTSIDE_WIDTH = 200SCREEN_WIDTH = WIDTH + SIDE_WIDTHWHITE = (0xff, 0xff, 0xff)BLACK = (0, 0, 0)LINE_COLOR = (0x33, 0x33, 0x33)CUBE_COLORS = [(0xcc, 0x99, 0x99), (0xff, 0xff, 0x99), (0x66, 0x66, 0x99),(0x99, 0x00, 0x66), (0xff, 0xcc, 0x00), (0xcc, 0x00, 0x33),(0xff, 0x00, 0x33), (0x00, 0x66, 0x99), (0xff, 0xff, 0x33),(0x99, 0x00, 0x33), (0xcc, 0xff, 0x66), (0xff, 0x99, 0x00)]screen = pygame.display.set_mode((SCREEN_WIDTH, HEIGHT))pygame.display.set_caption("俄罗斯方块")clock = pygame.time.Clock()FPS = 30score = 0level = 1screen_color_matrix = [[None] * GRID_NUM_WIDTH for i in range(GRID_NUM_HEIGHT)]# 设置游戏的根目录为当前文件夹base_folder = os.path.dirname(__file__)def show_text(surf, text, size, x, y, color=WHITE):font_name = os.path.join(base_folder, 'font/font.ttc')font = pygame.font.Font(font_name, size)text_surface = font.render(text, True, color)text_rect = text_surface.get_rect()text_rect.midtop = (x, y)surf.blit(text_surface, text_rect)class CubeShape(object):SHAPES = ['I', 'J', 'L', 'O', 'S', 'T', 'Z']I = [[(0, -1), (0, 0), (0, 1), (0, 2)],[(-1, 0), (0, 0), (1, 0), (2, 0)]]J = [[(-2, 0), (-1, 0), (0, 0), (0, -1)],[(-1, 0), (0, 0), (0, 1), (0, 2)],[(0, 1), (0, 0), (1, 0), (2, 0)],[(0, -2), (0, -1), (0, 0), (1, 0)]]L = [[(-2, 0), (-1, 0), (0, 0), (0, 1)],[(1, 0), (0, 0), (0, 1), (0, 2)],[(0, -1), (0, 0), (1, 0), (2, 0)],[(0, -2), (0, -1), (0, 0), (-1, 0)]]O = [[(0, 0), (0, 1), (1, 0), (1, 1)]]S = [[(-1, 0), (0, 0), (0, 1), (1, 1)],[(1, -1), (1, 0), (0, 0), (0, 1)]]T = [[(0, -1), (0, 0), (0, 1), (-1, 0)],[(-1, 0), (0, 0), (1, 0), (0, 1)],[(0, -1), (0, 0), (0, 1), (1, 0)],[(-1, 0), (0, 0), (1, 0), (0, -1)]]Z = [[(0, -1), (0, 0), (1, 0), (1, 1)],[(-1, 0), (0, 0), (0, -1), (1, -1)]]SHAPES_WITH_DIR = {'I': I, 'J': J, 'L': L, 'O': O, 'S': S, 'T': T, 'Z': Z}def __init__(self):self.shape = self.SHAPES[random.randint(0, len(self.SHAPES) - 1)]# 骨牌所在的行列self.center = (2, GRID_NUM_WIDTH // 2)self.dir = random.randint(0, len(self.SHAPES_WITH_DIR[self.shape]) - 1)self.color = CUBE_COLORS[random.randint(0, len(CUBE_COLORS) - 1)]def get_all_gridpos(self, center=None):curr_shape = self.SHAPES_WITH_DIR[self.shape][self.dir]if center is None:center = [self.center[0], self.center[1]]return [(cube[0] + center[0], cube[1] + center[1])for cube in curr_shape]def conflict(self, center):for cube in self.get_all_gridpos(center):# 超出屏幕之外,说明不合法if cube[0] < 0 or cube[1] < 0 or cube[0] >= GRID_NUM_HEIGHT or \cube[1] >= GRID_NUM_WIDTH:return True# 不为None,说明之前已经有小方块存在了,也不合法if screen_color_matrix[cube[0]][cube[1]] is not None:return Truereturn Falsedef rotate(self):new_dir = self.dir + 1new_dir %= len(self.SHAPES_WITH_DIR[self.shape])old_dir = self.dirself.dir = new_dirif self.conflict(self.center):self.dir = old_dirreturn Falsedef down(self):# import pdb; pdb.set_trace()center = (self.center[0] + 1, self.center[1])if self.conflict(center):return Falseself.center = centerreturn Truedef left(self):center = (self.center[0], self.center[1] - 1)if self.conflict(center):return Falseself.center = centerreturn Truedef right(self):center = (self.center[0], self.center[1] + 1)if self.conflict(center):return Falseself.center = centerreturn Truedef draw(self):for cube in self.get_all_gridpos():pygame.draw.rect(screen, self.color,(cube[1] * GRID_WIDTH, cube[0] * GRID_WIDTH,GRID_WIDTH, GRID_WIDTH))pygame.draw.rect(screen, WHITE,(cube[1] * GRID_WIDTH, cube[0] * GRID_WIDTH,GRID_WIDTH, GRID_WIDTH),1)def draw_grids():for i in range(GRID_NUM_WIDTH):pygame.draw.line(screen, LINE_COLOR,(i * GRID_WIDTH, 0), (i * GRID_WIDTH, HEIGHT))for i in range(GRID_NUM_HEIGHT):pygame.draw.line(screen, LINE_COLOR,(0, i * GRID_WIDTH), (WIDTH, i * GRID_WIDTH))pygame.draw.line(screen, WHITE,(GRID_WIDTH * GRID_NUM_WIDTH, 0),(GRID_WIDTH * GRID_NUM_WIDTH, GRID_WIDTH * GRID_NUM_HEIGHT))def draw_matrix():for i, row in zip(range(GRID_NUM_HEIGHT), screen_color_matrix):for j, color in zip(range(GRID_NUM_WIDTH), row):if color is not None:pygame.draw.rect(screen, color,(j * GRID_WIDTH, i * GRID_WIDTH,GRID_WIDTH, GRID_WIDTH))pygame.draw.rect(screen, WHITE,(j * GRID_WIDTH, i * GRID_WIDTH,GRID_WIDTH, GRID_WIDTH), 2)def draw_score():show_text(screen, u'得分:{}'.format(score), 20, WIDTH + SIDE_WIDTH // 2, 100)def remove_full_line():global screen_color_matrixglobal scoreglobal levelnew_matrix = [[None] * GRID_NUM_WIDTH for i in range(GRID_NUM_HEIGHT)]index = GRID_NUM_HEIGHT - 1n_full_line = 0for i in range(GRID_NUM_HEIGHT - 1, -1, -1):is_full = Truefor j in range(GRID_NUM_WIDTH):if screen_color_matrix[i][j] is None:is_full = Falsecontinueif not is_full:new_matrix[index] = screen_color_matrix[i]index -= 1else:n_full_line += 1score += n_full_linelevel = score // 20 + 1screen_color_matrix = new_matrixdef show_welcome(screen):show_text(screen, u'俄罗斯方块', 30, WIDTH / 2, HEIGHT / 2)show_text(screen, u'按任意键开始游戏', 20, WIDTH / 2, HEIGHT / 2 + 50)running = Truegameover = Truecounter = 0live_cube = Nonewhile running:clock.tick(FPS)for event in pygame.event.get():if event.type == pygame.QUIT:running = Falseelif event.type == pygame.KEYDOWN:if gameover:gameover = Falselive_cube = CubeShape()breakif event.key == pygame.K_LEFT:live_cube.left()elif event.key == pygame.K_RIGHT:live_cube.right()elif event.key == pygame.K_DOWN:live_cube.down()elif event.key == pygame.K_UP:live_cube.rotate()elif event.key == pygame.K_SPACE:while live_cube.down() == True:passremove_full_line()# level 是为了方便游戏的难度,level 越高 FPS // level 的值越小# 这样屏幕刷新的就越快,难度就越大if gameover is False and counter % (FPS // level) == 0:# down 表示下移骨牌,返回False表示下移不成功,可能超过了屏幕或者和之前固定的# 小方块冲突了if live_cube.down() == False:for cube in live_cube.get_all_gridpos():screen_color_matrix[cube[0]][cube[1]] = live_cube.colorlive_cube = CubeShape()if live_cube.conflict(live_cube.center):gameover = Truescore = 0live_cube = Nonescreen_color_matrix = [[None] * GRID_NUM_WIDTH for i in range(GRID_NUM_HEIGHT)]# 消除满行remove_full_line()counter += 1# 更新屏幕screen.fill(BLACK)draw_grids()draw_matrix()draw_score()if live_cube is not None:live_cube.draw()if gameover:show_welcome(screen)pygame.display.update()
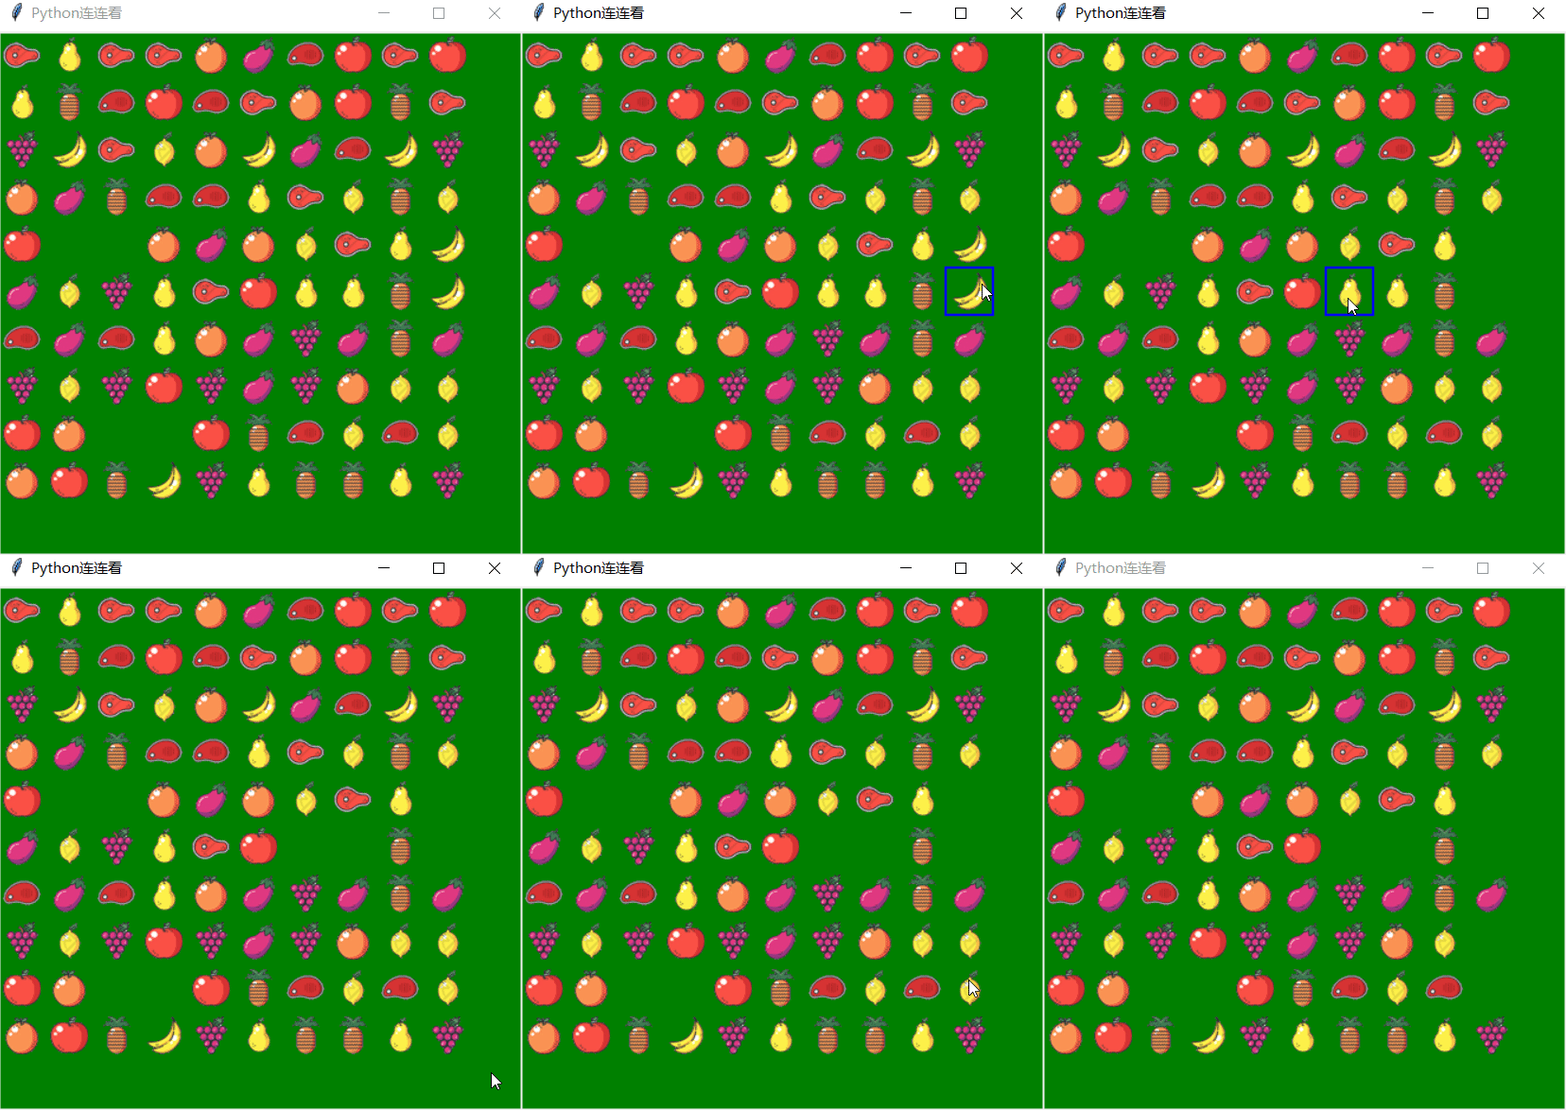
4、连连看
from tkinter import *from tkinter.messagebox import *from threading import Timerimport timeimport randomclass Point:# 点类def __init__(self, x, y):self.x = xself.y = y# --------------------------------------'''判断选中的两个方块是否可以消除'''def IsLink(p1, p2):if lineCheck(p1, p2):return Trueif OneCornerLink(p1, p2): # 一个转弯(折点)的联通方式return Trueif TwoCornerLink(p1, p2): # 两个转弯(折点)的联通方式return Truereturn False# ---------------------------def IsSame(p1, p2):if map[p1.x][p1.y] == map[p2.x][p2.y]:print("clicked at IsSame")return Truereturn Falsedef callback(event): # 鼠标左键事件代码global Select_first, p1, p2global firstSelectRectId, SecondSelectRectId# print ("clicked at", event.x, event.y,turn)x = (event.x) // 40 # 换算棋盘坐标y = (event.y) // 40print("clicked at", x, y)if map[x][y] == " ":showinfo(title="提示", message="此处无方块")else:if Select_first == False:p1 = Point(x, y)# 画选定(x1,y1)处的框线firstSelectRectId = cv.create_rectangle(x * 40, y * 40, x * 40 + 40, y * 40 + 40, width=2, outline="blue")Select_first = Trueelse:p2 = Point(x, y)# 判断第二次点击的方块是否已被第一次点击选取,如果是则返回。if (p1.x == p2.x) and (p1.y == p2.y):return# 画选定(x2,y2)处的框线print('第二次点击的方块', x, y)# SecondSelectRectId=cv.create_rectangle(100,20,x*40+40,y*40+40,width=2,outline="yellow")SecondSelectRectId = cv.create_rectangle(x * 40, y * 40, x * 40 + 40, y * 40 + 40, width=2,outline="yellow")print('第二次点击的方块', SecondSelectRectId)cv.pack()# 判断是否连通if IsSame(p1, p2) and IsLink(p1, p2):print('连通', x, y)Select_first = False# 画选中方块之间连接线drawLinkLine(p1, p2)# clearTwoBlock()# time.sleep(0.6)# clearFlag=Truet = Timer(timer_interval, delayrun) # 定时函数t.start()else: # 重新选定第一个方块# 清除第一个选定框线cv.delete(firstSelectRectId)cv.delete(SecondSelectRectId)# print('清除第一个选定框线')# firstSelectRectId=SecondSelectRectId# p1=Point(x,y) #设置重新选定第一个方块的坐标Select_first = Falsetimer_interval = 0.3 # 0.3秒# --------------------------------------def delayrun():clearTwoBlock() # 清除连线及方块def clearTwoBlock(): # 清除连线及方块# 延时0.1秒# time.sleep(0.1)# 清除第一个选定框线cv.delete(firstSelectRectId)# 清除第2个选定框线cv.delete(SecondSelectRectId)# 清空记录方块的值map[p1.x][p1.y] = " "cv.delete(image_map[p1.x][p1.y])map[p2.x][p2.y] = " "cv.delete(image_map[p2.x][p2.y])Select_first = FalseundrawConnectLine() # 清除选中方块之间连接线def drawQiPan(): # 画棋盘for i in range(0, 15):cv.create_line(20, 20 + 40 * i, 580, 20 + 40 * i, width=2)for i in range(0, 15):cv.create_line(20 + 40 * i, 20, 20 + 40 * i, 580, width=2)cv.pack()def print_map(): # 输出map地图global image_mapfor x in range(0, Width): # 0--14for y in range(0, Height): # 0--14if (map[x][y] != ' '):img1 = imgs[int(map[x][y])]id = cv.create_image((x * 40 + 20, y * 40 + 20), image=img1)image_map[x][y] = idcv.pack()for y in range(0, Height): # 0--14for x in range(0, Width): # 0--14print(map[x][y], end=' ')print(",", y)'''* 同行同列情况消除方法 原理:如果两个相同的被消除元素之间的 空格数spaceCount等于他们的(行/列差-1)则 两者可以联通消除* x代表列,y代表行* param p1 第一个保存上次选中点坐标的点对象* param p2 第二个保存上次选中点坐标的点对象'''# 直接连通def lineCheck(p1, p2):absDistance = 0spaceCount = 0if (p1.x == p2.x or p1.y == p2.y): # 同行同列的情况吗?print("同行同列的情况------")# 同列的情况if (p1.x == p2.x and p1.y != p2.y):print("同列的情况")# 绝对距离(中间隔着的空格数)absDistance = abs(p1.y - p2.y) - 1# 正负值if p1.y - p2.y > 0:zf = -1else:zf = 1for i in range(1, absDistance + 1):if (map[p1.x][p1.y + i * zf] == " "):# 空格数加1spaceCount += 1else:break; # 遇到阻碍就不用再探测了# 同行的情况elif (p1.y == p2.y and p1.x != p2.x):print(" 同行的情况")absDistance = abs(p1.x - p2.x) - 1# 正负值if p1.x - p2.x > 0:zf = -1else:zf = 1for i in range(1, absDistance + 1):if (map[p1.x + i * zf][p1.y] == " "):# 空格数加1spaceCount += 1else:break; # 遇到阻碍就不用再探测了if (spaceCount == absDistance):# 可联通print(absDistance, spaceCount)print("行/列可直接联通")return Trueelse:print("行/列不能消除!")return Falseelse:# 不是同行同列的情况所以直接返回falsereturn False;# --------------------------------------# 第二种,直角连通'''直角连接,即X,Y坐标都不同的,可以用这个方法尝试连接param first:选中的第一个点param second:选中的第二个点'''def OneCornerLink(p1, p2):# 第一个直角检查点,如果这里为空则赋予相同值供检查checkP = Point(p1.x, p2.y)# 第二个直角检查点,如果这里为空则赋予相同值供检查checkP2 = Point(p2.x, p1.y);# 第一个直角点检测if (map[checkP.x][checkP.y] == " "):if (lineCheck(p1, checkP) and lineCheck(checkP, p2)):linePointStack.append(checkP)print("直角消除ok", checkP.x, checkP.y)return True# 第二个直角点检测if (map[checkP2.x][checkP2.y] == " "):if (lineCheck(p1, checkP2) and lineCheck(checkP2, p2)):linePointStack.append(checkP2)print("直角消除ok", checkP2.x, checkP2.y)return Trueprint("不能直角消除")return False;# -----------------------------------------'''#第三种,双直角连通双直角联通判定可分两步走:1. 在p1点周围4个方向寻找空格checkP2. 调用OneCornerLink(checkP, p2)3. 即遍历 p1 4 个方向的空格,使之成为 checkP,然后调用 OneCornerLink(checkP,p2)判定是否为真,如果为真则可以双直角连同,否则当所有的空格都遍历完而没有找到一个checkP使OneCornerLink(checkP, p2)为真,则两点不能连同具体代码:双直角连接方法@param p1 第一个点@param p2 第二个点'''def TwoCornerLink(p1, p2):checkP = Point(p1.x, p1.y)# 四向探测开始for i in range(0, 4):checkP.x = p1.xcheckP.y = p1.y# 向下if (i == 3):checkP.y += 1while ((checkP.y < Height) and map[checkP.x][checkP.y] == " "):linePointStack.append(checkP)if (OneCornerLink(checkP, p2)):print("下探测OK")return Trueelse:linePointStack.pop()checkP.y += 1print("ssss", checkP.y, Height - 1)# 补充两个折点都在游戏区域底侧外部if checkP.y == Height: # 出了底部,则仅需判断p2能否也达到底部边界z = Point(p2.x, Height - 1) # 底部边界点if lineCheck(z, p2): # 两个折点在区域外部的底侧linePointStack.append(Point(p1.x, Height))linePointStack.append(Point(p2.x, Height))print("下探测到游戏区域外部OK")return True# 向右elif (i == 2):checkP.x += 1while ((checkP.x < Width) and map[checkP.x][checkP.y] == " "):linePointStack.append(checkP)if (OneCornerLink(checkP, p2)):print("右探测OK")return Trueelse:linePointStack.pop()checkP.x += 1# 补充两个折点都在游戏区域右侧外部if checkP.x == Width: # 出了右侧,则仅需判断p2能否也达到右部边界z = Point(Width - 1, p2.y) # 右部边界点if lineCheck(z, p2): # 两个折点在区域外部的底侧linePointStack.append(Point(Width, p1.y))linePointStack.append(Point(Width, p2.y))print("右探测到游戏区域外部OK")return True# 向左elif (i == 1):checkP.x -= 1while ((checkP.x >= 0) and map[checkP.x][checkP.y] == " "):linePointStack.append(checkP)if (OneCornerLink(checkP, p2)):print("左探测OK")return Trueelse:linePointStack.pop()checkP.x -= 1# 向上elif (i == 0):checkP.y -= 1while ((checkP.y >= 0) and map[checkP.x][checkP.y] == " "):linePointStack.append(checkP)if (OneCornerLink(checkP, p2)):print("上探测OK")return Trueelse:linePointStack.pop()checkP.y -= 1# 四个方向都寻完都没找到适合的checkP点print("两直角连接没找到适合的checkP点")return False;# ---------------------------# 画连接线def drawLinkLine(p1, p2):if (len(linePointStack) == 0):Line_id.append(drawLine(p1, p2))else:print(linePointStack, len(linePointStack))if (len(linePointStack) == 1):z = linePointStack.pop()print("一折连通点z", z.x, z.y)Line_id.append(drawLine(p1, z))Line_id.append(drawLine(p2, z))if (len(linePointStack) == 2):z1 = linePointStack.pop()print("2折连通点z1", z1.x, z1.y)Line_id.append(drawLine(p2, z1))z2 = linePointStack.pop()print("2折连通点z2", z2.x, z2.y)Line_id.append(drawLine(z1, z2))Line_id.append(drawLine(p1, z2))# 删除连接线def undrawConnectLine():while len(Line_id) > 0:idpop = Line_id.pop()cv.delete(idpop)def drawLine(p1, p2):print("drawLine p1,p2", p1.x, p1.y, p2.x, p2.y)# cv.create_line( 40+20, 40+20,200,200,width=5,fill='red')id = cv.create_line(p1.x * 40 + 20, p1.y * 40 + 20, p2.x * 40 + 20, p2.y * 40 + 20, width=5, fill='red')# cv.pack()return id# --------------------------------------def create_map(): # 产生map地图global map# 生成随机地图# 将所有匹配成对的动物物种放进一个临时的地图中tmpMap = []m = (Width) * (Height) // 10print('m=', m)for x in range(0, m):for i in range(0, 10): # 每种方块有10个tmpMap.append(x)random.shuffle(tmpMap)for x in range(0, Width): # 0--14for y in range(0, Height): # 0--14map[x][y] = tmpMap[x * Height + y]# --------------------------------------def find2Block(event): # 自动查找global firstSelectRectId, SecondSelectRectIdm_nRoW = Heightm_nCol = WidthbFound = False;# 第一个方块从地图的0位置开始for i in range(0, m_nRoW * m_nCol):# 找到则跳出循环if (bFound):break# 算出对应的虚拟行列位置x1 = i % m_nColy1 = i // m_nColp1 = Point(x1, y1)# 无图案的方块跳过if (map[x1][y1] == ' '):continue# 第二个方块从前一个方块的后面开始for j in range(i + 1, m_nRoW * m_nCol):# 算出对应的虚拟行列位置x2 = j % m_nColy2 = j // m_nColp2 = Point(x2, y2)# 第二个方块不为空 且与第一个方块的动物相同if (map[x2][y2] != ' ' and IsSame(p1, p2)):# 判断是否可以连通if (IsLink(p1, p2)):bFound = Truebreak# 找到后自动消除if (bFound): # p1(x1,y1)与p2(x2,y2)连通print('找到后', p1.x, p1.y, p2.x, p2.y)# 画选定(x1,y1)处的框线firstSelectRectId = cv.create_rectangle(x1 * 40, y1 * 40, x1 * 40 + 40, y1 * 40 + 40, width=2, outline="red")# 画选定(x2,y2)处的框线secondSelectRectId = cv.create_rectangle(x2 * 40, y2 * 40, x2 * 40 + 40, y2 * 40 + 40, width=2, outline="red")# t=Timer(timer_interval,delayrun)#定时函数# t.start()return bFound# 游戏主逻辑root = Tk()root.title("Python连连看 ")imgs = [PhotoImage(file='images\\bar_0' + str(i) + '.gif') for i in range(0, 10)] # 所有图标图案Select_first = False # 是否已经选中第一块firstSelectRectId = -1 # 被选中第一块地图对象SecondSelectRectId = -1 # 被选中第二块地图对象clearFlag = FalselinePointStack = []Line_id = []Height = 10Width = 10map = [[" " for y in range(Height)] for x in range(Width)]image_map = [[" " for y in range(Height)] for x in range(Width)]cv = Canvas(root, bg='green', width=440, height=440)# drawQiPan( )cv.bind("" , callback) # 鼠标左键事件cv.bind("" , find2Block) # 鼠标右键事件cv.pack()create_map() # 产生map地图print_map() # 打印map地图root.mainloop()
- EOF -
回复关键字“简明python ”,立即获取入门必备书籍《简明python教程》电子版
回复关键字“爬虫”,立即获取爬虫学习资料

推荐
评论

