Android导航栏适配的实现

和你一起终身学 习,这里是程序员Android
经典好文推荐,通过阅读本文,您将收获以下知识点:
一、前言
二、导航栏的处理
三、 修改StatusHostLayout方案
四、总结
一、前言
在之前的文章中,大家比较关注宿主侵入的方式,并且有要求适配导航栏的操作。
其实大部分的应用都只需要使用到状态栏,导航栏由系统去管理,为什么不自己管理导航栏,就是导航栏的坑太多。
背景设置的坑,判断是否存在的坑,手动设置隐藏显示导航栏的坑,导航栏高度获取的坑。
如果项目中确实需要用到操作导航栏怎么办?
二、导航栏的处理
导航栏为什么难处理,因为之前的一些添加Flag的方案有些不实用,有兼容问题,也可以说手机厂商并没有完全适配,导致兼容性有问题。
而我们通过 WindowInsetsController / WindowInsets 的一些方式则可以相对方便的操作导航栏。
那么是不是 WindowInsetsController / WindowInsets 的方式就完全兼容了呢?也并不是,只是相对好一点,重要的功能能用而已。
下面介绍一下相对稳定的一些操作方法。
2.1 判断当前是否显示了导航栏
        /**
     * 当前是否显示了底部导航栏
     */
public static void hasNavigationBars(Activity activity, BooleanValueCallback callback) {

View decorView = activity.findViewById(android.R.id.content);
boolean attachedToWindow = decorView.isAttachedToWindow();

if (attachedToWindow) {

WindowInsetsCompat windowInsets = ViewCompat.getRootWindowInsets(decorView);

if (windowInsets != null) {

boolean hasNavigationBar = windowInsets.isVisible(WindowInsetsCompat.Type.navigationBars()) &&
                        windowInsets.getInsets(WindowInsetsCompat.Type.navigationBars()).bottom > 0;

                callback.onBoolean(hasNavigationBar);
}

} else {

            decorView.addOnAttachStateChangeListener(new View.OnAttachStateChangeListener() {
@Override
public void onViewAttachedToWindow(View v) {

WindowInsetsCompat windowInsets = ViewCompat.getRootWindowInsets(v);

if (windowInsets != null) {

boolean hasNavigationBar = windowInsets.isVisible(WindowInsetsCompat.Type.navigationBars()) &&
                                windowInsets.getInsets(WindowInsetsCompat.Type.navigationBars()).bottom > 0;

                        callback.onBoolean(hasNavigationBar);
}
}

@Override
public void onViewDetachedFromWindow(View v) {
}
});
}
}
复制代码
其实核心代码是一样的,只是区分了是否已经onAttach了,防止在onCreate方法中调用的时候会报错。
它的核心思路是和老版本的方法是相似的,只是老版本是从window中找到导航栏布局去判断是否隐藏和显示和判断高度。而新版本通过WindowInset 的方式获取导航栏对象相对比较稳妥。
2.2 获取导航栏的高度
        /**
     * 获取底部导航栏的高度
     */
public static void getNavigationBarHeight(View view, HeightValueCallback callback) {

boolean attachedToWindow = view.isAttachedToWindow();

if (attachedToWindow) {

WindowInsetsCompat windowInsets = ViewCompat.getRootWindowInsets(view);
assert windowInsets != null;
int top = windowInsets.getInsets(WindowInsetsCompat.Type.navigationBars()).top;
int bottom = windowInsets.getInsets(WindowInsetsCompat.Type.navigationBars()).bottom;
int height = Math.abs(bottom - top);
if (height > 0) {
                callback.onHeight(height);
} else {
                callback.onHeight(getNavigationBarHeight(view.getContext()));
}

} else {

            view.addOnAttachStateChangeListener(new View.OnAttachStateChangeListener() {
@Override
public void onViewAttachedToWindow(View v) {

WindowInsetsCompat windowInsets = ViewCompat.getRootWindowInsets(v);
assert windowInsets != null;
int top = windowInsets.getInsets(WindowInsetsCompat.Type.navigationBars()).top;
int bottom = windowInsets.getInsets(WindowInsetsCompat.Type.navigationBars()).bottom;
int height = Math.abs(bottom - top);
if (height > 0) {
                        callback.onHeight(height);
} else {
                        callback.onHeight(getNavigationBarHeight(view.getContext()));
}
}

@Override
public void onViewDetachedFromWindow(View v) {
}
});
}
}

/**
     * 老的方法获取导航栏的高度
     */
private static int getNavigationBarHeight(Context context) {
int result = 0;
int resourceId = context.getResources().getIdentifier("navigation_bar_height", "dimen", "android");
if (resourceId > 0) {
            result = context.getResources().getDimensionPixelSize(resourceId);
}
return result;
}
复制代码
新版的方法和老版本的方法都定义了,通常我们使用 WindowInsets 的方式即可获取到导航栏对象,然后去获取它的高度。
而老版本的方式则是通过获取系列内置的一个高度值,而一些手机并不会按这个高度设置导航栏高度,所以获取出来的值则是错误的。
如下图所示:

image.png
2.3 导航栏的隐藏与沉浸式处理
在一些应用需要全屏的时候,我们需要隐藏导航栏(是的,你无法返回了)。
        /**
     * 显示隐藏底部导航栏(注意不是沉浸式效果)
     */
    public static void showHideNavigationBar(Activity activity, boolean isShow) {

        View decorView = activity.findViewById(android.R.id.content);
        WindowInsetsControllerCompat controller = ViewCompat.getWindowInsetsController(decorView);

if (controller != null) {
if (isShow) {
                controller.show(WindowInsetsCompat.Type.navigationBars());
                controller.setSystemBarsBehavior(WindowInsetsControllerCompat.BEHAVIOR_SHOW_BARS_BY_TOUCH);
} else {
                controller.hide(WindowInsetsCompat.Type.navigationBars());
                controller.setSystemBarsBehavior(WindowInsetsControllerCompat.BEHAVIOR_SHOW_TRANSIENT_BARS_BY_SWIPE);
}
}
}
复制代码
而在一些常规的页面,我们如果想像状态栏一样获取沉浸式体验,我们则是不同的处理逻辑:
        /**
     * 5.0以上-设置NavigationBar底部导航栏的沉浸式
     */
public static void immersiveNavigationBar(Activity activity) {
if (Build.VERSION.SDK_INT >= Build.VERSION_CODES.LOLLIPOP) {
            Window window = activity.getWindow();
            View decorView = window.getDecorView();
            decorView.setSystemUiVisibility(decorView.getSystemUiVisibility()
| View.SYSTEM_UI_FLAG_LAYOUT_HIDE_NAVIGATION
| View.SYSTEM_UI_FLAG_LAYOUT_STABLE);

            window.setNavigationBarColor(Color.TRANSPARENT);
}
}
复制代码
我们把导航栏常用的一些操作理清之后,我们再来看 StatusHostLayout 这样的宿主方案如何帮助我们管理导航栏。
三、 修改StatusHostLayout方案
前文我们讲到过状态栏的管理,如果加入导航栏的管理,我们需要做哪些操作?
先理清一下思路:
-
定义一个自定义的ViewGroup,内部顺序排列状态栏,内容容器,导航栏三个布局。
-
我们需要强制设置状态栏和导航栏的沉浸式,让我们自己的状态栏.导航栏View的布局展示出来。
-
自定义状态栏View,与导航栏View,我们只需要获取到正确的高度,然后测量的时候定死指定的高度即可。
-
我们可以以View的形式来操作自定义导航栏/状态栏的背景,图片,显示隐藏等操作。
-
把我们DecorView中的跟视图替换为我们自定义的布局。
-
暴露一个inject方法注入到指定的Activity中去,并提供自定义布局的对象。
之前状态栏的逻辑已经做好了,现在我们只需要处理导航栏的逻辑。我们定义好上面的一些导航栏操作工具类方法。
先定义一个自己的导航栏View,只需要处理高度即可。
    /**
 * 自定义底部导航栏的View,用于StatusBarHostLayout中使用
 */
class NavigationView extends View {

private int mBarSize;

public NavigationView(Context context) {
this(context, null, 0);
}

public NavigationView(Context context, AttributeSet attrs) {
this(context, attrs, 0);
}

public NavigationView(Context context, AttributeSet attrs, int defStyleAttr) {
super(context, attrs, defStyleAttr);

StatusBarHostUtils.getNavigationBarHeight(this, new HeightValueCallback() {
@Override
public void onHeight(int height) {

                mBarSize = height;
}
});
}

@Override
protected void onMeasure(int widthMeasureSpec, int heightMeasureSpec) {
if (Build.VERSION.SDK_INT >= Build.VERSION_CODES.LOLLIPOP) {
setMeasuredDimension(MeasureSpec.getSize(widthMeasureSpec), mBarSize);
} else {
setMeasuredDimension(0, 0);
}
}

public int getBarSize() {
return mBarSize;
}

}
复制代码
然后在自定义的布局中添加我们的导航栏View
        //加载自定义的宿主布局
if (mStatusView == null && mContentLayout == null) {
setOrientation(LinearLayout.VERTICAL);

        mStatusView = new StatusView(mActivity);
        mStatusView.setLayoutParams(new ViewGroup.LayoutParams(ViewGroup.LayoutParams.MATCH_PARENT, ViewGroup.LayoutParams.WRAP_CONTENT));
addView(mStatusView);

        mContentLayout = new FrameLayout(mActivity);
        mContentLayout.setLayoutParams(new LinearLayout.LayoutParams(ViewGroup.LayoutParams.MATCH_PARENT, 0, 1.0f));
addView(mContentLayout);

        mNavigationView = new NavigationView(mActivity);
        mNavigationView.setLayoutParams(new ViewGroup.LayoutParams(ViewGroup.LayoutParams.MATCH_PARENT, ViewGroup.LayoutParams.WRAP_CONTENT));
addView(mNavigationView);
}
复制代码
核心方法是替换掉 DecorView 中的 ContentView:
        private void replaceContentView() {
        Window window = mActivity.getWindow();
        ViewGroup contentLayout = window.getDecorView().findViewById(Window.ID_ANDROID_CONTENT);
if (contentLayout.getChildCount() > 0) {
//先找到DecorView的容器移除掉已经设置的ContentView
            View contentView = contentLayout.getChildAt(0);
            contentLayout.removeView(contentView);
            ViewGroup.LayoutParams contentParams = contentView.getLayoutParams();

//外部设置的ContentView添加到宿主中来
            mContentLayout.addView(contentView, contentParams.width, contentParams.height);
}
//再把整个宿主添加到Activity对应的DecorView中去
        contentLayout.addView(this, -1, -1);
}
复制代码
然后我们暴露一些公共的方法供外界操作我们自定义的导航栏:
     /**
     * 设置导航栏图片颜色为黑色
     */
public StatusBarHostLayout setNavigatiopnBarIconBlack() {
        StatusBarHostUtils.setNavigationBarDrak(mActivity, true);
return this;
}

/**
     * 设置导航栏图片颜色为白色
     */
public StatusBarHostLayout setNavigatiopnBarIconWhite() {
        StatusBarHostUtils.setNavigationBarDrak(mActivity, false);
return this;
}

/**
     * 设置自定义状态栏布局的背景颜色
     */
public StatusBarHostLayout setNavigationBarBackground(int color) {
if (mNavigationView != null)
            mNavigationView.setBackgroundColor(color);
return this;
}

/**
     * 设置自定义状态栏布局的背景图片
     */
public StatusBarHostLayout setNavigationBarBackground(Drawable drawable) {
if (mNavigationView != null)
            mNavigationView.setBackground(drawable);
return this;
}

/**
     * 设置自定义状态栏布局的透明度
     */
public StatusBarHostLayout setNavigationBarBackgroundAlpha(int alpha) {
if (mNavigationView != null) {
Drawable background = mNavigationView.getBackground();
if (background != null) {
                background.mutate().setAlpha(alpha);
}
}
return this;
}

/**
     * 设置自定义导航栏的沉浸式
     */
public StatusBarHostLayout setNavigationBarImmersive(boolean needImmersive, int color) {
if (mNavigationView != null) {
if (needImmersive) {
                mNavigationView.setVisibility(GONE);
} else {
                mNavigationView.setVisibility(VISIBLE);
                mNavigationView.setBackgroundColor(color);
}
}
return this;
}
复制代码
使用的时候我们这样用:
       val hostLayout = StatusBarHost.inject(this)
.setStatusBarBackground(startColor)
.setStatusBarBlackText()
.setNavigationBarBackground(startColor)

//修改导航栏的图标颜色 - 深色
fun btn07(view: View) {
        hostLayout.setNavigationBarIconBlack()
}

//修改导航栏的图标颜色 - 亮色
fun btn08(view: View) {
        hostLayout.setNavigationBarIconWhite()
}

fun btn06(view: View) {
        hostLayout.setNavigationBarBackground(resources.getColor(R.color.teal_200))
}
复制代码
其中的一些效果如下图所示,更多的示例代码可以查看源码:
状态栏的操作:

image.png

image.png
导航栏的操作:

image.png

image.png
状态栏与导航栏的沉浸式处理

image.png

image.png
状态栏与导航栏图片背景的设置

image.png
全面屏手机与老款的可动态隐藏导航栏的手机都能正确的判断是否有导航栏:

image.png
Android5.0的老款手机,不带内置导航栏的:

image.png
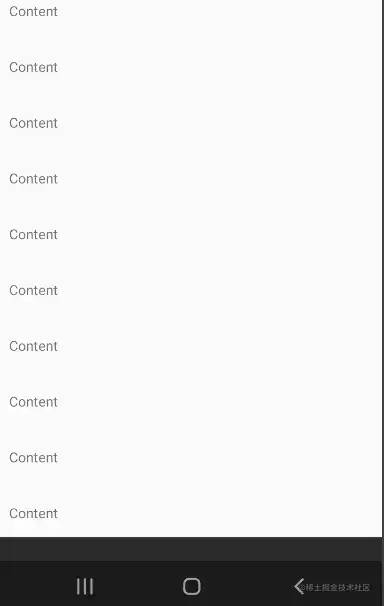
Android12三星手机滚动的效果:

image.png
四、总结
由于使用了 WindowInsetsController 的Api,所以本方案支持Android5.0+版本。
有关更多的Demo与效果可以查看我的源码项目,点击查看,我会持续更新和优化。大家可以点个Star关注一波。
关于本文的Demo我也单独做了项目与Demo的效果,点击查看。
如果你想直接使用,我也已经上传到 MavenCentral ,直接依赖即可。
    implementation "com.gitee.newki123456:status_host_layout:1.0.0"
复制代码
惯例,我如有讲解不到位或错漏的地方,希望同学们可以指出交流。
作者:newki
链接:https://juejin.cn/post/7150088571313979399
友情推荐:
至此,本篇已结束。转载网络的文章,小编觉得很优秀,欢迎点击阅读原文,支持原创作者,如有侵权,恳请联系小编删除,欢迎您的建议与指正。同时期待您的关注,感谢您的阅读,谢谢!
点击阅读原文,为大佬点赞!
