esp32 linux 下 环境配置 编译与烧写
esp32 环境配置 编译与烧写
本文针对esp32初学者进行Linux 下的编译环境配置的分享
一 官方资料
ESP-IDF 编程指南[1] 
在ESP-IDF 编程指南中可以选择不同的版本对不同版本的查看与入门,环境搭建不同版本之间并无过多差别。无版本要求 建议使用master分支(lstest),是当时最为稳定的版本。
二 环境配置
第一步:安装准备
如果是首次使用Ubuntu,需要使用下列命令将 所需要工具升级到最新并查看版本
sudo apt-get install git wget flex bison gperf python3 python3-pip python3-setuptools cmake ninja-build ccache libffi-dev libssl-dev dfu-util libusb-1.0-0
 python3 -V
Python 3.8.10
cat /proc/version
Linux version 5.11.0-27-generic (buildd@lcy01-amd64-019) (gcc (Ubuntu 9.3.0-17ubuntu1~20.04) 9.3.0, GNU ld (GNU Binutils for Ubuntu) 2.34) #29~20.04.1-Ubuntu SMP Wed Aug 11 15:58:17 UTC 2021

•根据手册我们需要使用Python 3.6以上版本与ubuntu 20.04 ,所以建议保持一致。
第二步 获取 esp-idf
使用下列命令将esp-idf及其子模块克隆下来。
git clone --recursive https://github.com/espressif/esp-idf.git
如果克隆速度慢可使用github加速插件;
使用下面命令进行克隆速度极快
git clone --recursive https://github.com.cnpmjs.org/espressif/esp-idf.git
第三步 配置 esp-idf编译工具
3.1使用脚本下载相应的编译工具工具链 进入esp-idf 运行 install.sh 与 export.sh
export IDF_GITHUB_ASSETS="dl.espressif.com/github_assets"
./install.sh esp32
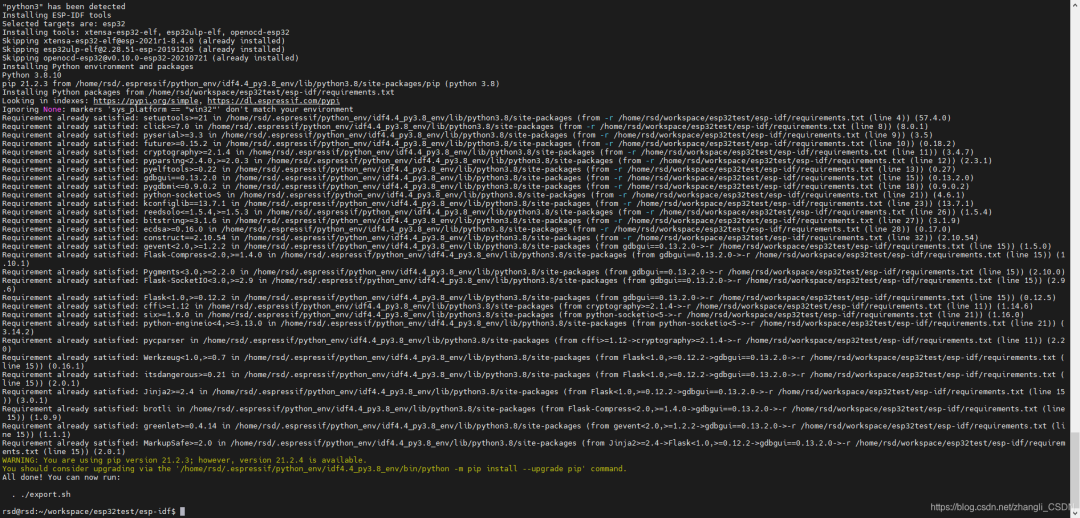 根据上图提示. ./export.sh 表示 已经下载完毕,如果中途有中断 继续运行./install.sh esp32 即可 直至出现提示。
(注意,命令开始的“.”与export.sh脚本之间,有一个空格)
然后我们运行 以下命令
. ./export.sh
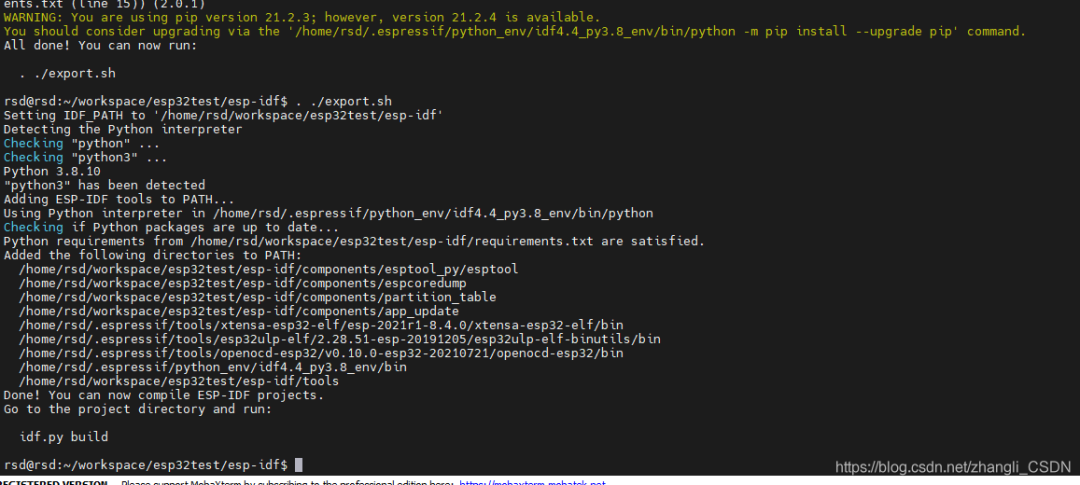
查看path
/home/rsd/workspace/esp32test/esp-idf/components/esptool_py/esptool:/home/rsd/workspace/esp32test/esp-idf/components/espcoredump:/home/rsd/workspace/esp32test/esp-idf/components/partition_table:/home/rsd/workspace/esp32test/esp-idf/components/app_update:/home/rsd/.espressif/tools/xtensa-esp32-elf/esp-2021r1-8.4.0/xtensa-esp32-elf/bin:/home/rsd/.espressif/tools/esp32ulp-elf/2.28.51-esp-20191205/esp32ulp-elf-binutils/bin:/home/rsd/.espressif/tools/openocd-esp32/v0.10.0-esp32-20210721/openocd-esp32/bin:/home/rsd/.espressif/python_env/idf4.4_py3.8_env/bin:/home/rsd/workspace/esp32test/esp-idf/tools:/home/rsd/.local/bin:/usr/local/sbin:/usr/local/bin:/usr/sbin:/usr/bin:/sbin:/bin:/usr/games:/usr/local/games:/snap/bin
到这里临时的环境变量已经配置完毕。
三 hello world
cp examples/get-started/hello_world/ ../ -a
cd ..
ls
cd hello_world/
ls

•我们通过上面的命令就可以看到hello_world 的 工程
在hello_world下运行
idf.py all
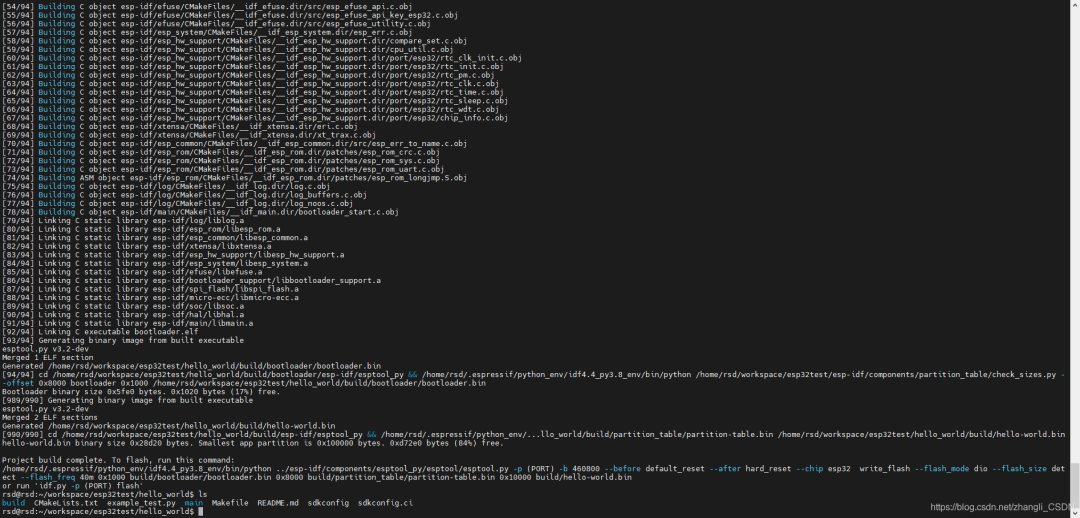 看到我们多了一个build 目录 并且里面有一个最耀眼的hello-world.elf 这就是hello固件
将开发板的IO0与end相连 拉低IO0 在使用下列命令开始下载
idf.py flash -p /dev/ttyUSB0
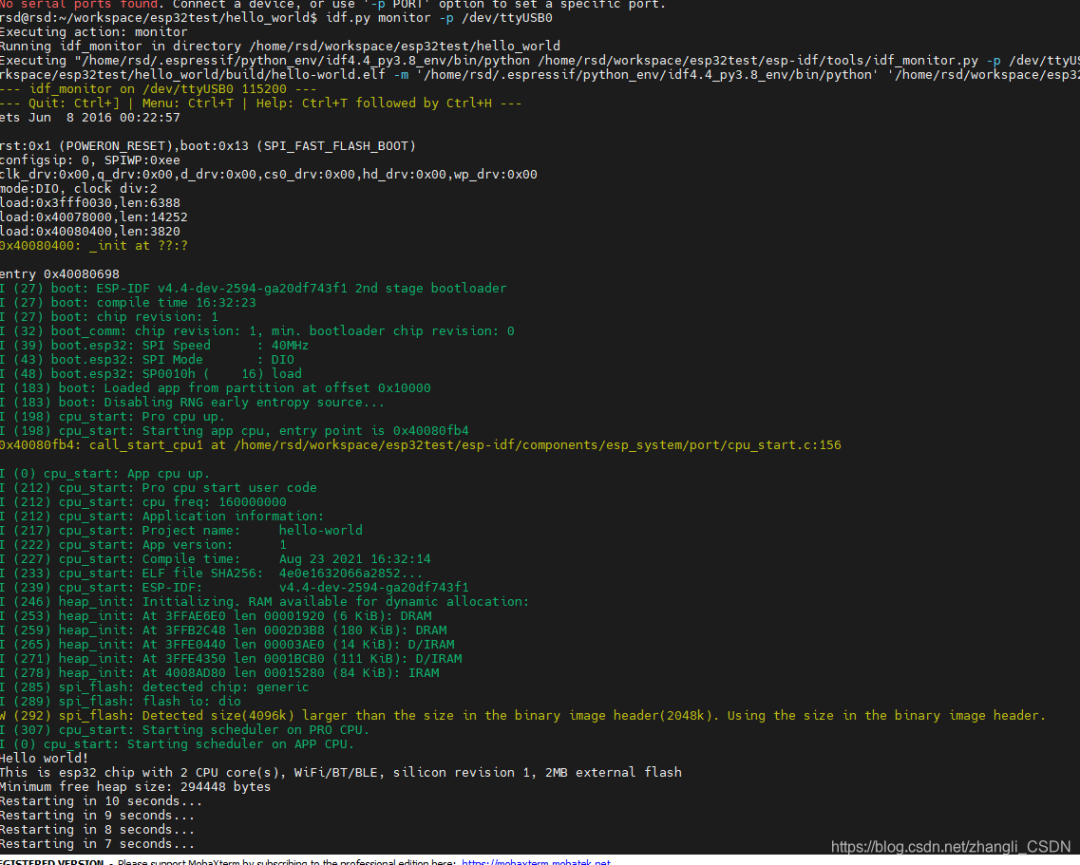
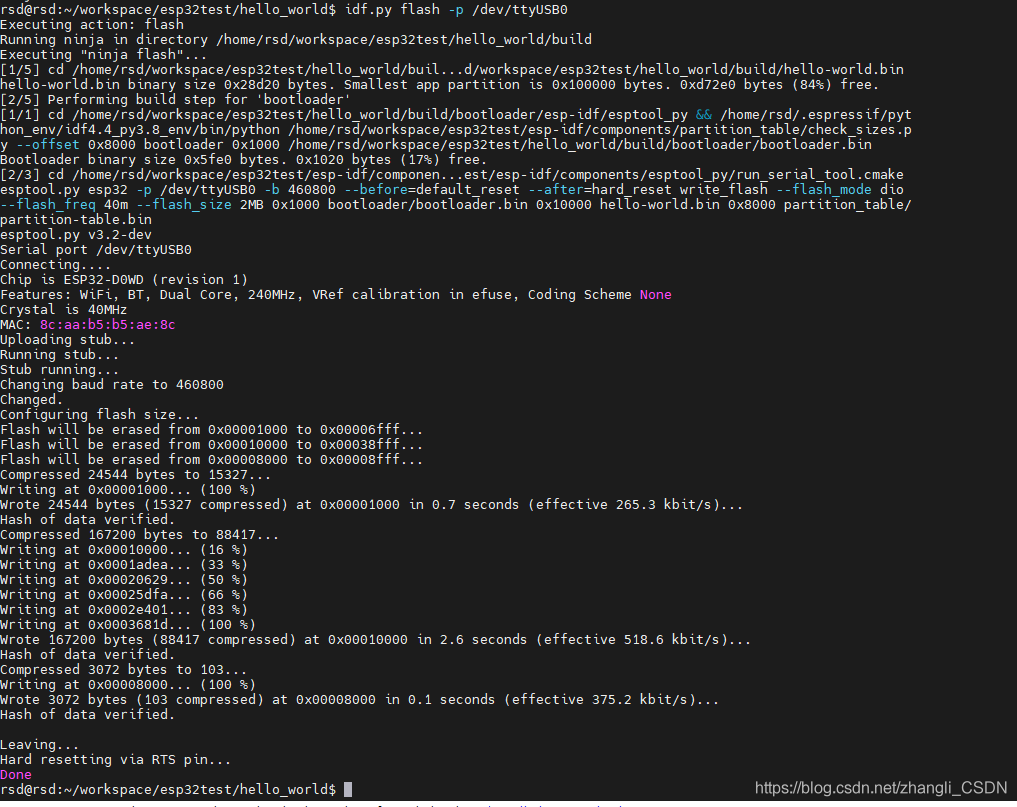 查看运行情况
idf.py monitor -p /dev/ttyUSB0
四 自定义环境配置
首先我们要明白为什么我们还要自定义环境配置
•就个人而言 使用麻烦
我们会发现上述的环境配置后今天可以使用,明天就无法运行了;上午还能用,一顿饭后下午就不能使用了,必须重新运行 export.sh才可以,相当麻烦。
•就项目版本管理而言 版本管理不完善,缺少编译工具的管理。
我们会发现,项目的编译工具在哪里,我们不知道,当我们的计算机出现问题,虚拟机无法运行时,岂不是丢失了环境。应该将环境纳入版本管理中。
•就团队而言,不利于团队开发
团队中每个人都需要配置一遍环境,当环境配置混乱时岂不是灾难。
环境配置 细心的读者会发现 环境被隐藏在.espressif里
•dist•idf-env.json• python_env• tools
 我们可以使用脚本进行环境管理与声明 使用下列命令在hello_world 下 创建 shell脚本 go.sh。
vim go.sh
esp_idf="/home/rsd/workspace/esp32project/esp-idf" #esp-idf的位置
esp_tools="/home/rsd/.espressif" #环境的位置,后期可以使用cp命令 移动到你想要的位置,便于工程管理
export PATH="${esp_idf}/components/esptool_py/esptool:$PATH"
export PATH="${esp_idf}/components/espcoredump:$PATH"
export PATH="${esp_idf}/components/partition_table:$PATH"
export PATH="${esp_idf}/components/app_update:$PATH"
export PATH="${esp_idf}/tools:$PATH"


export PATH="${esp_tools}/tools/xtensa-esp32-elf/esp-2021r1-8.4.0/xtensa-esp32-elf/bin:$PATH"
export PATH="${esp_tools}/tools/esp32ulp-elf/2.28.51-esp-20191205/esp32ulp-elf-binutils/bin:$PATH"
export PATH="${esp_tools}/tools/openocd-esp32/v0.10.0-esp32-20210721/openocd-esp32/bin:$PATH"
export PATH="${esp_tools}/python_env/idf4.4_py3.8_env/bin:$PATH"

export IDF_PATH=/home/rsd/workspace/esp32project/esp-idf #makefile需要的变量
#make all
echo -e "*******************************************************************************\n $PATH \n *******************************************************************************"
if [ "$1" = "build" ]; then

echo -e " \n idf.py build \n"
#make all
idf.py build

elif [ "$1" = "flash" ]; then

echo -e "\n idf.py  flash\n"
#make flash
idf.py flash -p /dev/ttyUSB0
elif [ "$1" = "clean" ]; then

echo -e "\n idf.py clean\n"
#make clean
idf.py clean

elif [ "$1" = "monitor" ]; then
echo "make monitor"
make monitor

elif [ "$1" = "menuconfig" ]; then
echo -e  "\n idf.py  menuconfig\n"
#make menuconfig
idf.py menuconig
elif [ "$1" = "erase_flash" ]; then
echo "idf.py  erase_flash"
idf.py erase_flash

else

echo "idf.py clean"
#make clean
#make all
idf.py clean
echo "idf.py bulid"
idf.py build


fi
修改shell文件的权就可以使用了。
sudo chmod 777 go.sh
从编写的可以看出 1-2行是定义的位置变量 方便后面的修改;
紧接着就是环境配置,此环境只在 运行go.sh 有效 ,方便使用;
后面就是makefile需要的一个变量
export IDF_PATH=/home/rsd/workspace/esp32project/esp-idf因为编译链接时依靠工程下的makefile文件。有兴趣的读者可以了自行了解一下。
再后面就是if -else 通过运行参数决定编译还是下载等等。
使用方法
编译:./go.sh build 清除 : ./go.sh clean
下载:./go.sh flash 监视器:./go.sh monitor
注意 在下载与调用监视器时如果不是root用户 需要将 /dev/ttyUSB0 修改权限
sudo chmod 777 /dev/ttyUSB0
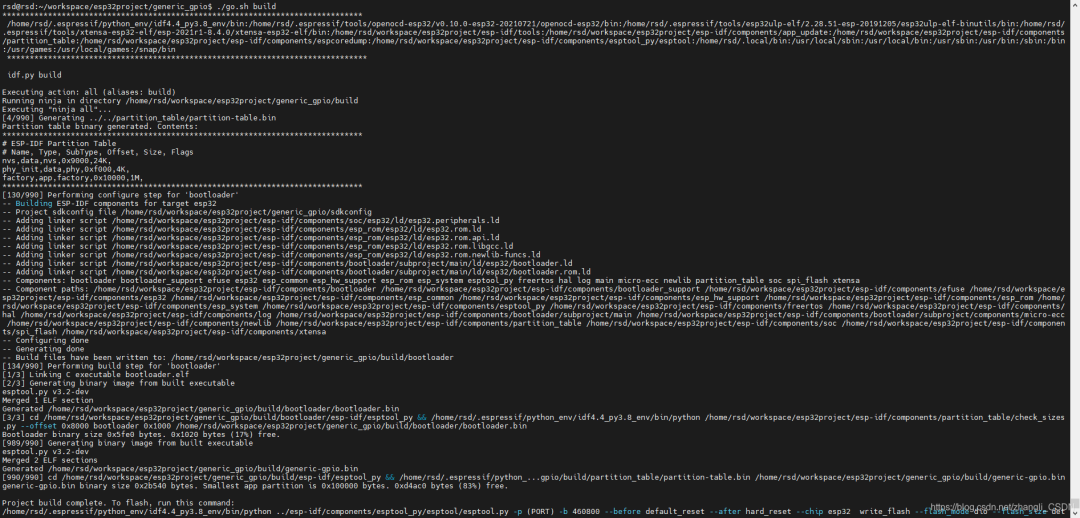

•当我们将./espressif里的 idf-env.json python_env tools 移动到 工程文件下,再使用git进行版本管理,团队其他人就可以不需要配置环境 ,只需要修改esp_tools="/home/rsd/.espressif"就可以 。真正实现了环境与虚拟机分离。个人的环境也非常方便 不因为其他项目的环境冲突。
五 参考
https://docs.espressif.com/projects/esp-idf/zh_CN/latest/esp32/get-started/index.html#get-started-set-up-env
六 声明
个人的水平有限,仅供参考或举一反三 ,如有错误或其他敬请谅解。
References
[1] ESP-IDF 编程指南: https://docs.espressif.com/projects/esp-idf/zh_CN/latest/esp32/get-started/index.html
