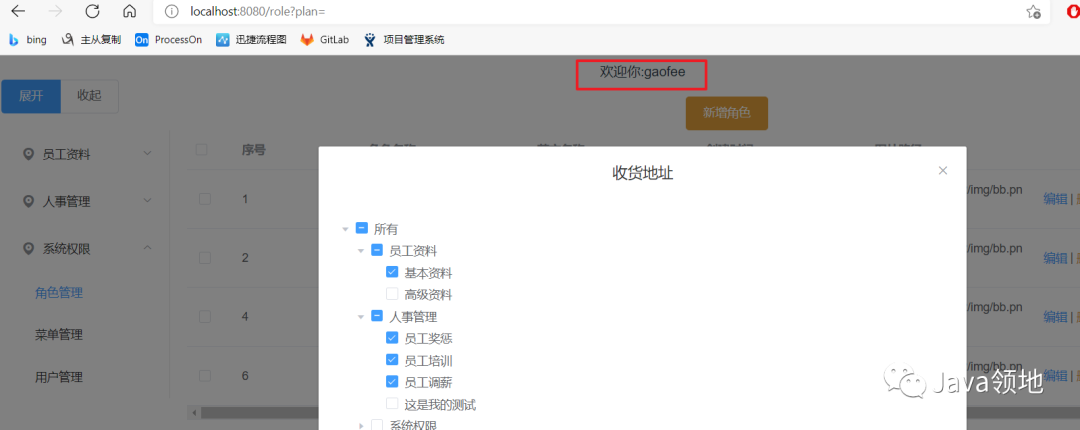
教你使用gitee做第三方登录
教你使用gitee做第三方登录(qq登录微信登录同样适用)
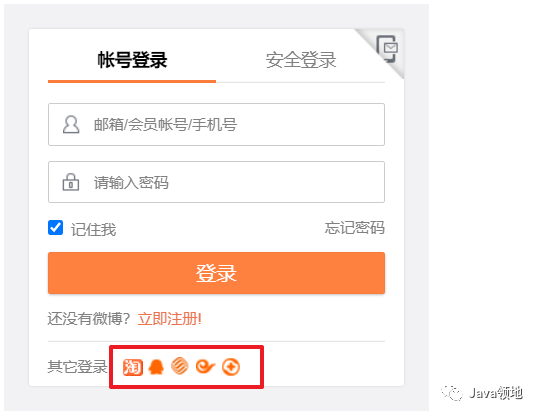
当你登录微博时看到这样的
又或者是当你登录码云时看到的是
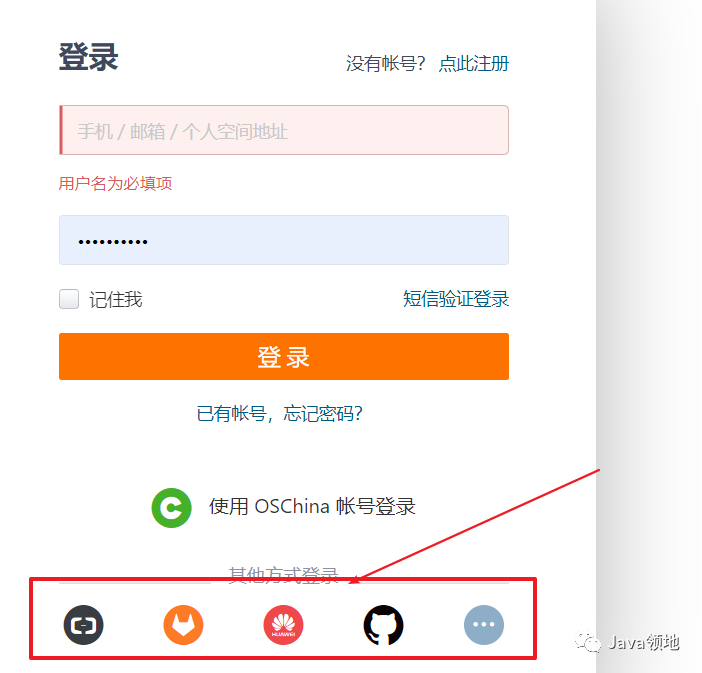
那么,这样的第三方登录到底如何做的呢?下面就来探讨一下
目前主流的认证系统比如:微博,qq,微信,码云,github都是遵循Oauth2协议的!
因此我们先来介绍下Oauth2.0:
OAuth 2.0是用于授权的行业标准协议。OAuth 2.0为简化客户端开发提供了特定的授权流,包括Web应用、桌面应用、移动端应用等。
OAuth2 相关名词解释
Resource owner(资源拥有者):拥有该资源的最终用户,他有访问资源的账号密码;
Resource server(资源服务器):拥有受保护资源的服务器,如果请求包含正确的访问令牌,可以访问资源;
Client(客户端):访问资源的客户端,会使用访问令牌去获取资源服务器的资源,可以是浏览器、移动设备或者服务器;
Authorization server(认证服务器):用于认证用户的服务器,如果客户端认证通过,发放访问资源服务器的令牌。
四种授权模式
Authorization Code(授权码模式):正宗的OAuth2的授权模式,客户端先将用户导向认证服务器,登录后获取授权码,然后进行授权,最后根据授权码获取访问令牌;
Implicit(简化模式):和授权码模式相比,取消了获取授权码的过程,直接获取访问令牌;
Resource Owner Password Credentials(密码模式):客户端直接向用户获取用户名和密码,之后向认证服务器获取访问令牌;
Client Credentials(客户端模式):客户端直接通过客户端认证(比如client_id和client_secret)从认证服务器获取访问令牌。
两种常用的授权模式
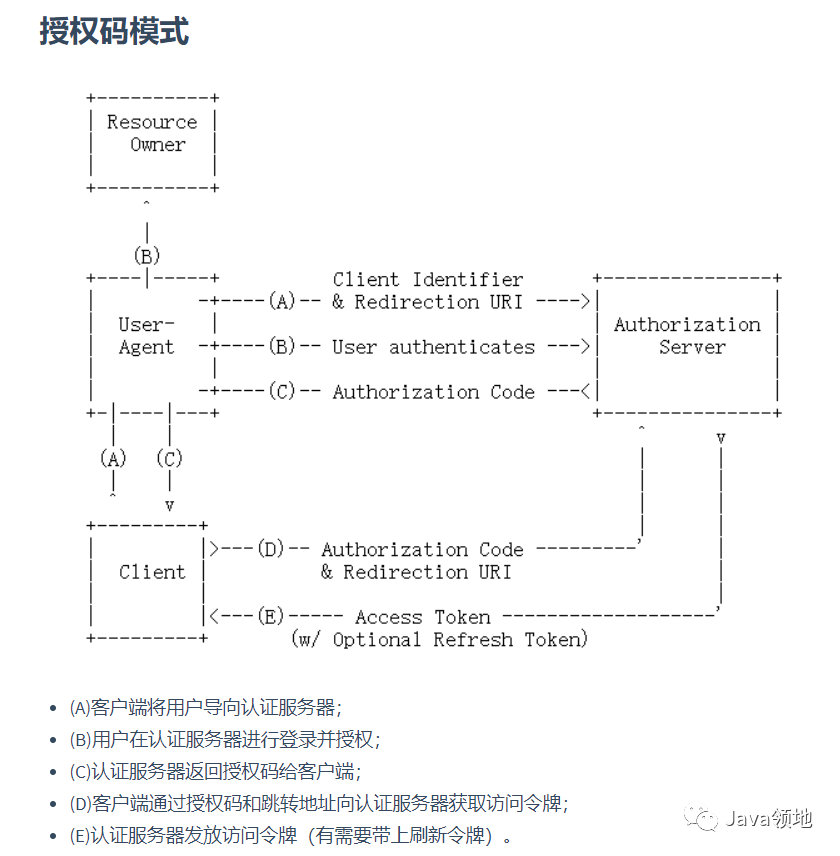
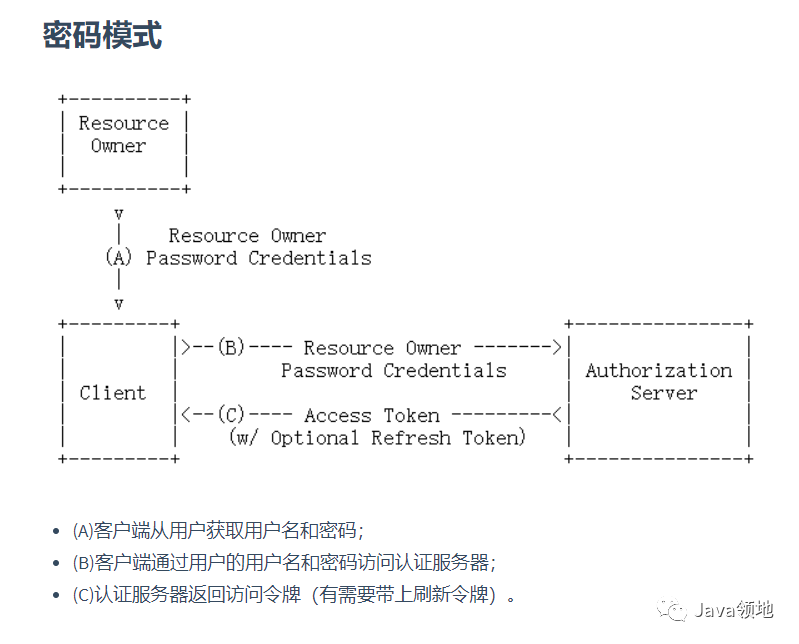
其他的两种模式本文不做赘述!详情自行度娘
了解了Oauth2.0的认证相关流程后,下面就是介绍如何使用码云作为第三方认证中心实现认证(授权码模式)!1. 打开码云官方文档
https://gitee.com/api/v5/oauth_doc#/
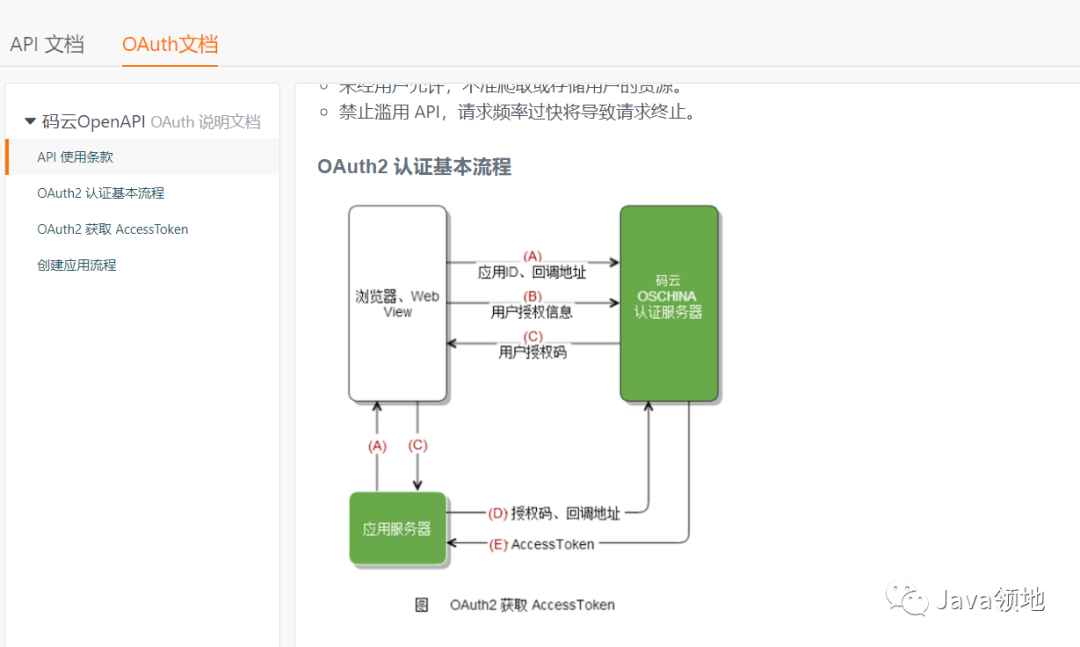
OAuth2 获取 AccessToken 认证步骤
1. 授权码模式
应用通过 浏览器 或 Webview 将用户引导到码云三方认证页面上( GET请求 )
https://gitee.com/oauth/authorize?client_id={client_id}&redirect_uri={redirect_uri}&response_type=code用户对应用进行授权
注意: 如果之前已经授权过的需要跳过授权页面,需要在上面第一步的 URL 加上 scope 参数,且 scope 的值需要和用户上次授权的勾选的一致。如用户在上次授权了user_info、projects以及pull_requests。则步骤A 中 GET 请求应为:https://gitee.com/oauth/authorize?client_id={client_id}&redirect_uri={redirect_uri}&response_type=code&scope=user_info%20projects%20pull_requests码云认证服务器通过回调地址{redirect_uri}将 用户授权码 传递给 应用服务器 或者直接在 Webview 中跳转到携带 用户授权码的回调地址上,Webview 直接获取code即可({redirect_uri}?code=abc&state=xyz)
应用服务器 或 Webview 使用 access_token API 向 码云认证服务器发送post请求传入 用户授权码 以及 回调地址( POST请求 )注:请求过程建议将 client_secret 放在 Body 中传值,以保证数据安全。
https://gitee.com/oauth/token?grant_type=authorization_code&code={code}&client_id={client_id}&redirect_uri={redirect_uri}&client_secret={client_secret}码云认证服务器返回 access_token
应用通过 access_token 访问 Open API 使用用户数据。当 access_token 过期后(有效期为一天),你可以通过以下 refresh_token 方式重新获取 access_token( POST请求 )
https://gitee.com/oauth/token?grant_type=refresh_token&refresh_token={refresh_token}注意:如果获取 access_token 返回 403,可能是没有设置User-Agent的原因。
详见:获取Token时服务端响应状态403是什么情况
2. 密码模式
用户向客户端提供邮箱地址和密码。客户端将邮箱地址和密码发给码云认证服务器,并向码云认证服务器请求令牌。( POST请求。Content-Type: application/x-www-form-urlencoded )
curl -X POST --data-urlencode "grant_type=password" --data-urlencode "username={email}" --data-urlencode "password={password}" --data-urlencode "client_id={client_id}" --data-urlencode "client_secret={client_secret}" --data-urlencode "scope=projects user_info issues notes" https://gitee.com/oauth/token
scope表示权限范围,有以下选项,请求时使用空格隔开user_info projects pull_requests issues notes keys hook groups gists enterprises码云认证服务器返回 access_token
应用通过 access_token 访问 Open API 使用用户数据。
创建应用流程
在 修改资料 -> 第三方应用,创建要接入码云的应用。
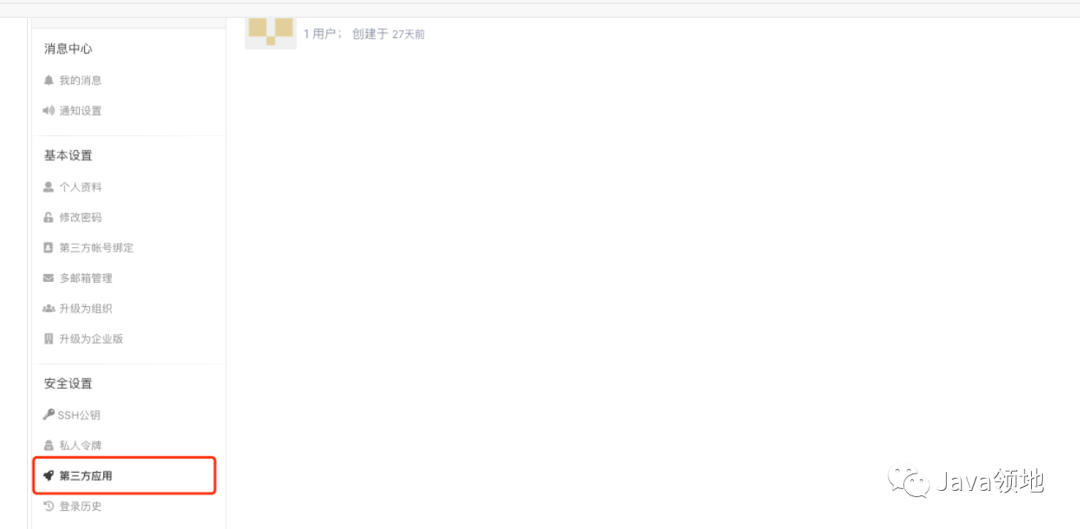
点击创建应用
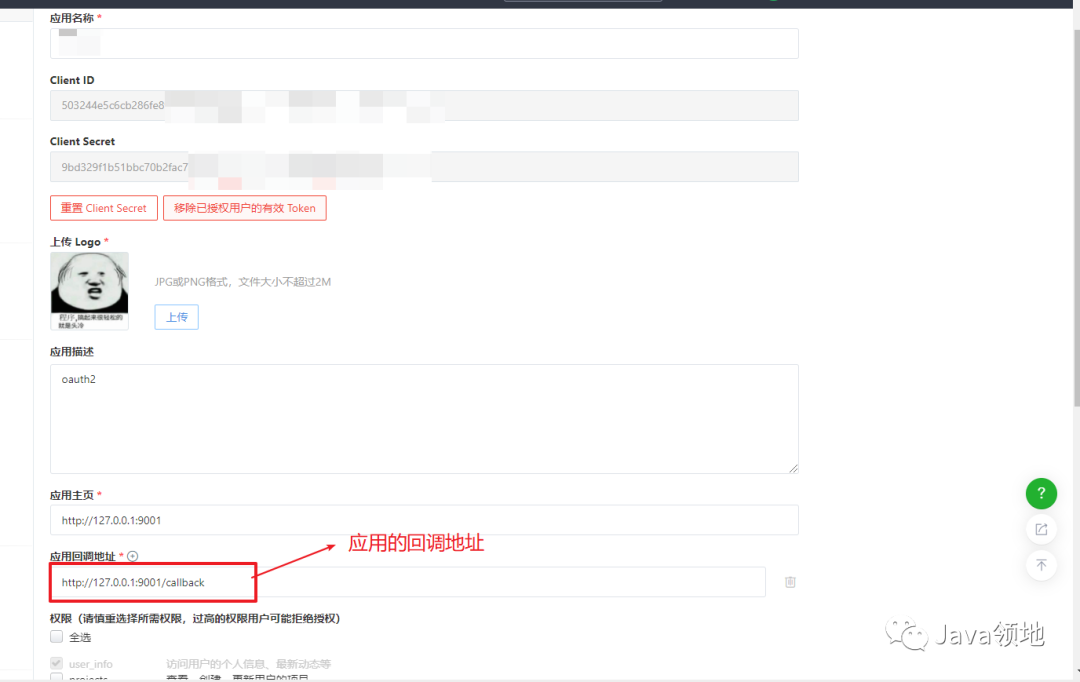
创建应用后,系统会给你生产密钥,好了,准备工作做完后,下面开始上代码了!
首先在你应用的登录页植入码云的登录连接:
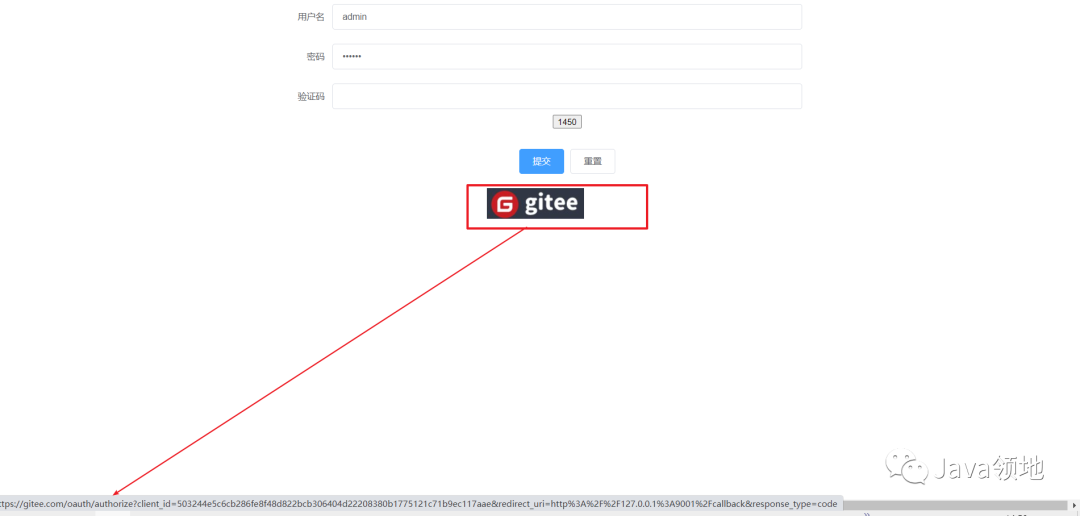
注意此登录链接是码云为我们提供的授权地址
2. 当我们点击码云登录图片链接时,会进入码云的授权页
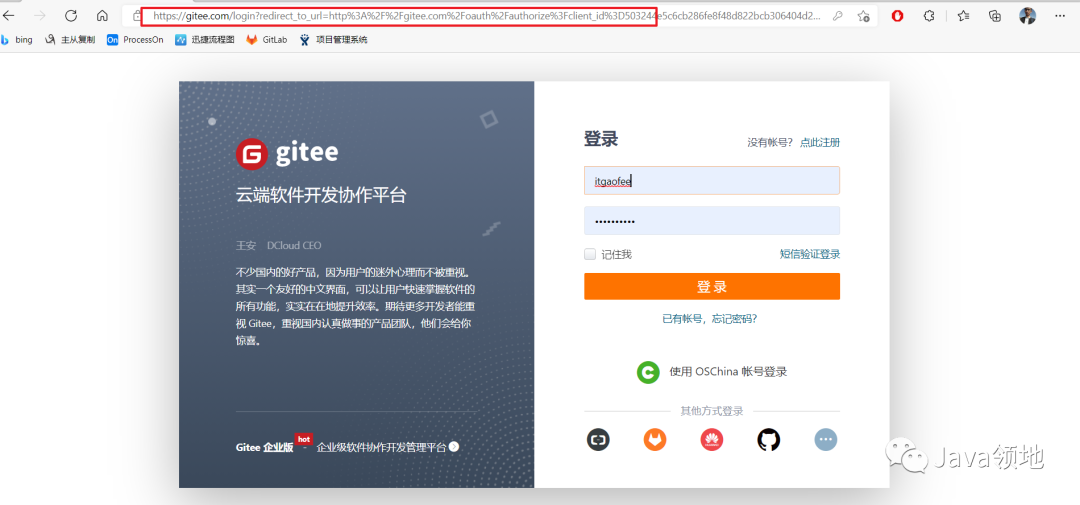
3.在码云授权页点击登录时,如果账号密码正确,则码云对携带着授权码请求回调地址:
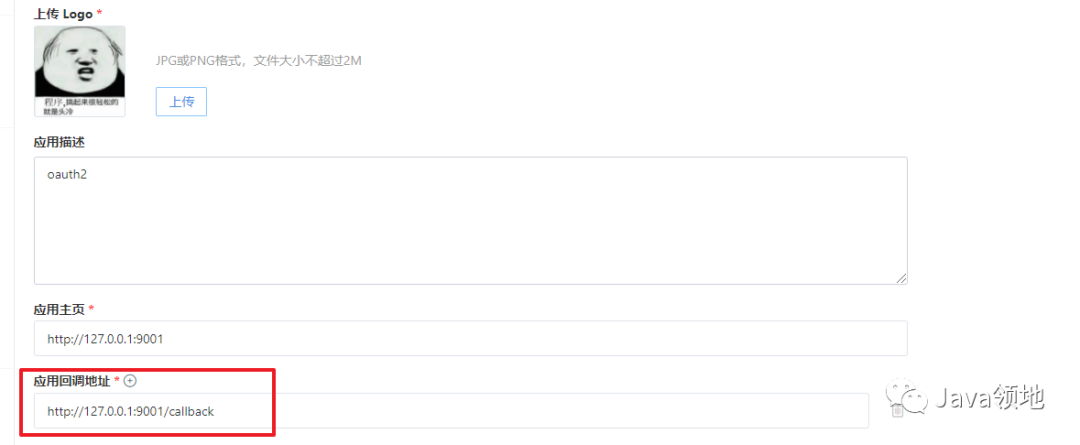
4.编写回调接口用来接收授权码
@Controller
@CrossOrigin
@Slf4j
public class MayunLoginController {

@Autowired
IUserService userService;

@RequestMapping("callback")
public void callback(String code, HttpServletResponse resp) throws IOException {

//1.拿着授权码请求token
Map<String, Object> map = new HashMap<>();
map.put("client_id","1b9ec117aae");
map.put("client_secret","8fdae53cbc560f9966ec");
map.put("grant_type","authorization_code");
map.put("code",code);
map.put("redirect_uri","http://127.0.0.1:9001/callback");

//HttpUtil.buildBasicAuth("503244e5c6cb286fe8f48d822bcb306404d22208380b1775121c71b9ec117aae","9bd329f1b51bbc70b2fac74c77f65db08bb3defb88588fdae53cbc560f9966ec", Charset.forName("UTF-8"));
        //2.如果token过期,使用refesh_token 重新获取一个access_token  这步省略
//当 access_token 过期后(有效期为一天),你可以通过以下 refresh_token 方式重新获取 access_token( POST请求 )
//https://gitee.com/oauth/token?grant_type=refresh_token&refresh_token={refresh_token}
        //3.获取token,失效时间,刷新token等
String tokenResult = HttpUtil.post("https://gitee.com/oauth/token", map);
Map parse = (Map) JSON.parse(tokenResult);
String access_token = (String) parse.get("access_token");
log.info("请求的token是:{}",tokenResult);
//4.根据token获取用户的信息
Map<String, Object> map1 = new HashMap<>();
map1.put("access_token",access_token);
String userInfo = HttpUtil.get("https://gitee.com/api/v5/user", map1);

Map<String,Object> user = (Map<String, Object>) JSON.parse(userInfo);
//获取码云上的giteeId
String giteeId = user.get("id")+"";
QueryWrapper<User> wrapper = new QueryWrapper<>();
wrapper.eq("giteeid",giteeId);
//根据giteeId查询本地用户id和姓名
User one = userService.getOne(wrapper);

//4.登录成功
resp.sendRedirect("http://localhost:8080/toLogin?uid="+one.getId()+"&name="+one.getName());
登录成功,重定向到前端工程(此处是前后端分离).
前端工程获取url中的用户参数即可实现用户登录
methods: {
//解析url中的token参数
getToken(){
debugger
            var url = window.document.location.href.toString();//获得当前url地址并转换成字符串
console.log(url)
var u = url.split("?");
//以?来分割字符串,将?前后的值存到一个数组中
if(typeof(u[1]) == "string"){//获得?后面具体的请求参数值
u = u[1].split("&");
var get = {};
for(var i in u){
var j = u[i].split("=");
get[j[0]] = j[1];
                }
return get;
            }
        }
    },
created() {
//获取到token 并封装到store中用于全程携带
let token11=this.getToken();
console.log(token11.uid+"===============")
let uid = token11.uid
let name = token11.name
if (uid != undefined && uid != {}){
localStorage.setItem('uid',uid)
localStorage.setItem('name',name)
//  var aaa = localStorage.getItem('token');
            //vuex
this.$store.state.user.id=uid
this.$store.state.user.name=name
//跳转到首页
this.$router.push('/home')
        }
    }
}
具体效果:
