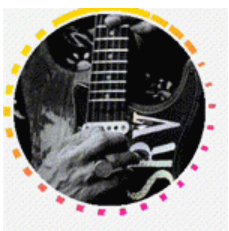
Android仿instagram头像点击加载动画


既然这个动画效果这么火,那还不赶快把我实现分享出来

1、介绍

2、使用
Step 1
dependencies {compile 'com.qintong:insLoadingAnimation:1.0.1'}
Step 2
android:layout_centerInParent="true"android:id="@+id/loading_view"android:layout_width="wrap_content"android:layout_height="wrap_content"android:src="@mipmap/pink"/>
Step 3
设置状态:
LOADING: 表示InsLoadingView被点击之后正在加载内容(未加载完毕之前),该状态下动画正在执行。
UNCLICKED: 该InsLoadingView被点击之前的状态,此状态下动画停止。
CLICKED: 表示InsLoadingView被点击和加载过,此状态下动画停止切圆圈的颜色为灰色。
默认的状态是LOADING。
xml:
app:status="loading" //or "clicked",or "clicked" mInsLoadingView.setStatus(InsLoadingView.Status.LOADING); //Or InsLoadingView.Status.CLICKED, InsLoadingView.Status.UNCLICKED设置颜色
可以按如下代码设置:
app:start_color="#FFF700C2" //or your colorapp:end_color="#FFFFD900" //or your color
mInsLoadingView.setStartColor(Color.YELLOW); //or your colormInsLoadingView.setEndColor(Color.BLUE); //or your color
设置速度
app:circle_duration="2000"app:rotate_duration="10000"
mInsLoadingView.setCircleDuration(2000);mInsLoadingView.setRotateDuration(10000);
2、实现
@Overrideprotected void onDraw(Canvas canvas) {canvas.scale(mScale, mScale, centerX(), centerY());drawBitmap(canvas);Paint paint = getPaint(getColor(0), getColor(360), 360);switch (mStatus) {case LOADING:drawTrack(canvas, paint);break;case UNCLICKED:drawCircle(canvas, paint);break;case CLICKED:drawClickedircle(canvas);break;}}
(1) 动画绘制:
degress和cricleWidth是实时变化的,他们的值由ValueAnimator设置,这两个值分别表示整个动画整体旋转的角度(也就是动画中转速较慢一端)和转速较快的圆弧的动画。两个变量的单位都是度degress范围为0-360,cricleWidth范围为-360到360。cricleWidth圆弧向回“收缩”和向外“伸展”的过程,分别对应代码中的a和b过程,对应的circleWidth范围为-360—0度和0—360度。
在a过程中,cricleWidth + 360换算得到成正的adjustCricleWidth,adjustCricleWidth到360度绘制一个扇形圆弧,adjustCricleWidth到0度,依次向后每隔12度画小的扇形圆弧,圆弧的宽度递减。
b过程中:从0到cricleWidth:最前端绘制4个小扇形圆弧,其后到0度绘制一个长圆弧。从360度到cricleWidth,每间隔12度依次绘制小圆弧,其宽度递减。
private void drawTrack(Canvas canvas, Paint paint) {canvas.rotate(degress, centerX(), centerY());canvas.rotate(ARC_WIDTH, centerX(), centerY());RectF rectF = new RectF(getWidth() * (1 - circleDia), getWidth() * (1 - circleDia),getWidth() * circleDia, getHeight() * circleDia);if (DEBUG) {Log.d(TAG, "cricleWidth:" + cricleWidth);}if (cricleWidth < 0) {//afloat startArg = cricleWidth + 360;canvas.drawArc(rectF, startArg, 360 - startArg, false, paint);float adjustCricleWidth = cricleWidth + 360;float width = 8;while (adjustCricleWidth > ARC_WIDTH) {width = width - arcChangeAngle;adjustCricleWidth = adjustCricleWidth - ARC_WIDTH;canvas.drawArc(rectF, adjustCricleWidth, width, false, paint);}} else {//bfor (int i = 0; i <= 4; i++) {if (ARC_WIDTH * i > cricleWidth) {break;}canvas.drawArc(rectF, cricleWidth - ARC_WIDTH * i, 8 + i, false, paint);}if (cricleWidth > ARC_WIDTH * 4) {canvas.drawArc(rectF, 0, cricleWidth - ARC_WIDTH * 4, false, paint);}float adjustCricleWidth = 360;float width = 8 * (360 - cricleWidth) / 360;if (DEBUG) {Log.d(TAG, "width:" + width);}while (width > 0 && adjustCricleWidth > ARC_WIDTH) {width = width - arcChangeAngle;adjustCricleWidth = adjustCricleWidth - ARC_WIDTH;canvas.drawArc(rectF, adjustCricleWidth, width, false, paint);}}}
(2) 点击View收缩效果:
canvas.scale(mScale, mScale, centerX(), centerY());这里值得注意的是,在重写onTouchEvent()时候,有两点要注意:
@Overridepublic boolean onTouchEvent(MotionEvent event) {boolean result = false;if (DEBUG) {Log.d(TAG, "onTouchEvent: " + event.getAction());}switch (event.getAction()) {case MotionEvent.ACTION_DOWN: {startDownAnim();result = true;break;}case MotionEvent.ACTION_UP: {startUpAnim();break;}case MotionEvent.ACTION_CANCEL: {startUpAnim();break;}}return super.onTouchEvent(event) || result;}private void startDownAnim() {mTouchAnim.setFloatValues(mScale, 0.9f);mTouchAnim.start();}private void startUpAnim() {mTouchAnim.setFloatValues(mScale, 1);mTouchAnim.start();}
(3) ValueAnimator:
private void onCreateAnimators() {mRotateAnim = ValueAnimator.ofFloat(0, 180, 360);mRotateAnim.addUpdateListener(new ValueAnimator.AnimatorUpdateListener() {@Overridepublic void onAnimationUpdate(ValueAnimator animation) {degress = (float) animation.getAnimatedValue();postInvalidate();}});mRotateAnim.setInterpolator(new LinearInterpolator());mRotateAnim.setDuration(mRotateDuration);mRotateAnim.setRepeatCount(-1);mCircleAnim = ValueAnimator.ofFloat(0, 360);mCircleAnim.setInterpolator(new DecelerateInterpolator());mCircleAnim.setDuration(mCircleDuration);mCircleAnim.setRepeatCount(-1);mCircleAnim.addUpdateListener(new ValueAnimator.AnimatorUpdateListener() {@Overridepublic void onAnimationUpdate(ValueAnimator animation) {if (isFirstCircle) {cricleWidth = (float) animation.getAnimatedValue();} else {cricleWidth = (float) animation.getAnimatedValue() - 360;}postInvalidate();}});mCircleAnim.addListener(new Animator.AnimatorListener() {@Overridepublic void onAnimationStart(Animator animation) {}@Overridepublic void onAnimationEnd(Animator animation) {}@Overridepublic void onAnimationCancel(Animator animation) {}@Overridepublic void onAnimationRepeat(Animator animation) {isFirstCircle = !isFirstCircle;}});mTouchAnim = new ValueAnimator();mTouchAnim.setInterpolator(new DecelerateInterpolator());mTouchAnim.setDuration(200);mTouchAnim.addUpdateListener(new ValueAnimator.AnimatorUpdateListener() {@Overridepublic void onAnimationUpdate(ValueAnimator animation) {mScale = (float) animation.getAnimatedValue();postInvalidate();}});startAnim();}
(4) 绘制圆形图片:
private void drawBitmap(Canvas canvas) {Paint bitmapPaint = new Paint();setBitmapShader(bitmapPaint);RectF rectF = new RectF(getWidth() * (1 - bitmapDia), getWidth() * (1 - bitmapDia),getWidth() * bitmapDia, getHeight() * bitmapDia);canvas.drawOval(rectF, bitmapPaint);}private void setBitmapShader(Paint paint) {Drawable drawable = getDrawable();Matrix matrix = new Matrix();if (null == drawable) {return;}Bitmap bitmap = drawableToBitmap(drawable);BitmapShader tshader = new BitmapShader(bitmap, Shader.TileMode.CLAMP, Shader.TileMode.CLAMP);float scale = 1.0f;int bSize = Math.min(bitmap.getWidth(), bitmap.getHeight());scale = getWidth() * 1.0f / bSize;matrix.setScale(scale, scale);if (bitmap.getWidth() > bitmap.getHeight()) {matrix.postTranslate(-(bitmap.getWidth() * scale - getWidth()) / 2, 0);} else {matrix.postTranslate(0, -(bitmap.getHeight() * scale - getHeight()) / 2);}tshader.setLocalMatrix(matrix);paint.setShader(tshader);}private Bitmap drawableToBitmap(Drawable drawable) {if (drawable instanceof BitmapDrawable) {BitmapDrawable bitmapDrawable = (BitmapDrawable) drawable;return bitmapDrawable.getBitmap();}int w = drawable.getIntrinsicWidth();int h = drawable.getIntrinsicHeight();Bitmap bitmap = Bitmap.createBitmap(w, h, Bitmap.Config.ARGB_8888);Canvas canvas = new Canvas(bitmap);drawable.setBounds(0, 0, w, h);drawable.draw(canvas);return bitmap;}
(5) 颜色:
Paint paint = getPaint(mStartColor, mEndColor, 360);private Paint getPaint(int startColor, int endColor, double arcWidth) {Paint paint = new Paint();Shader shader = new LinearGradient(0f, 0f, (float) (getWidth() * circleDia * (arcWidth - ARC_WIDTH * 4) / 360),getHeight() * strokeWidth, startColor, endColor, CLAMP);paint.setShader(shader);setPaintStroke(paint);return paint;}
(6) 重写onMeasure():
@Overrideprotected void onMeasure(int widthMeasureSpec, int heightMeasureSpec) {final int widthSpecMode = MeasureSpec.getMode(widthMeasureSpec);final int widthSpecSize = MeasureSpec.getSize(widthMeasureSpec);final int heightSpecMode = MeasureSpec.getMode(heightMeasureSpec);final int heightSpecSize = MeasureSpec.getSize(heightMeasureSpec);if (DEBUG) {Log.d(TAG, "onMeasure widthMeasureSpec:" + widthSpecMode + "--" + widthSpecSize);Log.d(TAG, "onMeasure heightMeasureSpec:" + heightSpecMode + "--" + heightSpecSize);}int width;if (widthSpecMode == MeasureSpec.EXACTLY && heightSpecMode == MeasureSpec.EXACTLY) {width = Math.min(widthSpecSize, heightSpecSize);} else {width = Math.min(widthSpecSize, heightSpecSize);width = Math.min(width, 300);}setMeasuredDimension(width, width);}
总结
源码地址:
评论
