精通 Spring Boot 系列 06
共 5301字,需浏览 11分钟
·
2020-08-26 13:36
阅读全文,约 13 分钟

这是江帅帅的第006篇原创
Spring Boot 文件的上传下载
说真的,在 Spring Boot 实现文件下载,真的是方便到让我颤抖。Java 中实现文件上传可以用两个组件:CommonMultipartResolver 和 StandardServletMultipartResolver。
Spring Boot 在 web 模块中集成了 Spring MVC ,文件上传这块儿的支持是可以通过即插即用的 MultipartResolver 实现类:CommonMultipartResolver。如果用它,则需要使用 commons-fileupload 组件来处理。
Spring Boot 提供的文件上传自动化配置类是 MultipartAutoConfiguration 中默认使用了 StandardServletMultipartResolver,在上传文件甚至能够做到零配置。
1. 单文件上传
1)添加 fileUpload.html 文件
在上传页面的表单中,添加一个 type 为 file 的控件,用来选择需要上传的图片文件。上传的接口是“/upload”,另外 method 要设置为“post”,还有 enctype 要设置为“multipart/form-data”,代码具体如下:
<html lang="en">
<head>
    <meta charset="UTF-8">
    <title>uploadtitle>
head>
<body>
<form action="/upload" method="post" enctype="multipart/form-data">
    <p><input type="file" name="upload" value="选一张图片">p>
    <p><input type="submit" value="开始上传">p>
form>
body>
html>
2)添加 FileUploadController 文件
首先,设置我们的文件上传路径为项目运行目录下的 upload 文件夹。然后,我们用 MultipartFile 来绑定上传的文件,使用 transferTo() 方法可以非常方便实现文件存储到磁盘当中。具体实现代码如下:
@PostMapping("/upload")
public String upload(HttpServletRequest req, MultipartFile uploadFile) {

    String path = req.getSession().getServletContext().getRealPath("/upload/");
    File folder = new File(path);

    if (!folder.isDirectory()) {
        folder.mkdirs();
    }

    String oName = uploadFile.getOriginalFilename();
    String nName = UUID.randomUUID().toString() + oName.substring(oName.lastIndexOf("."), oName.length());

    try {
        uploadFile.transferTo(new File(folder + File.separator + nName));

        String filePath = req.getScheme() + "://" + req.getServerName() + ":" + req.getServerPort() + "/upload/" + nName;

        return "ok";

    } catch (IOException ex) {
        ex.printStackTrace();
    }

    return "error";
}
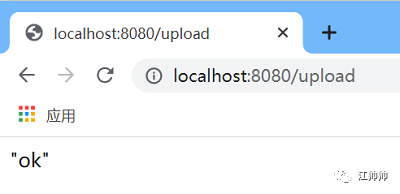
地址栏中,输入 http://localhost:8080/fileUpload.html 选择文件上传,具体运行效果如下:


2. 采用对象方式来上传文件
很多时候的上传操作,也都会把文件作为对象的属性进行保存,具体如何实现?下面通过注册页面,填写用户的相关信息,然后点击注册来上传 User 对象。
1)添加 fileUpload2.html 文件
通过一个表单,来收集用户的具体信息,然后点击“注册用户”按钮即可提交 /register 注册请求。代码具体如下:
<body>
    <form action="/register" method="post" enctype="multipart/form-data">
        <p>用户名:<input type="text" name="username">p>
        <p>密码:<input type="text" name="password">p>
        <p>头像:<input type="file" name="pic">p>
        <p><input type="submit" value="注册用户">p>
    form>
body>
2)添加 User 类
User 类主要是用来封装用户信息的,其中 MultipartFile 类型的 pic 是用来接收上传的图像文件。
public class User {

    private String username;
    private String password;
    private MultipartFile pic;

    // getter 和 setter 方法
}
3)添加 userRegister() 方法
在 userRegister() 方法形参列表中,使用 @ModelAttribute 注解将表单提交的数据绑定到 User 对象中,其中图片会保存到 User 的 pic 属性中,然后转换为 Multipart 类型。文件上传成功之后,所有的用户信息都保存到 model 当中。
@Controller
public class FileUploadController {

    @PostMapping("/register")
    public String userRegister(HttpServletRequest req, @ModelAttribute User user, Model model) throws Exception {
        if (!user.getPic().isEmpty()) {

            String picPath = req.getServletContext().getRealPath("/upload/");
            String picName = user.getPic().getOriginalFilename();

            File filePath = new File(picPath, picName);

            if (!filePath.getParentFile().exists()){
                filePath.getParentFile().mkdirs();
            }

            user.getPic().transferTo(new File(picPath + File.separator + picName));

            model.addAttribute("user", user);
            return "userMsg";

        } else {
            return "error";
        }
    }
}
3)在 templates 目录中,添加 userMsg.html 文件
<body>
    <table>
        <tr>
            <td><img th:src="@{'upload/'+${user.pic.originalFilename}}" height="100"/>td>
            <td th:text="${user.username}">用户名td>
        tr>
    table>
body>
运行效果,具体如下:

3. 多文件上传
1)添加 fileUpload2.html 页面
<form action="/uploadFiles" method="post" enctype="multipart/form-data">
    <p>选第一张图片:<input type="file" name="uploadFiles">p>
    <p>选第二张图片:<input type="file" name="uploadFiles">p>
    <p>选第三张图片:<input type="file" name="uploadFiles">p>
    <p><input type="submit" value="开始上传">p>
form>
body>
2)添加 uploadFiles() 方法
@PostMapping("/uploadFiles")
public String uploadFiles(MultipartFile[] uploadFiles, HttpServletRequest req) {

    String path = req.getSession().getServletContext().getRealPath("/upload/");
    File folder = new File(path);

    if (!folder.isDirectory()) {
        folder.mkdirs();
    }

    if (null != uploadFiles && uploadFiles.length > 0) {

        for (MultipartFile uploadFile : uploadFiles) {

            String oName = uploadFile.getOriginalFilename();
            String nName = UUID.randomUUID().toString() + oName.substring(oName.lastIndexOf("."), oName.length());

            try {

                uploadFile.transferTo(new File(folder, nName));
                return "ok";

            } catch (IOException ex) {
                ex.printStackTrace();
            }
        }
    }

    return "error";
}
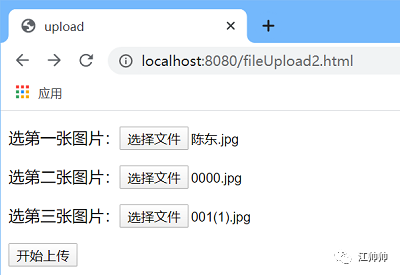
运行结果,具体如下:

4. 文件下载
1)编辑 userMsg.html 页面
<table>
    <tr>
        <td><img th:src="@{'upload/'+${user.pic.originalFilename}}" height="100"/>td>
        <td th:text="${user.username}">用户名td>
        <td><a th:href="@{download(pic=${user.pic.originalFilename })}">下载头像a>td>
    tr>
table>
2)添加 downloadPic() 方法
这里使用了 ResponseEntity 类型,就能定义返回的 HttpHeaders、BodyBuilder 和 HttpStatus,然后返回客户端下载。
@RequestMapping(value="/download")
public ResponseEntity<byte[]> downloadPic(HttpServletRequest request, @RequestParam("pic") String filename, @RequestHeader("User-Agent") String userAgent, Model model)throws Exception{

    String path = request.getServletContext().getRealPath(
        "/upload/");

    File file = new File(path + File.separator + filename);

    BodyBuilder builder = ResponseEntity.ok();
    builder.contentLength(file.length());
    // 二进制流数据
    builder.contentType(MediaType.APPLICATION_OCTET_STREAM);

    // 解码
    filename = URLEncoder.encode(filename, "UTF-8");

    if (userAgent.indexOf("MSIE") > 0) {
        // IE
        builder.header("Content-Disposition", "attachment; filename=" + filename);
    } else {
        // FireFox、Chrome
        builder.header("Content-Disposition", "attachment; filename*=UTF-8''" + filename);
    }
    return builder.body(FileUtils.readFileToByteArray(file));
}
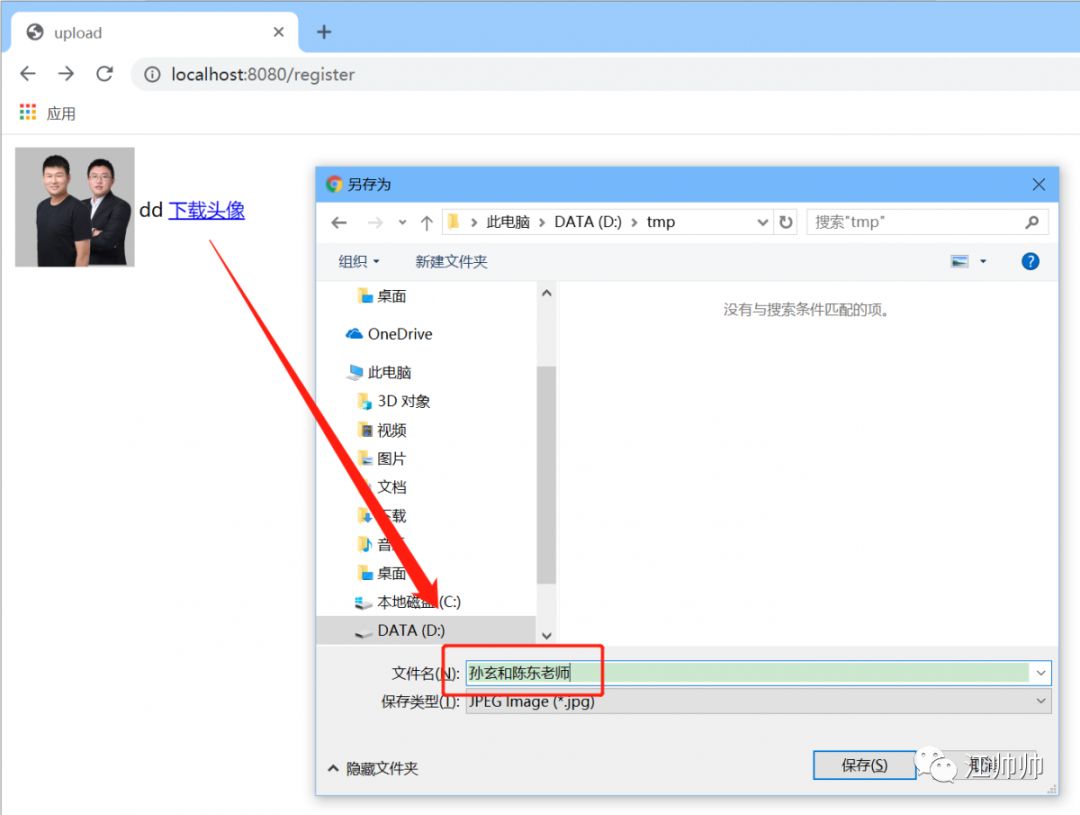
运行效果,具体如下:


来源公众号:江帅帅(ID:NXJSS666)
--END--
▐ 推荐
公众号ID|javabaiwen
小编微信|619531440
每天分享技术干货
视频 | 电子书 | 面试题 | 开发经验

