
盘点 23 款神经网络的设计和可视化工具

极市导读
本文汇总了23个令人眼前一亮的神经网络的设计和可视化工具,并对其进行了简要介绍。>>加入极市CV技术交流群,走在计算机视觉的最前沿
前言
draw_convnet NNSVG PlotNeuralNet TensorBoard Caffe Matlab Keras.js Keras-sequential-ascii Netron DotNet Graphviz Keras Visualization Conx ENNUI NNet GraphCore Neataptic TensorSpace Netscope CNN Analyzer Monial Texample Quiver Net2Vis
工具
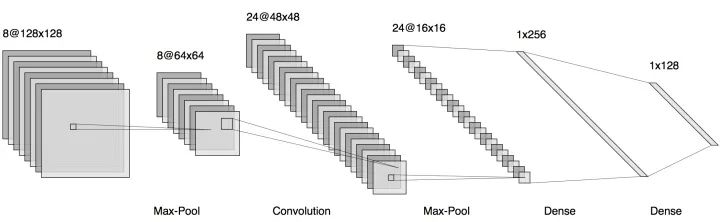
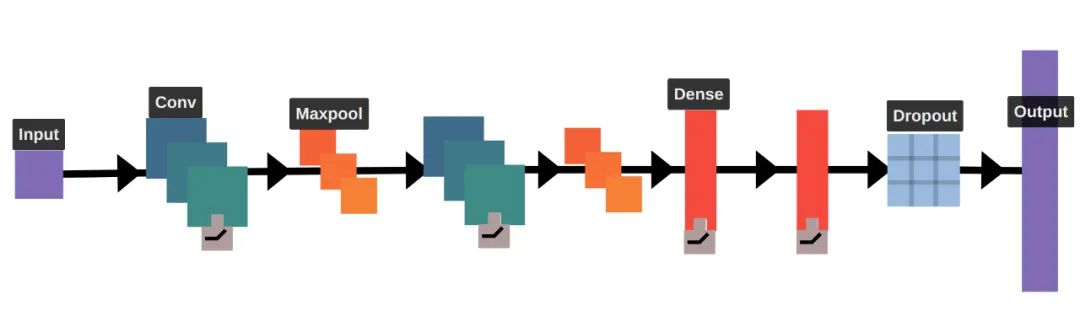
1. draw_convnet
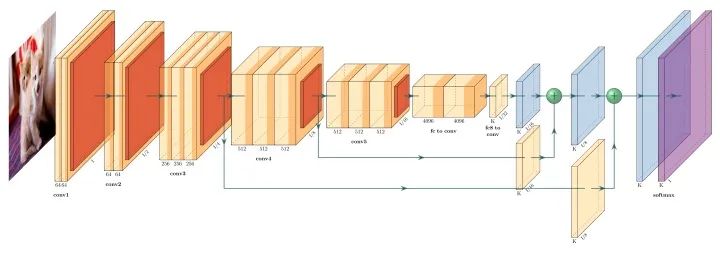
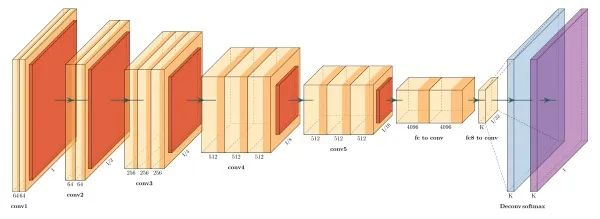
2. NNSVG

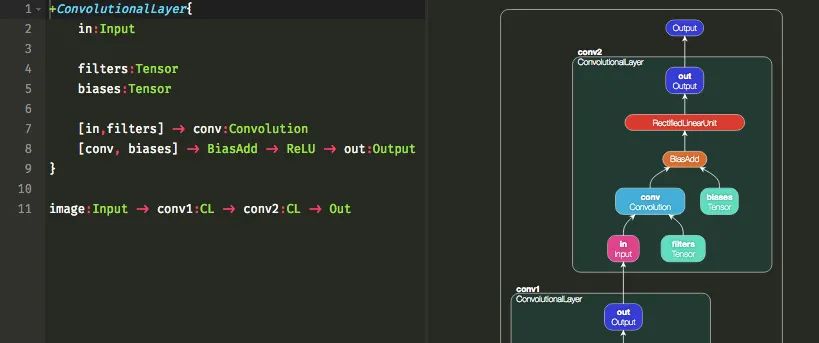
3. PlotNeuralNet
安装
sudo apt-get install texlive-latex-extra
sudo apt-get install texlive-latex-basesudo apt-get install texlive-fonts-recommendedsudo apt-get install texlive-fonts-extrasudo apt-get install texlive-latex-extra
首先下载并安装 MikTex,下载网站:https://miktex.org/download 其次,下载并安装 windows 的 bash 运行器,推荐这两个:
Git:https://git-scm.com/download/win Cygwin:https://www.cygwin.com/
使用例子
cd pyexamples/bash ../tikzmake.sh test_simple
先创建新的文件夹,并生成一个新的 python 代码文件:
mkdir my_projectcd my_projectvim my_arch.py
然后在新的代码文件 my_arch.py中添加这段代码,用于定义你的网络结构,主要是不同类型网络层的参数,包括输入输出数量、卷积核数量等
import syssys.path.append('../')from pycore.tikzeng import *# defined your archarch = [to_head( '..' ),to_cor(),to_begin(),to_Conv("conv1", 512, 64, offset="(0,0,0)", to="(0,0,0)", height=64, depth=64, width=2 ),to_Pool("pool1", offset="(0,0,0)", to="(conv1-east)"),to_Conv("conv2", 128, 64, offset="(1,0,0)", to="(pool1-east)", height=32, depth=32, width=2 ),to_connection( "pool1", "conv2"),to_Pool("pool2", offset="(0,0,0)", to="(conv2-east)", height=28, depth=28, width=1),to_SoftMax("soft1", 10 ,"(3,0,0)", "(pool1-east)", caption="SOFT" ),to_connection("pool2", "soft1"),to_end()]def main():namefile = str(sys.argv[0]).split('.')[0]to_generate(arch, namefile + '.tex' )if __name__ == '__main__':main()
bash ../tikzmake.sh my_arch
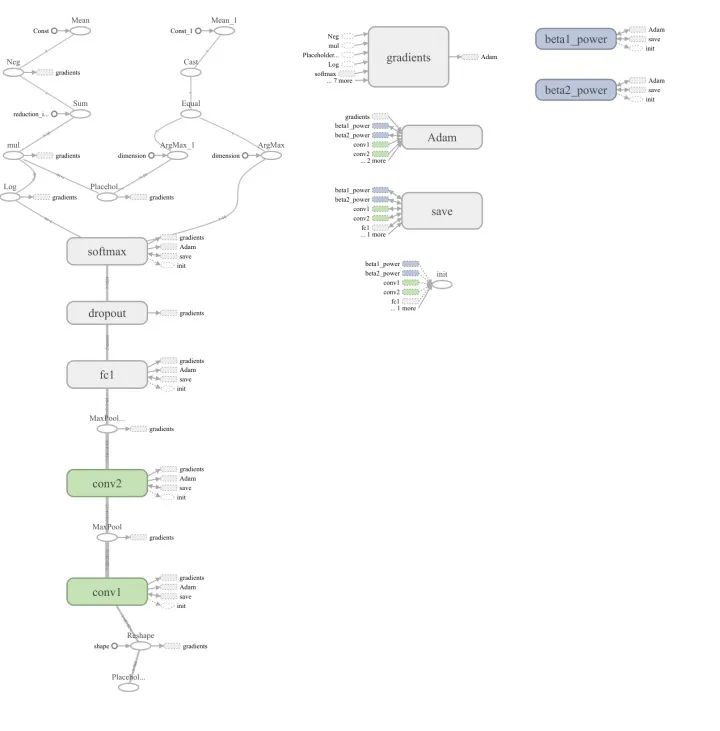
4. TensorBoard
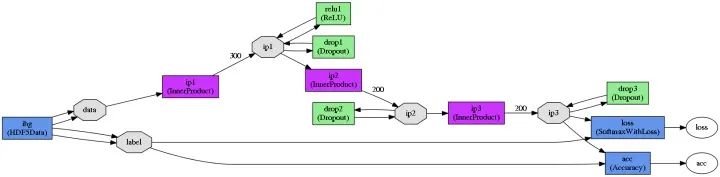
5. Caffe
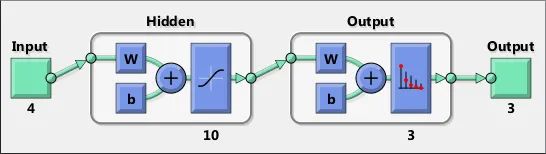
6. Matlab
7. Keras.js
8. keras-sequential-ascii
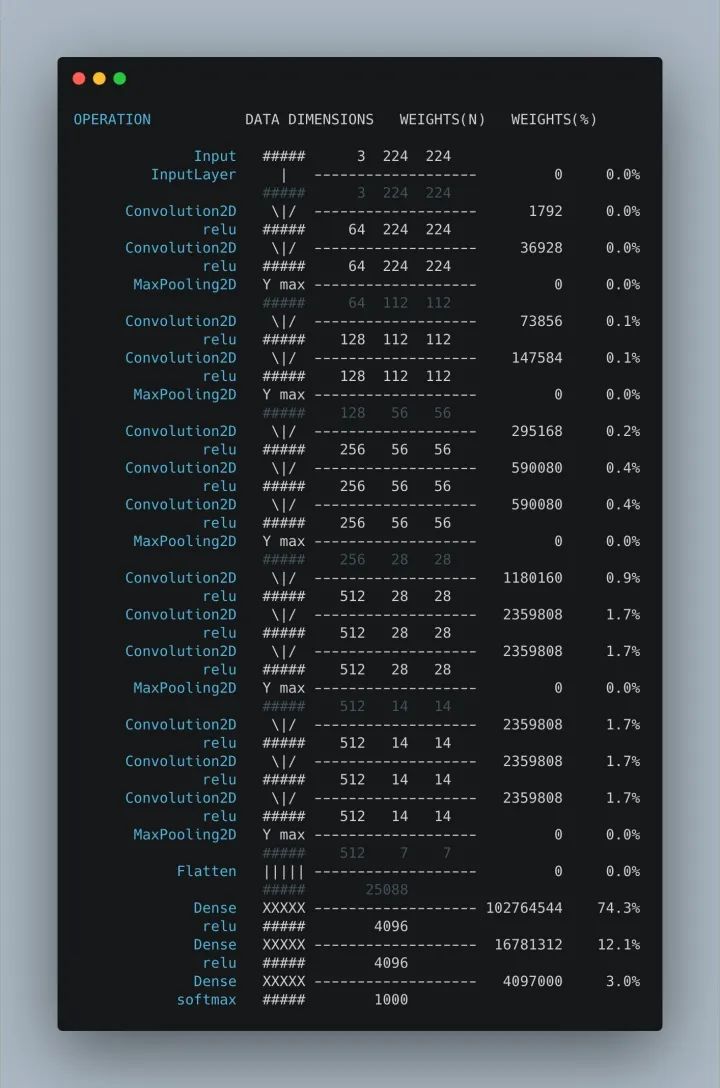
安装
pip install keras_sequential_ascii
pip install git+git://github.com/stared/keras-sequential-ascii.git
使用例子
from keras_sequential_ascii import keras2asciikeras2ascii(model)
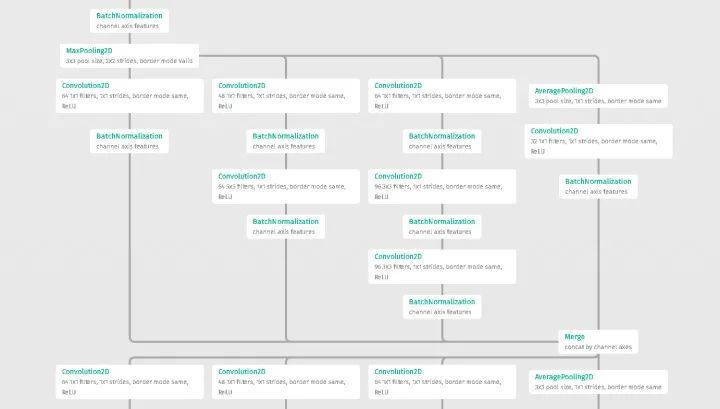
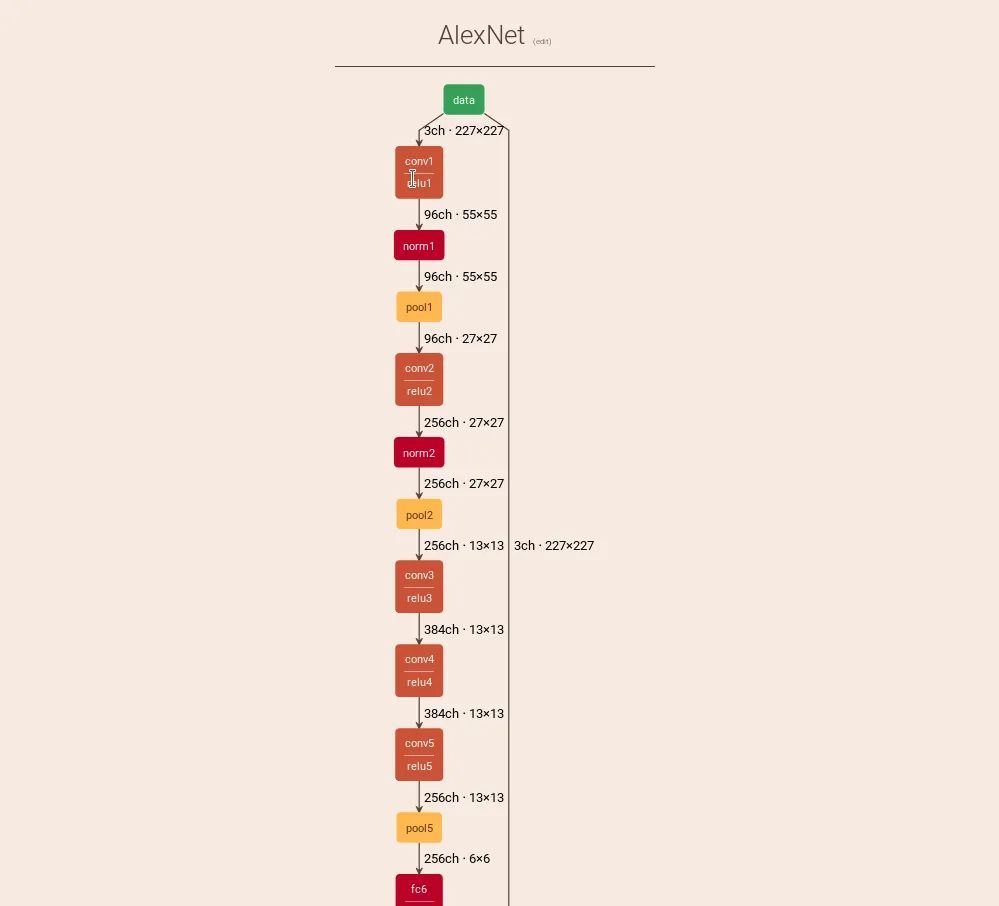
9. Netron
简介
ONNX: .onnx, .pb, .pbtxt文件Keras: .h5,.keras文件Core ML: .mlmodelCaffe: .caffemodel, .prototxtCaffe2: predict_net.pb, predict_net.pbtxtDarknet: .cfgMXNet: .model, -symbol.jsonncnn: .paramTensorFlow Lite: .tflite
TorchScript: .pt, .pthPyTorch: .pt, .pthTorch: .t7Arm NN: .armnnBarracuda: .nnBigDL .bigdl,.modelChainer : .npz,.h5CNTK : .model,.cntkDeeplearning4j: .zipMediaPipe: .pbtxthttp://ML.NET: .zipMNN: .mnnOpenVINO : .xmlPaddlePaddle : .zip,__model__scikit-learn : .pklTengine : .tmfileTensorFlow.js : model.json,.pbTensorFlow : .pb,.meta,.pbtxt,.ckpt,.index
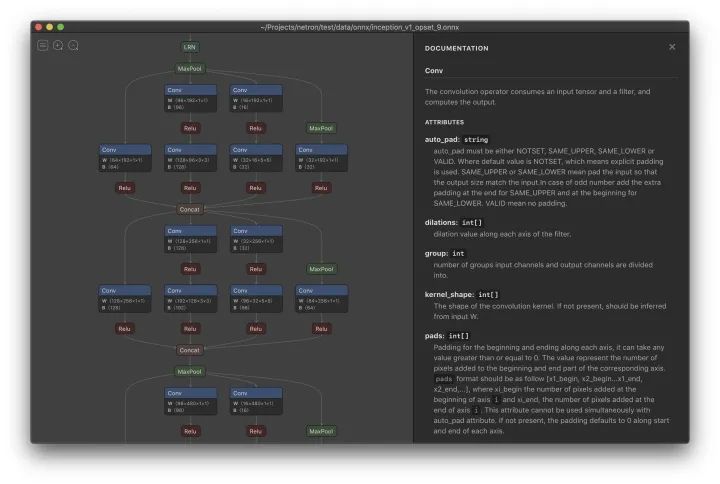
安装
下载 .dmg文件,地址:https://github.com/lutzroeder/netron/releases/latest运行命令 brew cask install netron
下载 .AppImage文件,下载地址:https://github.com/lutzroeder/netron/releases/latest运行命令 snap install netron
下载 .exe文件,下载地址:https://github.com/lutzroeder/netron/releases/latest运行命令 winget install netron
pip install netron,然后使用方法有两种:命令行,运行 netron [文件路径].py代码中加入
import netron;

netron.start('文件路径')
10. DotNet
Graphviz 生成神经网络的图片。主要参考了文章:https://tgmstat.wordpress.com/2013/06/12/draw-neural-network-diagrams-graphviz/python dotnets.py | dot -Tpng | open -f -a /Applications/Preview.app
python dotnets.py | dot -Tpdf > test.pdf
11. Graphviz
Graphviz 是一个开源的图可视化软件,它可以用抽象的图形和网络图来表示结构化信息。
12. Keras Visualization
keras.utils.vis_utils 提供的绘制 Keras 网络模型(使用的是 graphviz )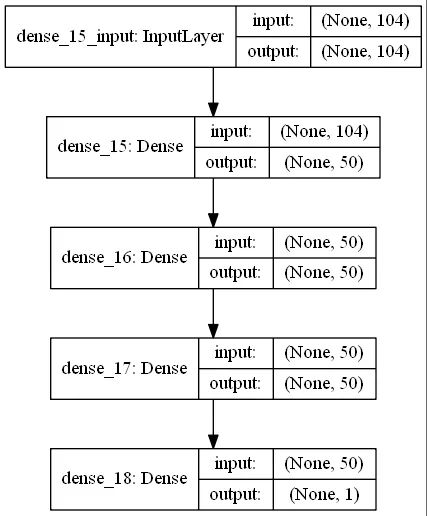
13. Conx
conx 可以通过函数net.picture() 来实现对带有激活函数网络的可视化,可以输出图片格式包括 SVG, PNG 或者是 PIL。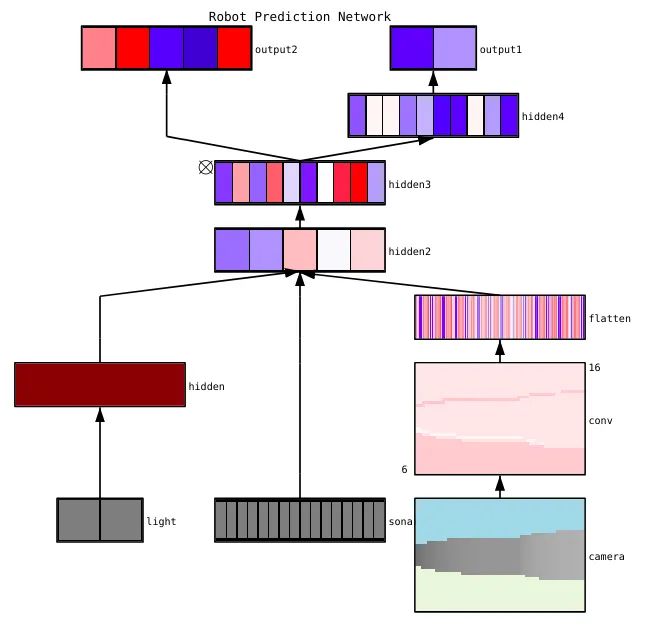
14. ENNUI
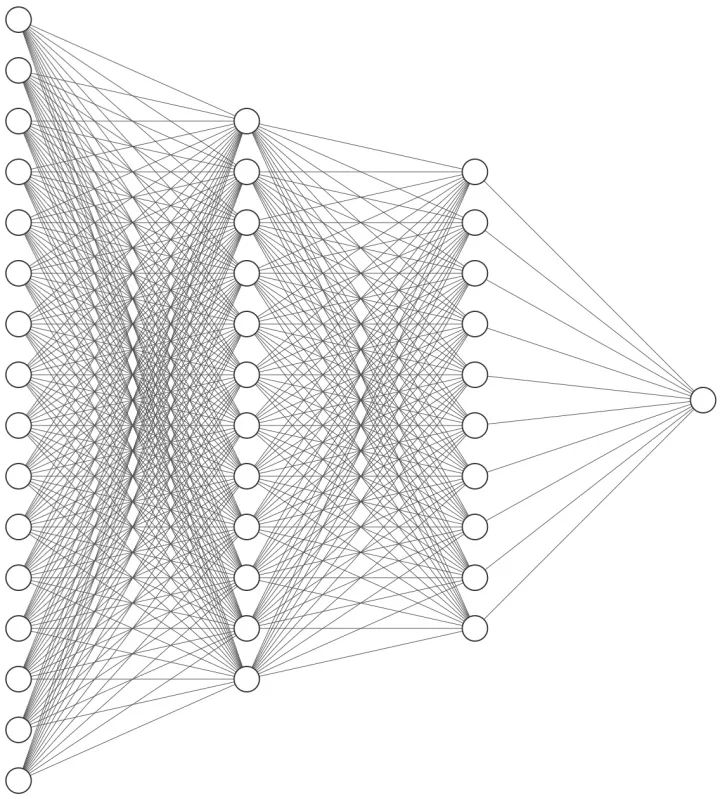
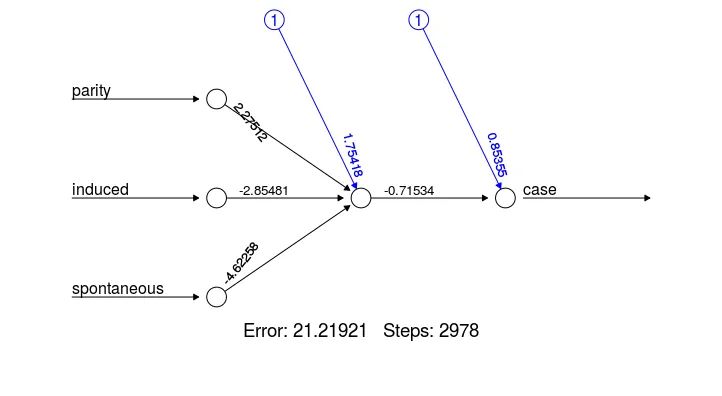
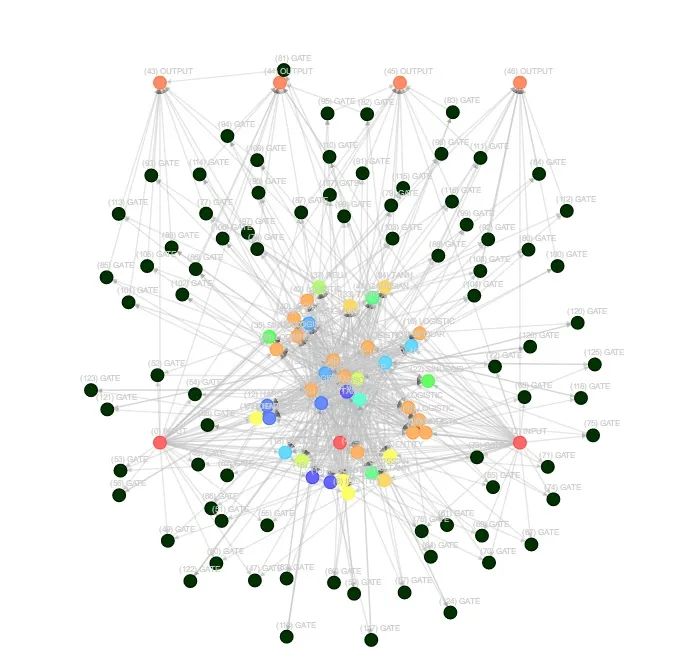
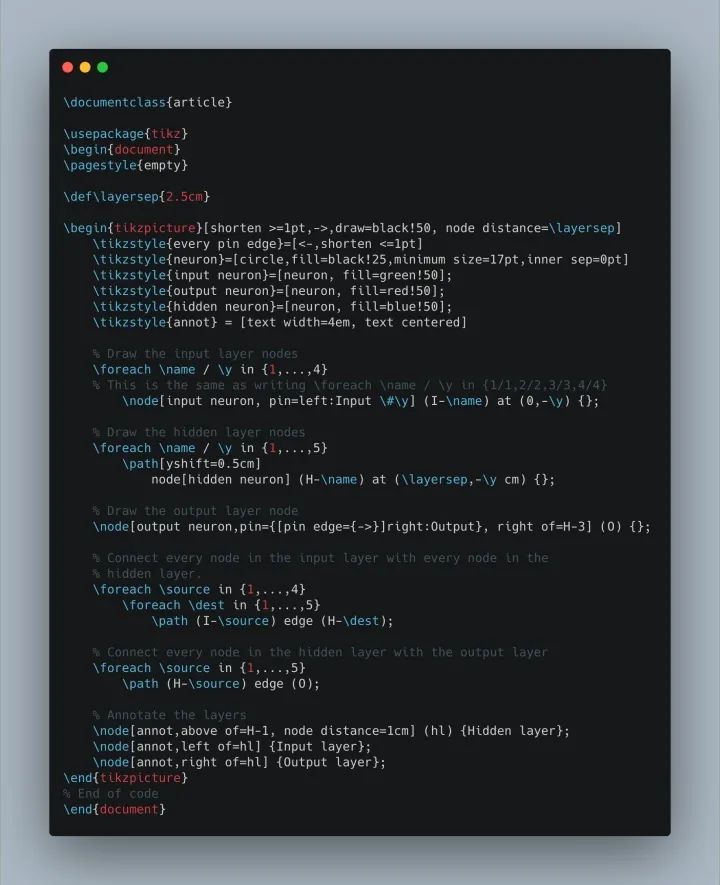
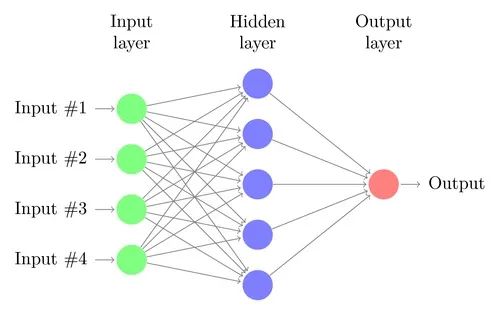
15. NNet
data(infert, package="datasets")plot(neuralnet(case~parity+induced+spontaneous, infert))
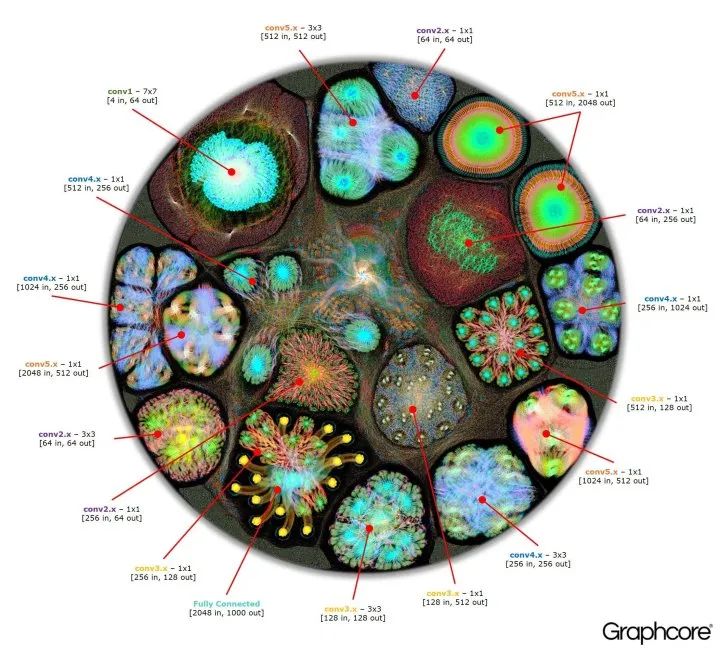
16. GraphCore

17. Neataptic
神经元和突触可以通过一行代码进行删除; 没有规定神经网络的结构必须包含哪些内容
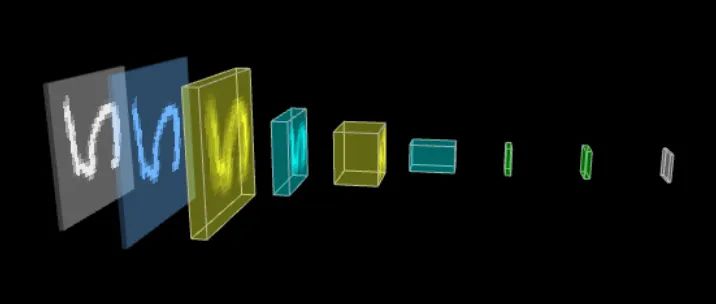
18. TensorSpace
19. Netscope CNN Analyzer
20. Monial
21. Texample
22. Quiver

安装方式
pippip install quiver_engine
pip install git+git://github.com/keplr-io/quiver.git
使用例子
model = Model(...)
quiver_engine.server.launch(model, classes=['cat','dog'], input_folder='./imgs')
from quiver_engine import server
server.launch(model)
localhost:5000
克隆这个 github 项目:
git clone https://github.com/viscom-ulm/Net2Vis
# 1.进入后端的文件夹内cd backend# 2. 安装依赖包pip3 install -r requirements.txt# 3. 安装 docker容器docker build --force-rm -t tf_plus_keras .# 4. 根据你的系统安装对应的 python 的 cairo 包,比如Debian 的 python-cairosvg# 5. 开启服务python server.py
# 1. 进入文件夹cd net2vis# 2. 安装 JavaScript 的依赖包npm install# 3. 开启应用npm start
https://datascience.stackexchange.com/questions/12851/how-do-you-visualize-neural-network-architectures https://datascience.stackexchange.com/questions/2670/visualizing-deep-neural-network-training
小结
推荐阅读

评论