
Tomcat源码学习第3篇 - Bootstrap的启动过程
上一篇我们看了Tomcat中各个组件的init过程,初始化赋值好了,那么接下来就该轮到start了,话不多说,马上进入主题~
1. Bootstrap.start()
通过start方法我们可以看到他是通过反射调用了 Catalina.start()方法,按F7跳到这个类里面看一下。
public void start() throws Exception {
    if (catalinaDaemon == null) {
        init();
    }
    // 通过反射调用 Catalina.start() 方法
    Method method = catalinaDaemon.getClass().getMethod("start", (Class [])null);
    method.invoke(catalinaDaemon, (Object [])null);
}

2. Catalina.start()
进来一看,又是熟悉的套娃风格,还得继续往里面跳转

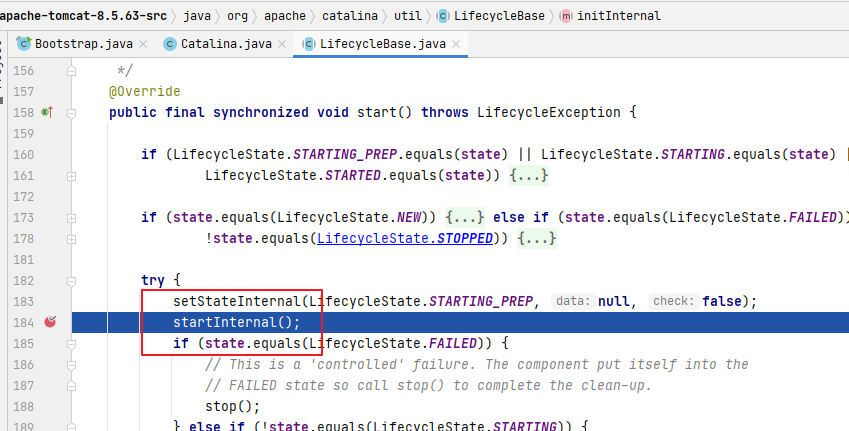
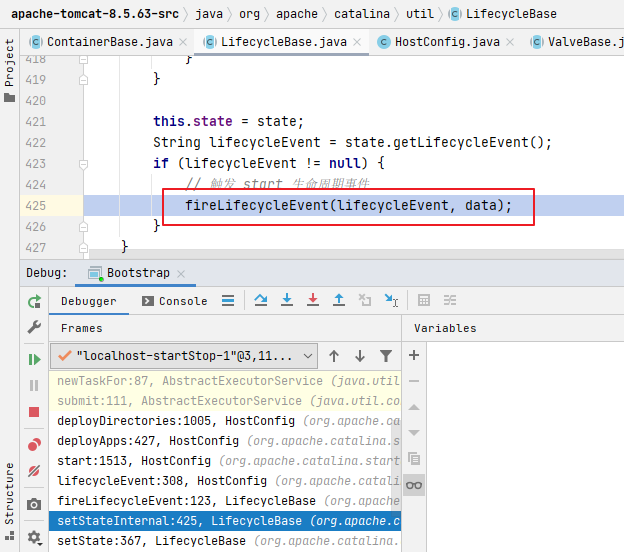
3. LifecycleBase.start()
还是这个熟悉的组件生命周期类,看到这里就仿佛看到了结局,肯定是跟initInternal这个方法一样一层层嵌套进去,让我们走起~
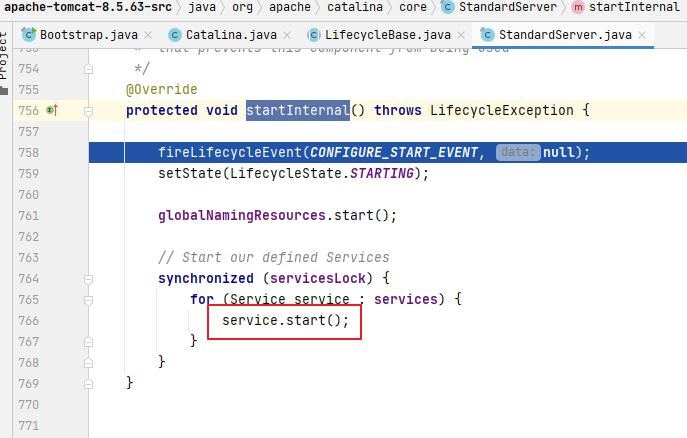
4. StandardServer.startInternal()
之前我们有说过在一个Tomcat中是可以有多个service的,所以这里需要遍历所有的service分别让各自启动起来
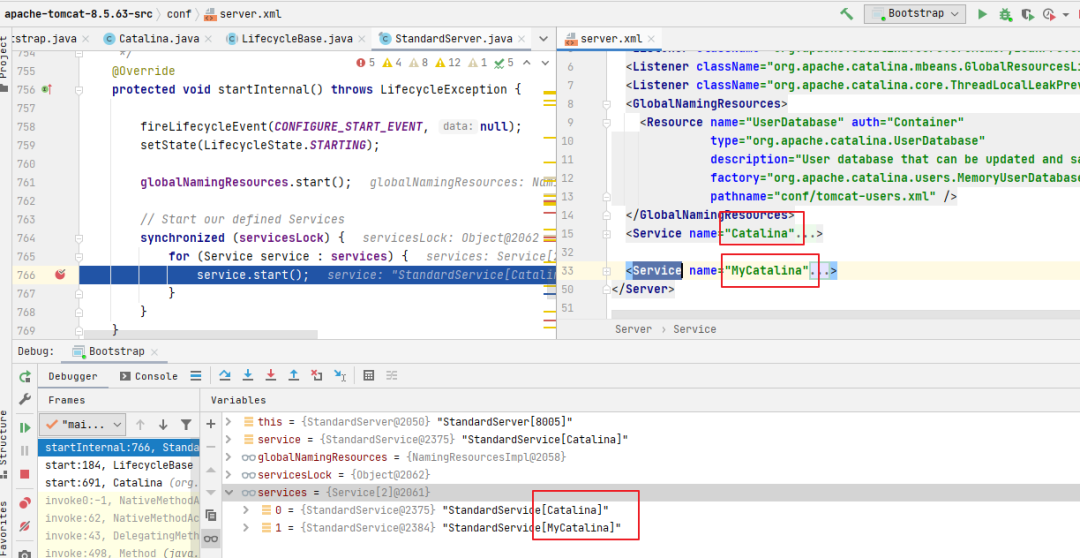
在server.xml文件中再给他配置一个<Service>标签即可,如图所示:
5. StandardService.startInternal()
开始进入正题了,在这个方法中我们可以看到它分别做了以下操作:
容器的启动: engine.start()连接器的启动: connector.start()
protected void startInternal() throws LifecycleException {
    if(log.isInfoEnabled())
        log.info(sm.getString("standardService.start.name", this.name));
    setState(LifecycleState.STARTING);

    // 这里首先启动我们定义的容器 engine
    if (engine != null) {
        synchronized (engine) {
            // 启动 engine 子容器
            engine.start();
        }
    }

    synchronized (executors) {
        for (Executor executor: executors) {
            executor.start();
        }
    }

    mapperListener.start();

    // Start our defined Connectors second
    synchronized (connectorsLock) {
        for (Connector connector: connectors) {
            try {
                // If it has already failed, don't try and start it
                if (connector.getState() != LifecycleState.FAILED) {
                    // 启动连接器
                    connector.start();
                }
            } catch (Exception e) {
                log.error(sm.getString(
                    "standardService.connector.startFailed",
                    connector), e);
            }
        }
    }
}
6. StandardEngine.startInternal()
这里直接调用的ContainerBase.startInternal方法实现下属组件的启动
protected synchronized void startInternal() throws LifecycleException {
    // Log our server identification information
    if(log.isInfoEnabled())
        log.info( "Starting Servlet Engine: " + ServerInfo.getServerInfo());
    // Standard container startup
    super.startInternal();
}
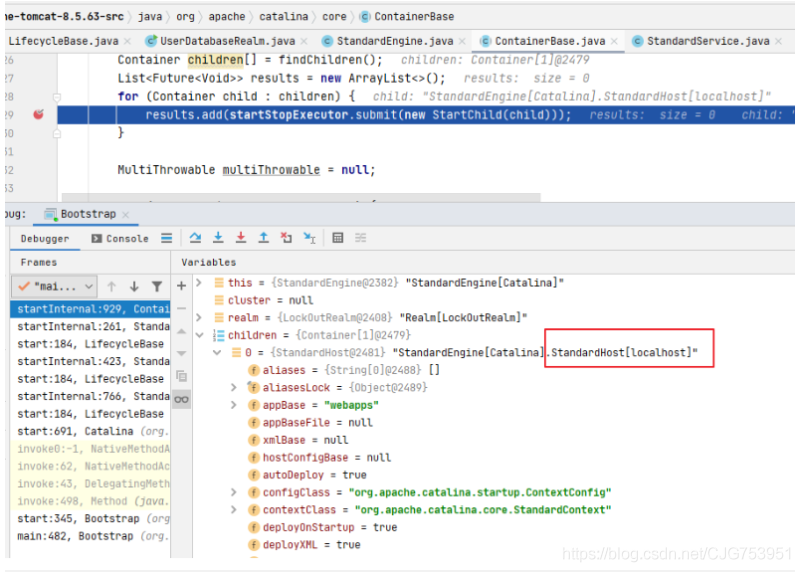
7. ContainerBase.startInternal()
这里使用的是线程池的方式,如果有多个Host,那么就可以多个线程并行实例化Host,加快Tomcat启动速度
protected synchronized void startInternal() throws LifecycleException {
    // 启动下属容器
    logger = null;
    getLogger();
    Cluster cluster = getClusterInternal();
    if (cluster instanceof Lifecycle) {
        ((Lifecycle) cluster).start();
    }
    Realm realm = getRealmInternal();
    if (realm instanceof Lifecycle) {
        ((Lifecycle) realm).start();
    }

    // 查找并启动子容器,Host 在初始化阶段后还是不完整的,需要继续封装,把容器关系维护完整
    Container children[] = findChildren();
    List<Future<Void>> results = new ArrayList<>();
    for (Container child : children) {
        results.add(startStopExecutor.submit(new StartChild(child)));
    }

    MultiThrowable multiThrowable = null;

    for (Future<Void> result : results) {
        try {
            result.get();
        } catch (Throwable e) {
            log.error(sm.getString("containerBase.threadedStartFailed"), e);
            if (multiThrowable == null) {
                multiThrowable = new MultiThrowable();
            }
            multiThrowable.add(e);
        }

    }
    if (multiThrowable != null) {
        throw new LifecycleException(sm.getString("containerBase.threadedStartFailed"),
                                     multiThrowable.getThrowable());
    }

    // Start the Valves in our pipeline (including the basic), if any
    if (pipeline instanceof Lifecycle) {
        ((Lifecycle) pipeline).start();
    }

    // 设置容器生命周期状态
    setState(LifecycleState.STARTING);

    // Start our thread
    threadStart();
}

8. StandardHost.startInternal()
protected synchronized void startInternal() throws LifecycleException {

    // Set error report valve
    String errorValve = getErrorReportValveClass();
    if ((errorValve != null) && (!errorValve.equals(""))) {
        try {
            boolean found = false;
            Valve[] valves = getPipeline().getValves();
            for (Valve valve : valves) {
                if (errorValve.equals(valve.getClass().getName())) {
                    found = true;
                    break;
                }
            }
            if(!found) {
                Valve valve =
                    (Valve) Class.forName(errorValve).getConstructor().newInstance();
                getPipeline().addValve(valve);
            }
        } catch (Throwable t) {
            ExceptionUtils.handleThrowable(t);
            log.error(sm.getString(
                    "standardHost.invalidErrorReportValveClass",
                    errorValve), t);
        }
    }
    super.startInternal();
}
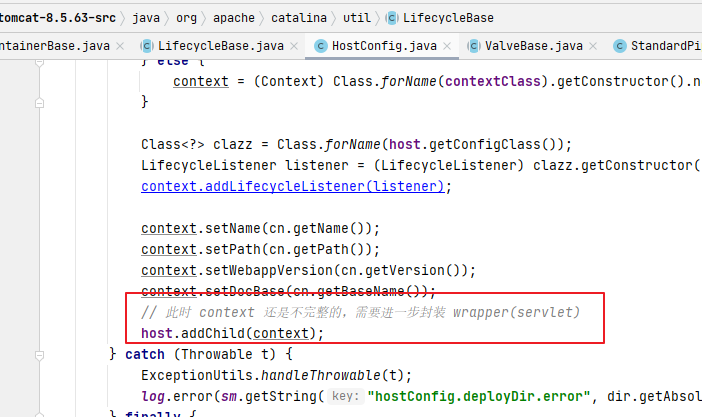
Host的实例化,是通过设置生命周期状态来进行促发生命周期事件fireLifecycleEvent来执行后续工作的。
deployApps:处理host下多个应用deployDirectories:处理host下面以目录方式部署的(results.add(),这里也是以多线程的方式并行执行的)host.addChild():这时才触发context实例核心内容context:具体读取web.xml封装wrapper过程使用事件驱动交给ContextConfig(它也是一个事件监听器)


9. MapperListener.startInternal()
public void startInternal() throws LifecycleException {

        setState(LifecycleState.STARTING);
  // 得到 engine 容器
        Engine engine = service.getContainer();
        if (engine == null) {
            return;
        }
  // 找到默认主机
        findDefaultHost();
  // 为当前容器以及子容器添加监听器
        addListeners(engine);
  // 注册engine下所有的host
        Container[] conHosts = engine.findChildren();
        for (Container conHost : conHosts) {
            Host host = (Host) conHost;
            if (!LifecycleState.NEW.equals(host.getState())) {
                // 注册上下文和包装器
                registerHost(host);
            }
        }
    }
10. Connector.startInternal()
截至到这里,容器的注册与启动已经完成了,接下来到连接器的启动了
protected void startInternal() throws LifecycleException {
    // Validate settings before starting
    if (getPort() < 0) {
        throw new LifecycleException(sm.getString(
            "coyoteConnector.invalidPort", Integer.valueOf(getPort())));
    }

    setState(LifecycleState.STARTING);

    try {
        protocolHandler.start();
    } catch (Exception e) {
        throw new LifecycleException(
            sm.getString("coyoteConnector.protocolHandlerStartFailed"), e);
    }
}
11. AbstractProtocol.start()
这里对 EndPoint进行初始化
public void start() throws Exception {
    if (getLog().isInfoEnabled()) {
        getLog().info(sm.getString("abstractProtocolHandler.start", getName()));
    }

    endpoint.start();

    // Start timeout thread
    asyncTimeout = new AsyncTimeout();
    Thread timeoutThread = new Thread(asyncTimeout, getNameInternal() + "-AsyncTimeout");
    int priority = endpoint.getThreadPriority();
    if (priority < Thread.MIN_PRIORITY || priority > Thread.MAX_PRIORITY) {
        priority = Thread.NORM_PRIORITY;
    }
    timeoutThread.setPriority(priority);
    timeoutThread.setDaemon(true);
    timeoutThread.start();
}

12. AbstractEndpoint.start()
public final void start() throws Exception {
    if (bindState == BindState.UNBOUND) {
        bind();
        bindState = BindState.BOUND_ON_START;
    }
    startInternal();
}
13. NioEndpoint.bind()
public void bind() throws Exception {
    if (!getUseInheritedChannel()) {
        // 获取 nio 通道 channel
        serverSock = ServerSocketChannel.open();
        socketProperties.setProperties(serverSock.socket());
        InetSocketAddress addr = (getAddress()!=null?new InetSocketAddress(getAddress(),getPort()):new InetSocketAddress(getPort()));
        // 绑定端口,但尚未使用 accept 获取客户端连接
        serverSock.socket().bind(addr,getAcceptCount());
    } else {
        // Retrieve the channel provided by the OS
        Channel ic = System.inheritedChannel();
        if (ic instanceof ServerSocketChannel) {
            serverSock = (ServerSocketChannel) ic;
        }
        if (serverSock == null) {
            throw new IllegalArgumentException(sm.getString("endpoint.init.bind.inherited"));
        }
    }
    serverSock.configureBlocking(true); //mimic APR behavior

    // Initialize thread count defaults for acceptor, poller
    if (acceptorThreadCount == 0) {
        // FIXME: Doesn't seem to work that well with multiple accept threads
        acceptorThreadCount = 1;
    }
    if (pollerThreadCount <= 0) {
        //minimum one poller thread
        pollerThreadCount = 1;
    }
    setStopLatch(new CountDownLatch(pollerThreadCount));

    // Initialize SSL if needed
    initialiseSsl();

    selectorPool.open();
}
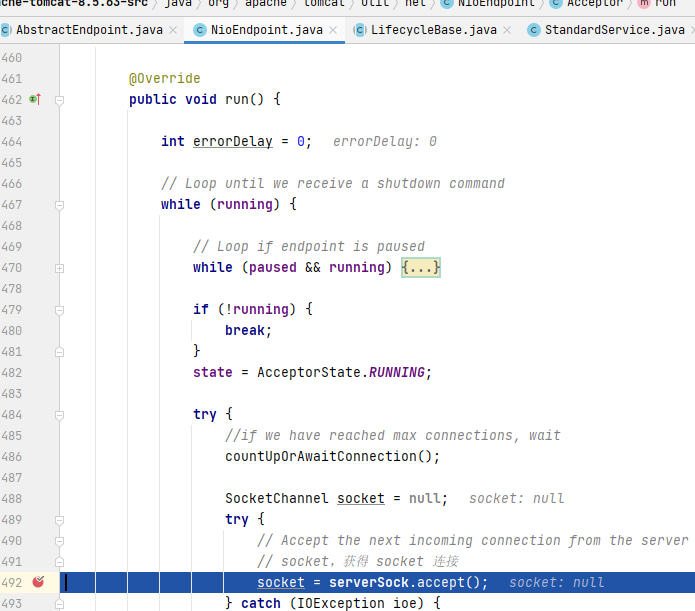
14. NioEndpoint.startInternal()
这里通过startAcceptorThreads启动Accepter线程,该线程用于接收新的Socket连接


总结

评论