如何在 Kubernetes 上调试 distroless 容器
本文主要包括如下内容:
•介绍 distroless 镜像、作用以及简单的使用•如何针对 distroless 容器的进行调试•临时容器(v.1.18+)的使用
Distroless 镜像
Distroless 容器,顾名思义使用 Distroless 镜像[1]作为基础镜像运行的容器。
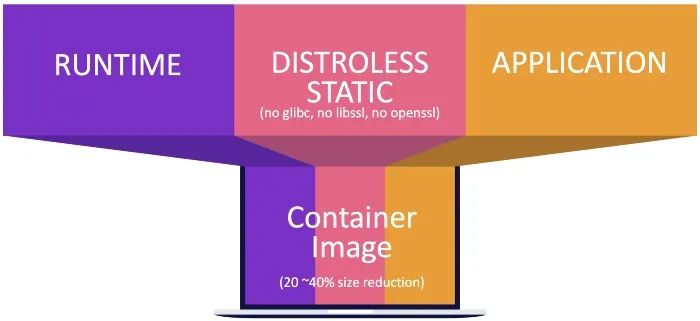
"Distroless" 镜像只包含了你的应用程序以及其运行时所需要的依赖。不包含你能在标准 Linxu 发行版里的可以找到的包管理器、shells 或者其他程序。
GoogleContainerTools/distroless[2] 针对不同语言提供了 distroless 镜像:
•gcr.io/distroless/static-debian11[3]•gcr.io/distroless/base-debian11[4]•gcr.io/distroless/java-debian11[5]•gcr.io/distroless/cc-debian11[6]•gcr.io/distroless/nodejs-debian11[7]•gcr.io/distroless/python3-debian11[8]
Distroless 镜像有什么用?
那些可能是构建镜像时需要的,但大部分并不是运行时需要的。这也是为什么上篇文章介绍 Buildpacks 时说的一个 builder 的 stack 镜像包含构建时基础镜像和运行时基础镜像,这样可以做到镜像的最小化。
其实控制体积并不是 distroless 镜像的主要作用。将运行时容器中的内容限制为应用程序所需的依赖,此外不应该安装任何东西。这种方式可能极大的提升容器的安全性,也是 distroless 镜像的最重要作用。

这里并不会再深入探究 distroless 镜像,而是如何调试 distroless 容器
没有了包管理器,镜像构建完成后就不能再使用类似 apt、yum 的包管理工具;没有了 shell,容器运行后无法再进入容器。
“就像一个没有任何门的房间,也无法安装门。” Distroless 镜像在提升容器安全性的同时,也为调试增加了难度。
使用 distroless 镜像
写个很简单的 golang 应用:
package mainimport("fmt""net/http")func defaultHandler(w http.ResponseWriter, r *http.Request){fmt.Fprintf(w,"Hello world!")}func main(){http.HandleFunc("/", defaultHandler)http.ListenAndServe(":8080",nil)}
比如使用 gcr.io/distroless/base-debian11 作为 golang 应用的基础镜像:
FROM golang:1.12as build-envWORKDIR /go/src/appCOPY ./go/src/appRUN go get-d -v ./...RUN go build -o /go/bin/appFROM gcr.io/distroless/base-debian11COPY --from=build-env /go/bin/app /CMD ["/app"]
使用镜像创建 deployment
$ kubectl create deploy golang-distroless --image addozhang/golang-distroless-example:latest$ kubectl get poNAME READY STATUS RESTARTS AGEgolang-distroless-784bb4875-srmmr 1/1Running03m2s
尝试进入容器:
$ kubectl exec-it golang-distroless-784bb4875-srmmr -- sherror:Internal error occurred: error executing command in container: failed to execin container: failed to start exec"b76e800eafa85d39f909f39fcee4a4ba9fc2f37d5f674aa6620690b8e2939203": OCI runtime exec failed:exec failed: container_linux.go:380: starting container process caused:exec:"sh": executable file not found in $PATH: unknown
如何调试 Distroless 容器
1. 使用 distroless debug 镜像
GoogleContainerTools 为每个 distroless 镜像都提供了 debug tag,适合在开发阶段进行调试。如何使用?替换容器的 base 镜像:
FROM golang:1.12as build-envWORKDIR /go/src/appCOPY ./go/src/appRUN go get-d -v ./...RUN go build -o /go/bin/appFROM gcr.io/distroless/base-debian11:debug # use debug tag hereCOPY --from=build-env /go/bin/app /CMD ["/app"]
重新构建镜像并部署,得益于debug镜像中提供了 busybox shell 让我们可以 exec 到容器中。
2. debug 容器与共享进程命名空间
同一个 pod 中可以运行多个容器,通过设置 pod.spec.shareProcessNamespace 为 true,来让同一个 Pod 中的多容器共享同一个进程命名空间[9]。
Share a single process namespace between all of the containers in a pod. When this is set containers will be able to view and signal processes from other containers in the same pod, and the first process in each container will not be assigned PID 1. HostPID and ShareProcessNamespace cannot both be set. Optional: Default to false.
添加一个使用 ubuntu 镜像的 debug 容器,这里为了测试(后面解释)我们为原容器添加 securityContext.runAsUser: 1000,模拟两个容器使用不同的 UID 运行:
apiVersion: apps/v1kind:Deploymentmetadata:creationTimestamp:nulllabels:app: golang-distrolessname: golang-distrolessspec:replicas:1selector:matchLabels:app: golang-distrolessstrategy:{}template:metadata:creationTimestamp:nulllabels:app: golang-distrolessspec:shareProcessNamespace:truecontainers:- image: addozhang/golang-distroless-example:latestname: golang-distroless-examplesecurityContext:runAsUser:1000resources:{}- image: ubuntuname: debugargs:['sleep','1d']securityContext:capabilities:add:- SYS_PTRACEresources:{}status:{}
更新 deployment 之后:
$ kubectl get poNAME READY STATUS RESTARTS AGEgolang-distroless-85c4896c45-rkjwn 2/2Running03m12s$ kubectl get po -o json | jq -r '.items[].spec.containers[].name'golang-distroless-exampledebug
然后通过 debug 容器来进入到 pod 中:
$ kubectl exec-it golang-distroless-85c4896c45-rkjwn -c debug -- sh然后在容器中执行:
$ ps -efUID PID PPID C STIME TTY TIME CMDroot 10014:54?00:00:00/pause # infra 容器100070014:54?00:00:00/app # 原容器,UID 为 1000root 190014:55?00:00:00 sleep 1d# debug 容器root 250014:55 pts/000:00:00 shroot 3225014:55 pts/000:00:00 ps -ef
尝试访问 进程 7 的进程空间:
$ cat /proc/7/environ$ cat:/proc/7/environ:Permission denied
我们需要为 debug 容器加上:
securityContext:capabilities:add:- SYS_PTRACE
之后再访问就正常了:
$ cat /proc/7/environPATH=/usr/local/sbin:/usr/local/bin:/usr/sbin:/usr/bin:/sbin:/binHOSTNAME=golang-distroless-58b6c5f455-v9zkvSSL_CERT_FILE=/etc/ssl/certs/ca-certificates.crtKUBERNETES_PORT_443_TCP=tcp://10.43.0.1:443KUBERNETES_PORT_443_TCP_PROTO=tcpKUBERNETES_PORT_443_TCP_PORT=443KUBERNETES_PORT_443_TCP_ADDR=10.43.0.1KUBERNETES_SERVICE_HOST=10.43.0.1KUBERNETES_SERVICE_PORT=443KUBERNETES_SERVICE_PORT_HTTPS=443KUBERNETES_PORT=tcp://10.43.0.1:443HOME=/root
同样我们也可以访问进程的文件系统:
$ cd /proc/7/root$ lsapp bin boot dev etc home lib lib64 proc root run sbin sys tmp usr var
无需修改容器的基础镜像,使用 pod.spec.shareProcessNamespace: true 配合安全配置中增加 SYS_PTRACE 特性,为 debug 容器赋予完整的 shell 访问来调试应用。但是修改 YAML 和安全配置只适合在测试环境使用,到了生产环境这些都是不允许的。
我们就需要用到 kubectl debug 了。
3. Kubectl debug
针对不同的资源 kubectl debug 可以进行不同操作:
•负载:创建一个正在运行的 Pod 的拷贝,并可以修改部分属性。比如在拷贝中使用新版本的tag。•负载:为运行中的 Pod 增加一个临时容器(下面介绍),使用临时容器中的工具调试,无需重启 Pod。•节点:在节点上创建一个 Pod 运行在节点的 host 命名空间,可以访问节点的文件系统。
3.1 临时容器
从 Kubernetes 1.18 之后开始,可以使用 kubectl 为运行的 pod 添加一个临时容器。这个命令还处于 alpha 阶段,因此需要在“feature gate”[10]中打开。
在使用 k3d 创建 k3s 集群时,打开 EphemeralContainers feature:
$ k3d cluster create test --k3s-arg "--kube-apiserver-arg=feature-gates=EphemeralContainers=true"@然后创建临时容器,创建完成后会直接进入容器:
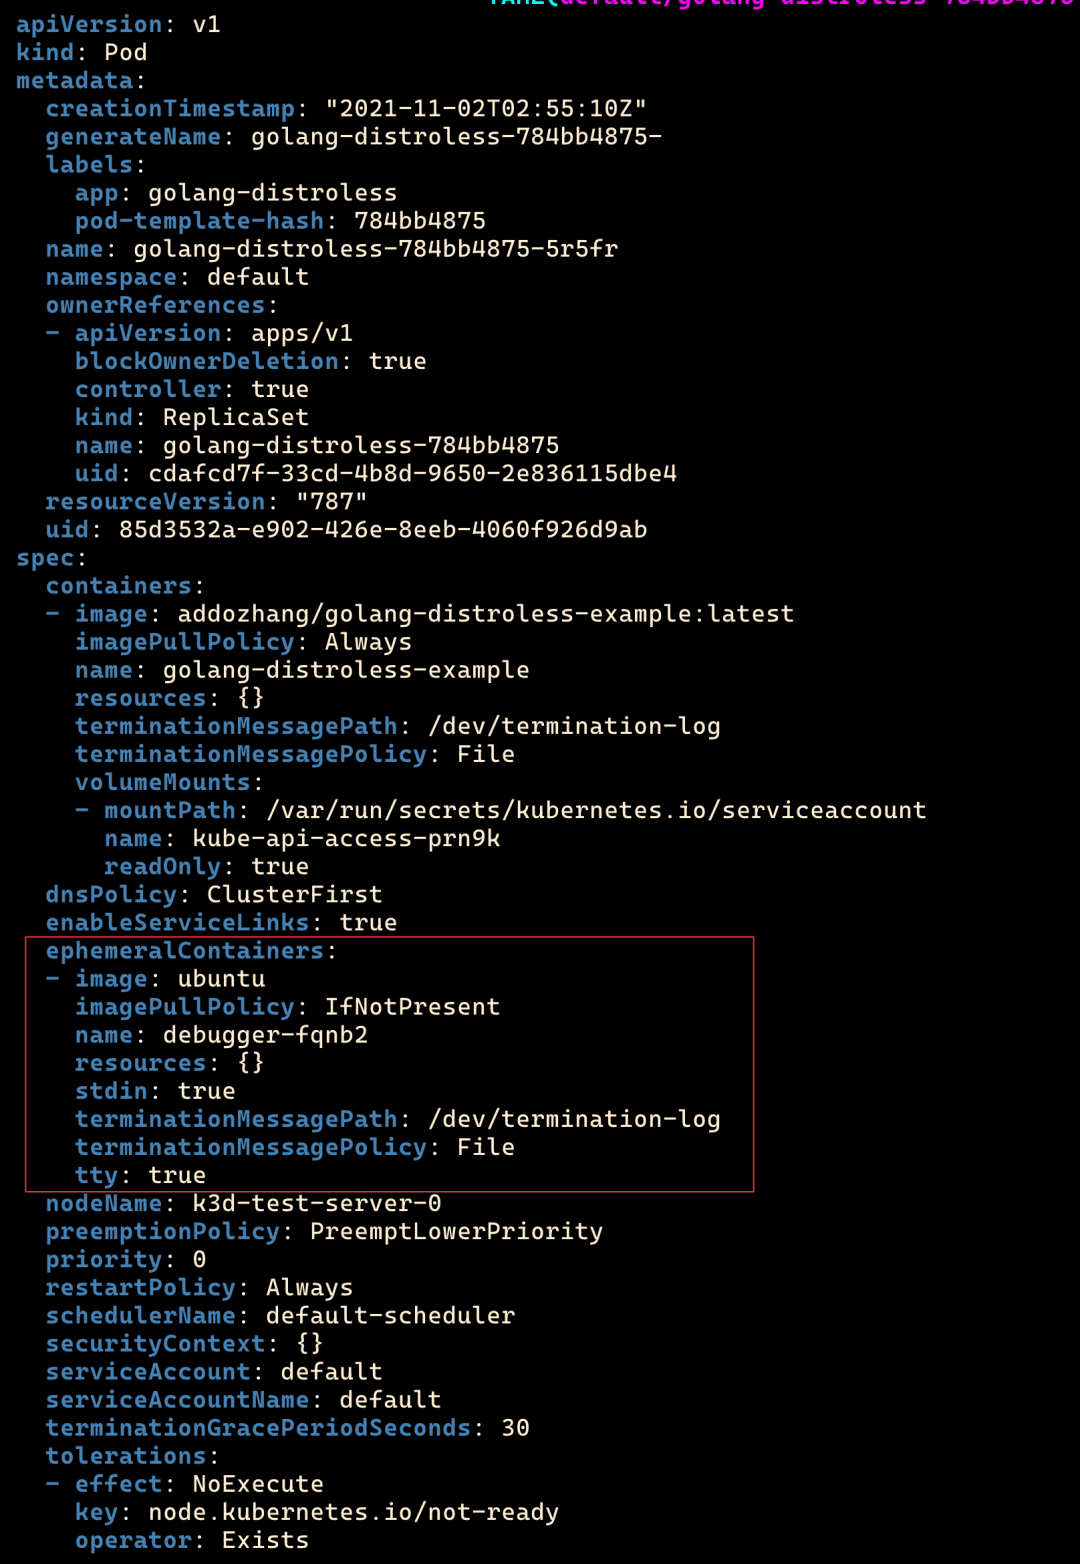
$ kubectl debug golang-distroless-85c4896c45-rkjwn -it --image=ubuntu --image-pull-policy=IfNotPresent#临时容器 shell$ apt update && apt install -y curl$ curl localhost:8080Hello world!
 临时容器
临时容器值得注意的是,临时容器无法与原容器共享进程命名空间:
$ ps -efUID PID PPID C STIME TTY TIME CMDroot 10002:59 pts/000:00:00 bashroot 30421003:02 pts/000:00:00 ps -ef
可以通过添加参数 --target=[container] 来将临时容器挂接到目标容器。这里与 pod.spec.shareProcessNamespace 并不同,进程号为 1 的进程是目标容器的进程,而后者的进程是 infra 容器的进程 /pause:
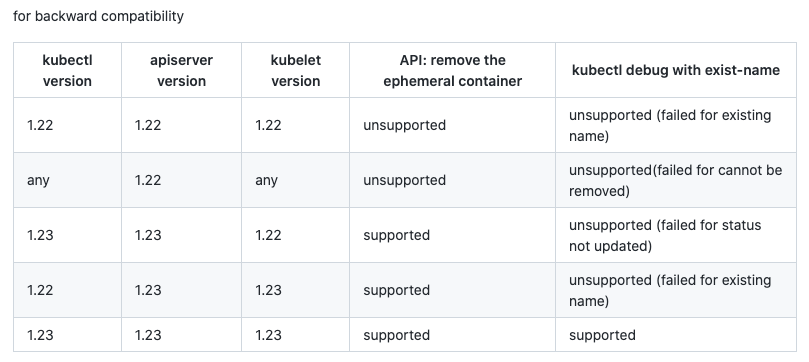
$ kubectl debug golang-distroless-85c4896c45-rkjwn -it --image=ubuntu --image-pull-policy=IfNotPresent--target=golang-distroless-example注意:目前的版本还不支持删除临时容器,参考 issue[11],支持的版本:

3.2 拷贝 Pod 并添加容器
除了添加临时容器以外,另一种方式就是创建一个 Pod 的拷贝,并添加一个容器。注意这里的是普通容器,不是临时容器。 注意这里加上了 --share-processes
$ kubectl debug golang-distroless-85c4896c45-rkjwn -it --image=ubuntu --image-pull-policy=IfNotPresent--share-processes --copy-to=golang-distroless-debug注意这里加上了 --share-processes,会自动加上 pod.spec.shareProcessNamespace=true:
$ kubectl get po golang-distroless-debug -o jsonpath='{.spec.shareProcessNamespace}'true
注意:使用 kubectl debug 调试,并不能为 pod 自动加上 SYS_PTRACE 安全特性,这就意味着如果容器使用的 UID 不一致,就无法访问进程空间。 截止发文,计划在 1.23 中支持[12]。
总结
目前上面所有的都不适合在生产环境使用,无法在不修改 Pod 定义的情况下进行调试。
期望 Kubernetes 1.23 版本之后 debug 功能添加 SYS_PTRACE 的支持。到时候,再尝试一下。
引用链接
[1] Distroless 镜像: https://github.com/GoogleContainerTools/distroless[2] GoogleContainerTools/distroless: https://github.com/GoogleContainerTools/distroless[3] gcr.io/distroless/static-debian11: https://github.com/GoogleContainerTools/distroless/blob/main/base/README.md[4] gcr.io/distroless/base-debian11: https://github.com/GoogleContainerTools/distroless/blob/main/base/README.md[5] gcr.io/distroless/java-debian11: https://github.com/GoogleContainerTools/distroless/blob/main/java/README.md[6] gcr.io/distroless/cc-debian11: https://github.com/GoogleContainerTools/distroless/blob/main/cc/README.md[7] gcr.io/distroless/nodejs-debian11: https://github.com/GoogleContainerTools/distroless/blob/main/nodejs/README.md[8] gcr.io/distroless/python3-debian11: https://github.com/GoogleContainerTools/distroless/blob/main/experimental/python3/README.md[9] 多容器共享同一个进程命名空间: https://kubernetes.io/docs/tasks/configure-pod-container/share-process-namespace/[10] “feature gate”: k3d%20cluster%20create%20test%20--k3s-arg%20%22--kube-apiserver-arg=feature-gates=EphemeralContainers=true%22@[11] issue: https://github.com/kubernetes/kubernetes/issues/84764#issuecomment-872839644[12] 计划在 1.23 中支持: https://github.com/kubernetes/kubernetes/issues/97103#issuecomment-899382147

喜欢明哥文章的同学欢迎长按下图订阅!
⬇⬇⬇
