
SpringBoot + kaptcha 生成验证码
点击上方蓝色字体,选择“标星公众号”
优质文章,第一时间送达
验证码生成使用的是 Google 的 kaptcha 框架,固定的代码,只需要自己配置一些参数即可,下面的代码是主要的代码,像项目的前端代码、验证生成的验证码之类的代码没有给出,所以需要一定的springboot基础
pom
需要引入 kaptcha 的 Maven 依赖
 com.github.penggle
 kaptcha
 2.3.2
KaptchaConfig
即 kaptcha 的配置文件
import java.util.Properties;

import org.springframework.context.annotation.Bean;
import org.springframework.stereotype.Component;

import com.google.code.kaptcha.impl.DefaultKaptcha;
import com.google.code.kaptcha.util.Config;

@Component
public class KaptchaConfig {
 @Bean
 public DefaultKaptcha getDefaultKaptcha() {
  com.google.code.kaptcha.impl.DefaultKaptcha defaultKaptcha = new com.google.code.kaptcha.impl.DefaultKaptcha();
  Properties properties = new Properties();
  // 图片边框
  properties.setProperty("kaptcha.border", "no");
  // 边框颜色
  properties.setProperty("kaptcha.border.color", "105,179,90");
  // 字体颜色
  properties.setProperty("kaptcha.textproducer.font.color", "black");
  // 图片宽
  properties.setProperty("kaptcha.image.width", "120");
  // 图片高
  properties.setProperty("kaptcha.image.height", "50");
  // 字体大小
  properties.setProperty("kaptcha.textproducer.font.size", "30");
  // session key
  properties.setProperty("kaptcha.session.key", "code");
  // 验证码长度
  properties.setProperty("kaptcha.textproducer.char.length", "5");
  // 字体
//  properties.setProperty("kaptcha.textproducer.font.names", "宋体,楷体,微软雅黑");
  Config config = new Config(properties);
  defaultKaptcha.setConfig(config);

  return defaultKaptcha;
 }
}
KaptchaController
验证码控制层
package com.cun.controller;

import java.awt.image.BufferedImage;
import java.io.ByteArrayOutputStream;

import javax.imageio.ImageIO;
import javax.servlet.ServletOutputStream;
import javax.servlet.http.HttpServletRequest;
import javax.servlet.http.HttpServletResponse;

import org.springframework.beans.factory.annotation.Autowired;
import org.springframework.stereotype.Controller;
import org.springframework.web.bind.annotation.RequestMapping;
import org.springframework.web.servlet.ModelAndView;

import com.google.code.kaptcha.impl.DefaultKaptcha;

@Controller
public class KaptchaController {

 //验证码工具
 @Autowired
 DefaultKaptcha defaultKaptcha;

 /**
  * 2、生成验证码
  * @param httpServletRequest
  * @param httpServletResponse
  * @throws Exception
  */
 @RequestMapping("/defaultKaptcha")
 public void defaultKaptcha(HttpServletRequest httpServletRequest, HttpServletResponse httpServletResponse)
   throws Exception {
  byte[] captchaChallengeAsJpeg = null;
  ByteArrayOutputStream jpegOutputStream = new ByteArrayOutputStream();
  try {
   // 生产验证码字符串并保存到session中
   String createText = defaultKaptcha.createText();
   httpServletRequest.getSession().setAttribute("rightCode", createText);
   // 使用生产的验证码字符串返回一个BufferedImage对象并转为byte写入到byte数组中
   BufferedImage challenge = defaultKaptcha.createImage(createText);
   ImageIO.write(challenge, "jpg", jpegOutputStream);
  } catch (IllegalArgumentException e) {
   httpServletResponse.sendError(HttpServletResponse.SC_NOT_FOUND);
   return;
  }

  // 定义response输出类型为image/jpeg类型,使用response输出流输出图片的byte数组
  captchaChallengeAsJpeg = jpegOutputStream.toByteArray();
  httpServletResponse.setHeader("Cache-Control", "no-store");
  httpServletResponse.setHeader("Pragma", "no-cache");
  httpServletResponse.setDateHeader("Expires", 0);
  httpServletResponse.setContentType("image/jpeg");
  ServletOutputStream responseOutputStream = httpServletResponse.getOutputStream();
  responseOutputStream.write(captchaChallengeAsJpeg);
  responseOutputStream.flush();
  responseOutputStream.close();
 }
效果
访问localhost:8080//defaultKaptcha(不同的端口不同访问链接)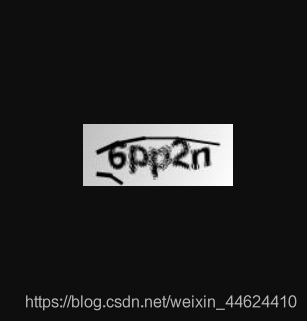
版权声明:本文为博主原创文章,遵循 CC 4.0 BY-SA 版权协议,转载请附上原文出处链接和本声明。
本文链接:
https://blog.csdn.net/weixin_44624410/article/details/110728397
粉丝福利:Java从入门到入土学习路线图
???

?长按上方微信二维码 2 秒
感谢点赞支持下哈 
评论