只需4步,自己搞个 Spring Boot Starter !
共 5442字,需浏览 11分钟
·
2020-08-09 08:48
阅读本文大概需要 4 分钟。
引言
第一步 创建maven项目
<project xmlns="http://maven.apache.org/POM/4.0.0"
         xmlns:xsi="http://www.w3.org/2001/XMLSchema-instance"
         xsi:schemaLocation="http://maven.apache.org/POM/4.0.0 http://maven.apache.org/xsd/maven-4.0.0.xsd">
    <modelVersion>4.0.0modelVersion>

    <groupId>org.examplegroupId>
    <artifactId>aspectlog-spring-boot-starterartifactId>
    <version>1.0.2version>
    <parent>
        <groupId>org.springframework.bootgroupId>
        <artifactId>spring-boot-starter-parentartifactId>
        <version>2.1.15.RELEASEversion>
    parent>

    <dependencies>
        <dependency>
            <groupId>org.springframework.bootgroupId>
            <artifactId>spring-boot-autoconfigureartifactId>
        dependency>
        <dependency>
            <groupId>org.springframework.bootgroupId>
            <artifactId>spring-boot-starter-aopartifactId>
        dependency>
        <dependency>
            <groupId>org.springframework.bootgroupId>
            <artifactId>spring-boot-configuration-processorartifactId>
            <optional>trueoptional>
        dependency>
    dependencies>

project>
true
第二步写自动配置逻辑

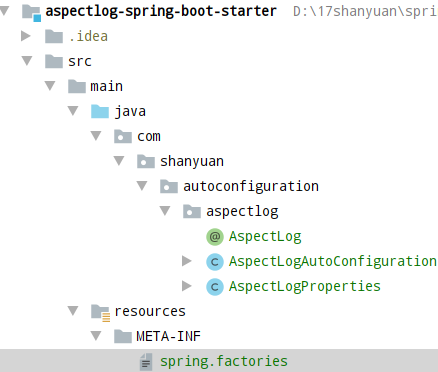
2.1.定义AspectLog注解,该注解用于标注需要打印执行时间的方法。
package com.shanyuan.autoconfiguration.aspectlog;
import java.lang.annotation.ElementType;
import java.lang.annotation.Retention;
import java.lang.annotation.RetentionPolicy;
import java.lang.annotation.Target;
/**
 * class_name: ScheduleManage
 * describe:   用于控制定时任务的开启与关闭
 * 对应切面
 * creat_user: wenl
 * creat_time:  2018/11/10 18:45
 **/
@Target(ElementType.METHOD)
@Retention(RetentionPolicy.RUNTIME)
public @interface   AspectLog {
}
2.2定义配置文件对应类
package com.shanyuan.autoconfiguration.aspectlog;
import org.springframework.boot.context.properties.ConfigurationProperties;

@ConfigurationProperties("aspectLog")
public class AspectLogProperties {
    private boolean enable;
    public boolean isEnable() {
        return enable;
    }
    public void setEnable(boolean enable) {
        this.enable = enable;
    }
}
2.3定义自动配置类
package com.shanyuan.autoconfiguration.aspectlog;

import org.aspectj.lang.ProceedingJoinPoint;
import org.aspectj.lang.annotation.Around;
import org.aspectj.lang.annotation.Aspect;
import org.slf4j.Logger;
import org.slf4j.LoggerFactory;
import org.springframework.boot.autoconfigure.condition.*;
import org.springframework.context.annotation.Configuration;
import org.springframework.context.annotation.EnableAspectJAutoProxy;
import org.springframework.core.PriorityOrdered;

@Aspect
@EnableAspectJAutoProxy(exposeProxy = true, proxyTargetClass = true)
@Configuration
@ConditionalOnProperty(prefix = "aspectLog", name = "enable",
                     havingValue = "true", matchIfMissing = true)
public class AspectLogAutoConfiguration implements PriorityOrdered {

    protected Logger logger = LoggerFactory.getLogger(getClass());

@Around("@annotation(com.shanyuan.autoconfiguration.aspectlog.AspectLog) ")
    public Object isOpen(ProceedingJoinPoint thisJoinPoint)
                                        throws Throwable {
        //执行方法名称
        String taskName = thisJoinPoint.getSignature()
            .toString().substring(
                thisJoinPoint.getSignature()
                    .toString().indexOf(" "),
                    thisJoinPoint.getSignature().toString().indexOf("("));
        taskName = taskName.trim();
        long time = System.currentTimeMillis();
        Object result = thisJoinPoint.proceed();
        logger.info("method:{} run :{} ms", taskName,
                            (System.currentTimeMillis() - time));
        return result;
    }
    @Override
    public int getOrder() {
        //保证事务等切面先执行
        return Integer.MAX_VALUE;
    }
}
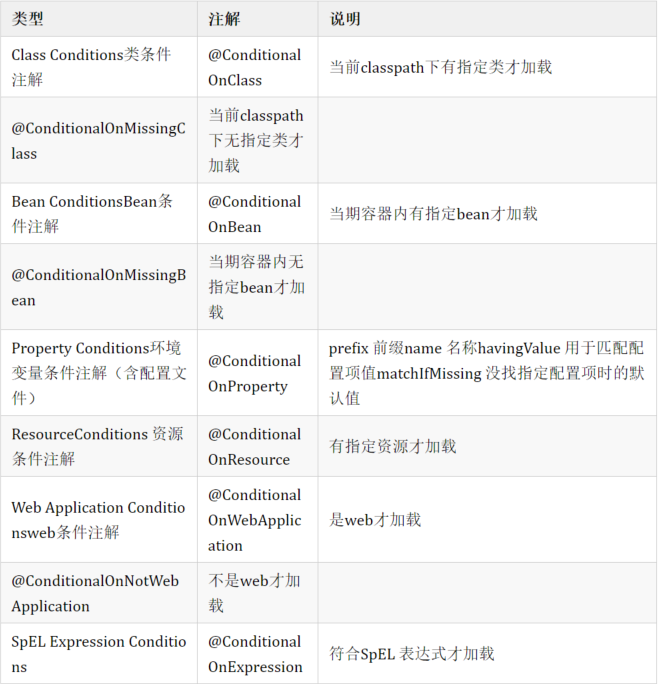
@ConditionalOnProperty(prefix = "aspectLog", name = "enable",havingValue = "true", matchIfMissing = true)
aspectLog.enable=true时开启,如果配置文件没有设置aspectLog.enable也开启。第三步META-INF/spring.factories
META-INF/spring.factories是spring的工厂机制,在这个文件中定义的类,都会被自动加载。多个配置使用逗号分割,换行用\@Enable驱动原理(设置连接)@EnableAutoConfiguration处理逻辑(设置连接)org.springframework.boot.autoconfigure.EnableAutoConfiguration=\
com.shanyuan.autoconfiguration.aspectlog.AspectLogAutoConfiguration
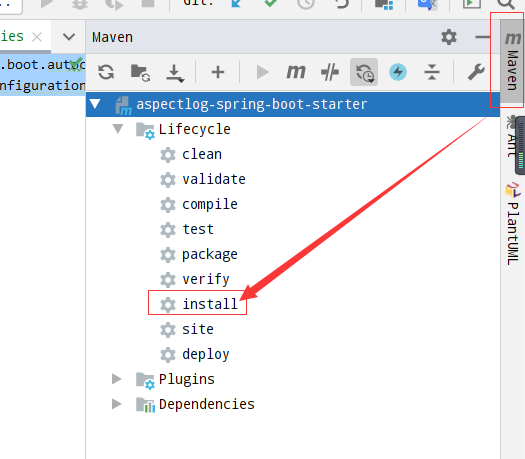
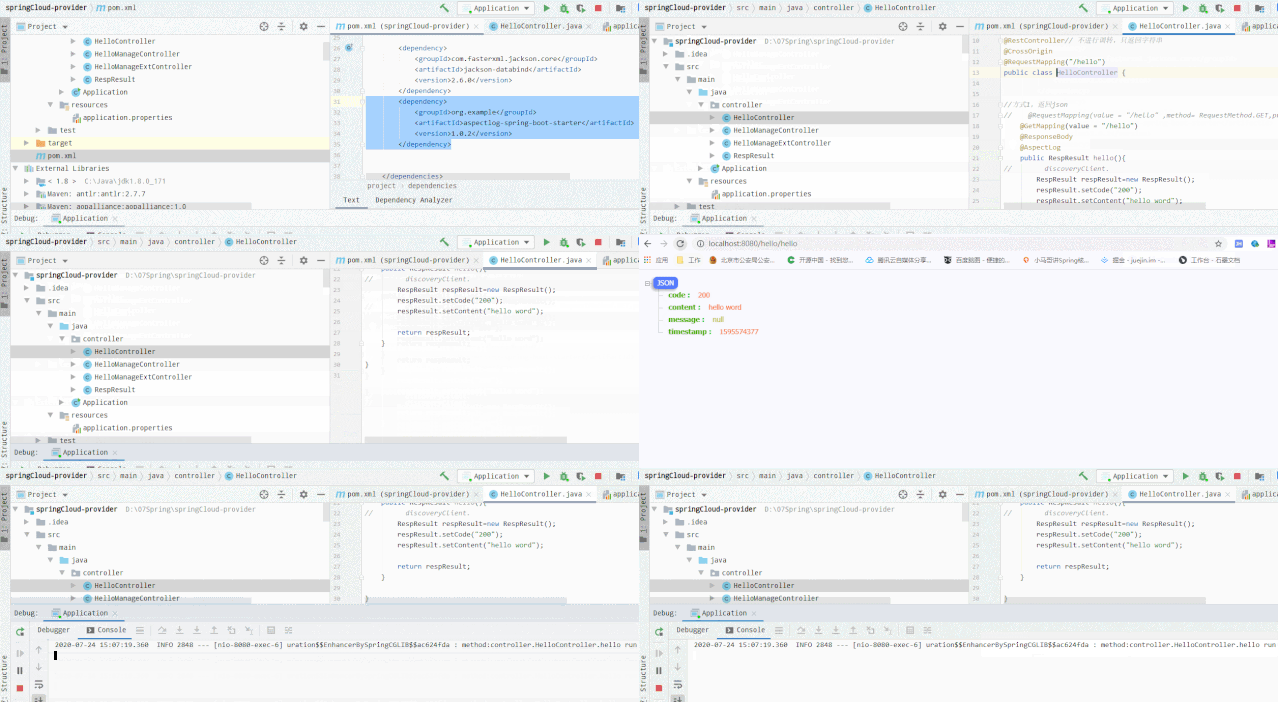
第四步打包测试


https://docs.spring.io/spring-boot/docs/2.1.15.RELEASE/reference/html/boot-features-developing-auto-configuration.html#boot-features-custom-starter
推荐阅读:
项目实践:Spring Boot 三招组合拳,手把手教你打出优雅的后端接口
微信扫描二维码,关注我的公众号
朕已阅 

