Jenkins流水线发布实现CICD到Kubernetes
第一步 本地安装好Kubernetes

第二步— Install Jenkins
a) Install Java
sudo apt update
sudo apt install openjdk-8-jdk
b) Add Jenkins Repository & append package repository address to the server’s source.list
wget -q -O - https://pkg.jenkins.io/debian/jenkins.io.key | sudo apt-key add -sudo sh -c 'echo deb http://pkg.jenkins.io/debian-stable binary/ > /etc/apt/sources.list.d/jenkins.list'
c) Install Jenkins
sudo apt update
sudo apt install jenkins
d) check Jenkins status
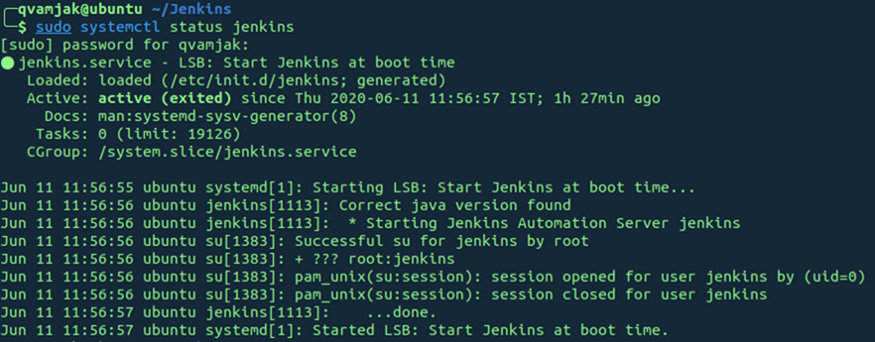
e) Configure Jenkins with necessary credentials and login to Jenkins
f) Add Jenkins to the docker group “sudo usermod -aG docker jenkins”
g) Install the following plugins for Jenkins
Docker Pipeline
Kubernetes
Kubernetes Continuous Deploy
h) The final step is to use ngrok to expose localhost Jenkins URL as public URL.
Download ngrok and execute it as shown in the image, http://a0ecbd0426f6.ngrok.io/ is the new URL to login to Jenkins and accessible over the internet.
使用ngrok 内网穿透实现本地jenkins互联网能够访问到

第三步: 配置Jenkins Configure Jenkins
a) 选择 流水线项目Select Demo1 as New Pipeline Project

b) 填入 the GitHub link的仓库地址
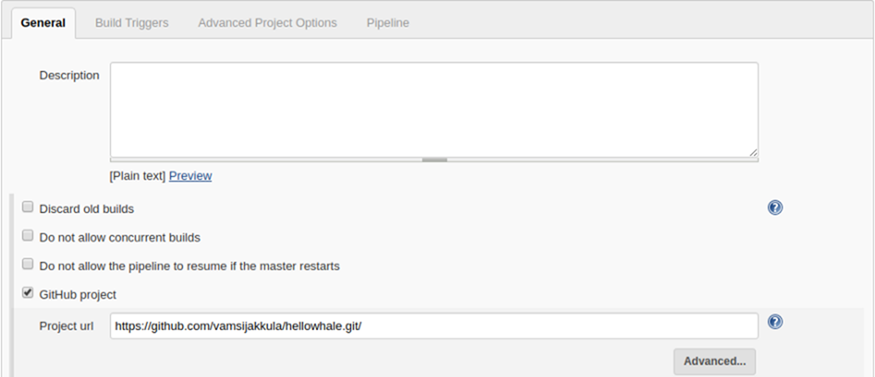
c) Mention the build trigger配置构建触发器
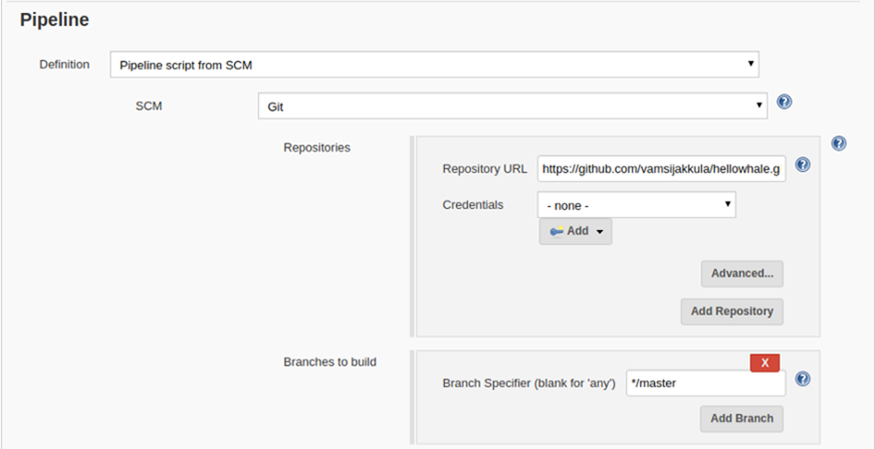
d) 在流水线中配置GIT地址 In the Pipeline mention the git links and the branch it has to operate upon
e) 配置dockerhub密钥 Configure docker hub credentials
![]()
f) Update Jenkinsfile -Its a declarative pipeline which is used as a code. It helps the pipeline code easier to read and write. This code is written in a Jenkinsfile.
当代码提交到github时,Jenkins会收到一个webhook已配置于Github, 整个阶段流程如下:
In this implementation, the moment code is checked-in, Jenkins will have a notification through a webhook configured in Github. it follows the following stages below
i) Check out the source
ii)Build the new image
iii) Push it to the new repository
iv) Deploy the app on Kube
pipeline {agent anystages {stage('Checkout Source') {steps {git url:'https://github.com/vamsijakkula/hellowhale.git', branch:'master'}}stage("Build image") {steps {script {myapp = docker.build("vamsijakkula/hellowhale:${env.BUILD_ID}")}}}stage("Push image") {steps {script {docker.withRegistry('https://registry.hub.docker.com', 'dockerhub') {myapp.push("latest")myapp.push("${env.BUILD_ID}")}}}}stage('Deploy App') {steps {script {kubernetesDeploy(configs: "hellowhale.yml", kubeconfigId: "mykubeconfig")}}}}}
g) Have the configuration of mykubeconfig in Jenkins defined
![]()
h) Also have the connection between Jenkins and Kubernetes in place
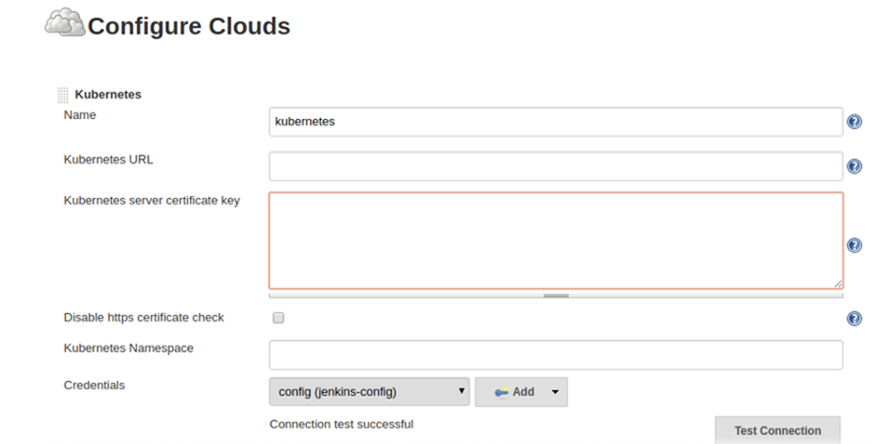
i) Mention the Jenkins URL
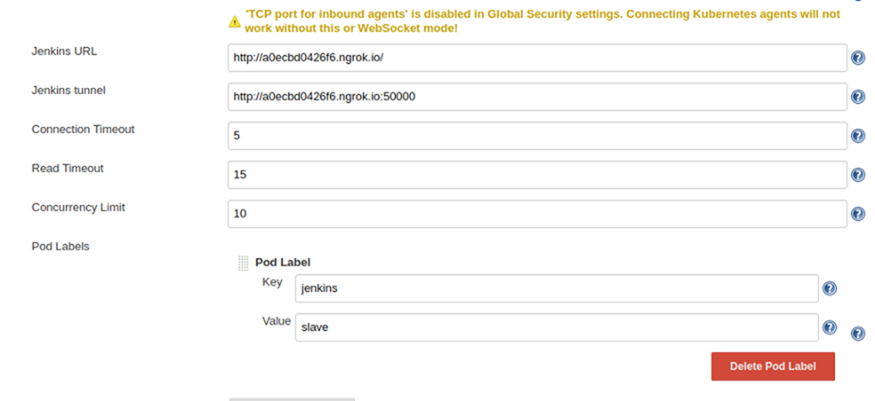
j)Update the pod template.
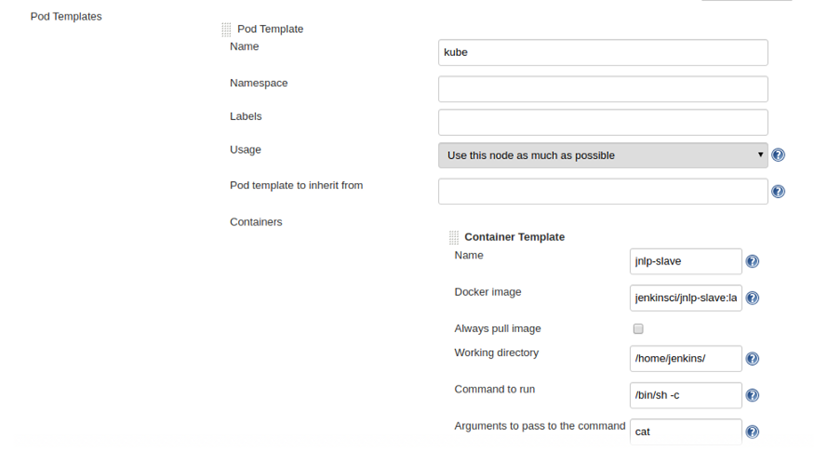
k) Configure the webhook in Github
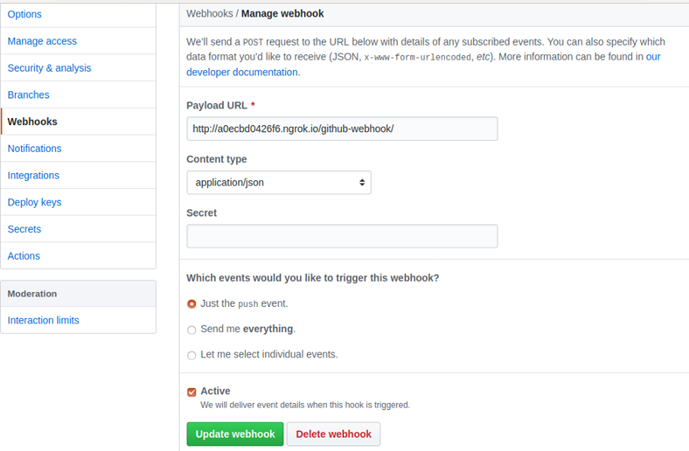
第4步 — Develop application deployment manifest. In this tutorial, we are deploying a simple hellowhale app exposed as NodePort.
---apiVersion: apps/v1kind: Deploymentmetadata:name: hello-blue-whalespec:replicas: 3selector:matchLabels:app: hello-whale-appversion: bluetemplate:metadata:name: hello-blue-whale-podlabels:app: hello-whale-appversion: bluespec:containers:- name: hello-whale-containerimage: vamsijakkula/hellowhale:latestimagePullPolicy: Alwaysports:- containerPort: 80---apiVersion: v1kind: Servicemetadata:name: hello-whale-svclabels:app: hello-whale-appspec:selector:app: hello-whale-appversion: bluetype: NodePortports:- nodePort: 31113port: 80targetPort: 80
第5步: Check-in the application manifest in GitHub and we can see the deployment starting in Jenkins

第6步 Once the deployment is completed, we can see the following pods(3) are in place and exposed as NodePort(31113)

Access the deployment on NodePort.
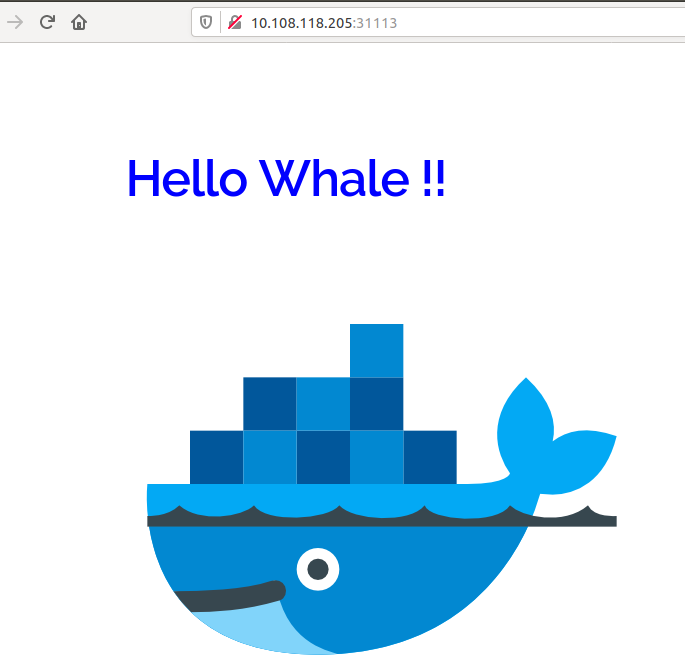
第7步: 通过deployment调整实例从3个到5个,如下在kube可以看到。Update the deployment by changing the replica’s from 3 to 5 and we can see 5 pods are deployed on Kube.

GIT示例仓库 https://github.com/vamsijakkula/hellowhale
总结
此示例以本地环境部署Kubernetes的2个简单结点,内网穿透暴露于互联网, 基于nginx的前端程序构建docker,通过jenkins的pipeline流水线发布到Kubernetes.
实现CI CD过程,示例代码于公网。对云原生技术CI CD是关键的DevOps基础过程,需要今天广大开发工程师了解。

腾讯、阿里、滴滴后台面试题汇总总结 — (含答案)
面试:史上最全多线程面试题 !
最新阿里内推Java后端面试题
JVM难学?那是因为你没认真看完这篇文章

关注作者微信公众号 —《JAVA烂猪皮》
了解更多java后端架构知识以及最新面试宝典


看完本文记得给作者点赞+在看哦~~~大家的支持,是作者源源不断出文的动力
作者:PetterLiu
出处:https://www.cnblogs.com/wintersun/p/13905167.html
