省时省力!这大概是用Python写GUI最快的方式了!
↑ 关注 + 星标 ,每天学Python新技能
后台回复【大礼包】送你Python自学大礼包
文 | 闲欢 来源:Python 技术「ID: pythonall」
大家好,我是龙哥!
PySimpleGUI 是 python GUI 框架中的佼佼者,适用于快速生成简洁大方的 GUI。使用它来写 GUI 已经比较快了,那么还有没有更快的方法吗?
答案是肯定的,本文就为你揭晓!
GUI 实例
PySimpleGUI 在GitHub上的地址是:
https://github.com/PySimpleGUI/PySimpleGUI
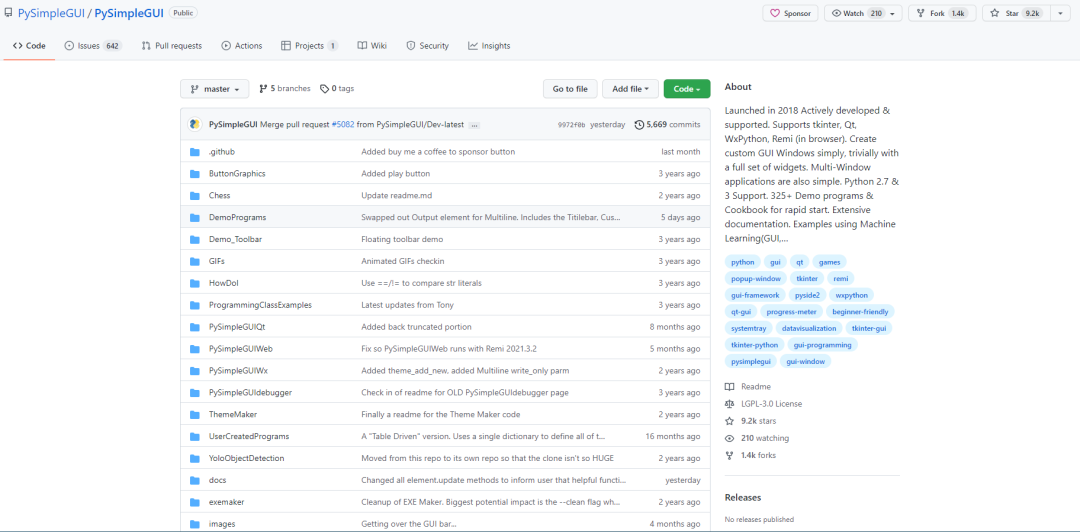
大家可以访问看看,其首页是这样的:

有很多内容是不是?
这里面有一个重要的内容,在 DemoPrograms 文件夹下,这个文件夹是作者写的一些
demo 实例。作者真的是深谙我们这些懒虫的心理,即使有了这么简单好用的 GUI 框架,到了要写实例的时候,我们也可能会去网络上搜索实例,然后采用 CV大法。框架作者可能料想到这一点,所以他自己写了很多不同的实例,让你真正的拿来即用。
这个文件夹下大概有300多个实例,基本上可以囊括我们平时使用 python 写 GUI 所能遇到的各种组件和布局了。
CV 几个看看
有了这个神器,我们只需要把这个 GitHub 上的项目给复制到本地,然后将这些实例运行一遍,大致知道每个实例u哪些内容。后续当我们自己要写 GUI 时,我们只需要找到对应的实例,然后复制代码就可以了。是不是很简单?
下面我来运行几个 demo ,给大家展示一下这里面的实例都是什么样子的。
聊天界面
我们先复制一下源码:
#!/usr/bin/env python
import PySimpleGUI as sg

'''
A chatbot with history
Scroll up and down through prior commands using the arrow keys
Special keyboard keys:
    Up arrow - scroll up in commands
    Down arrow - scroll down in commands
    Escape - clear current command
    Control C - exit form
'''


def ChatBotWithHistory():
    # -------  Make a new Window  ------- #
    # give our form a spiffy set of colors
    sg.theme('GreenTan')

    layout = [[sg.Text('Your output will go here', size=(40, 1))],
              [sg.Output(size=(127, 30), font=('Helvetica 10'))],
              [sg.Text('Command History'),
               sg.Text('', size=(20, 3), key='history')],
              [sg.ML(size=(85, 5), enter_submits=True, key='query', do_not_clear=False),
               sg.Button('SEND', button_color=(sg.YELLOWS[0], sg.BLUES[0]), bind_return_key=True),
               sg.Button('EXIT', button_color=(sg.YELLOWS[0], sg.GREENS[0]))]]

    window = sg.Window('Chat window with history', layout,
                       default_element_size=(30, 2),
                       font=('Helvetica', ' 13'),
                       default_button_element_size=(8, 2),
                       return_keyboard_events=True)

    # ---===--- Loop taking in user input and using it  --- #
    command_history = []
    history_offset = 0

    while True:
        event, value = window.read()

        if event == 'SEND':
            query = value['query'].rstrip()
            # EXECUTE YOUR COMMAND HERE
            print('The command you entered was {}'.format(query))
            command_history.append(query)
            history_offset = len(command_history)-1
            # manually clear input because keyboard events blocks clear
            window['query'].update('')
            window['history'].update('\n'.join(command_history[-3:]))

        elif event in (sg.WIN_CLOSED, 'EXIT'):            # quit if exit event or X
            break

        elif 'Up' in event and len(command_history):
            command = command_history[history_offset]
            # decrement is not zero
            history_offset -= 1 * (history_offset > 0)
            window['query'].update(command)

        elif 'Down' in event and len(command_history):
            # increment up to end of list
            history_offset += 1 * (history_offset < len(command_history)-1)
            command = command_history[history_offset]
            window['query'].update(command)

        elif 'Escape' in event:
            window['query'].update('')


ChatBotWithHistory()
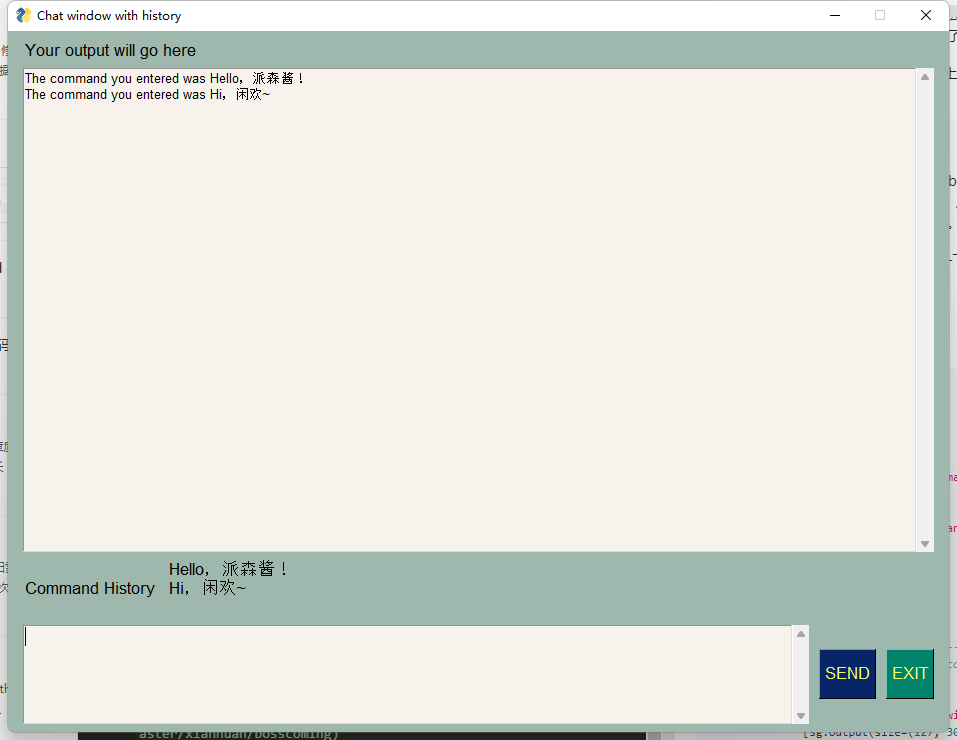
运行一下,看看效果:

这是一个带历史记录的聊天软件,如果你需要做一个类似的软件的话,可以直接复制代码,然后稍微改动一下。
组件大全
我们再来看一个例子:
#!/usr/bin/env python
"""
    Example of (almost) all Elements, that you can use in PySimpleGUI.
    Shows you the basics including:
        Naming convention for keys
        Menubar format
        Right click menu format
        Table format
        Running an async event loop
        Theming your application (requires a window restart)
        Displays the values dictionary entry for each element
        And more!

    Copyright 2021 PySimpleGUI
"""

import PySimpleGUI as sg

def make_window(theme):
    sg.theme(theme)
    menu_def = [['&Application', ['E&xit']],
                ['&Help', ['&About']] ]
    right_click_menu_def = [[], ['Nothing','More Nothing','Exit']]

    # Table Data
    data = [["John", 10], ["Jen", 5]]
    headings = ["Name", "Score"]

    input_layout =  [[sg.Menu(menu_def, key='-MENU-')],
                [sg.Text('Anything that requires user-input is in this tab!')],
                [sg.Input(key='-INPUT-')],
                [sg.Slider(orientation='h', key='-SKIDER-'),
                 sg.Image(data=sg.DEFAULT_BASE64_LOADING_GIF, enable_events=True, key='-GIF-IMAGE-'),],
                [sg.Checkbox('Checkbox', default=True, k='-CB-')],
                [sg.Radio('Radio1', "RadioDemo", default=True, size=(10,1), k='-R1-'), sg.Radio('Radio2', "RadioDemo", default=True, size=(10,1), k='-R2-')],
                [sg.Combo(values=('Combo 1', 'Combo 2', 'Combo 3'), default_value='Combo 1', readonly=True, k='-COMBO-'),
                 sg.OptionMenu(values=('Option 1', 'Option 2', 'Option 3'),  k='-OPTION MENU-'),],
                [sg.Spin([i for i in range(1,11)], initial_value=10, k='-SPIN-'), sg.Text('Spin')],
                [sg.Multiline('Demo of a Multi-Line Text Element!\nLine 2\nLine 3\nLine 4\nLine 5\nLine 6\nLine 7\nYou get the point.', size=(45,5), k='-MLINE-')],
                [sg.Button('Button'), sg.Button('Popup'), sg.Button(image_data=sg.DEFAULT_BASE64_ICON, key='-LOGO-')]]

    asthetic_layout = [[sg.T('Anything that you would use for asthetics is in this tab!')],
               [sg.Image(data=sg.DEFAULT_BASE64_ICON,  k='-IMAGE-')],
               [sg.ProgressBar(1000, orientation='h', size=(20, 20), key='-PROGRESS BAR-'), sg.Button('Test Progress bar')]]

    logging_layout = [[sg.Text("Anything printed will display here!")], [sg.Output(size=(60,15), font='Courier 8')]]

    graphing_layout = [[sg.Text("Anything you would use to graph will display here!")],
                      [sg.Graph((200,200), (0,0),(200,200),background_color="black", key='-GRAPH-', enable_events=True)],
                      [sg.T('Click anywhere on graph to draw a circle')],
                      [sg.Table(values=data, headings=headings, max_col_width=25,
                                background_color='black',
                                auto_size_columns=True,
                                display_row_numbers=True,
                                justification='right',
                                num_rows=2,
                                alternating_row_color='black',
                                key='-TABLE-',
                                row_height=25)]]

    specalty_layout = [[sg.Text("Any \"special\" elements will display here!")],
                      [sg.Button("Open Folder")],
                      [sg.Button("Open File")]]

    theme_layout = [[sg.Text("See how elements look under different themes by choosing a different theme here!")],
                    [sg.Listbox(values = sg.theme_list(),
                      size =(20, 12),
                      key ='-THEME LISTBOX-',
                      enable_events = True)],
                      [sg.Button("Set Theme")]]

    layout = [[sg.Text('Demo Of (Almost) All Elements', size=(38, 1), justification='center', font=("Helvetica", 16), relief=sg.RELIEF_RIDGE, k='-TEXT HEADING-', enable_events=True)]]
    layout +=[[sg.TabGroup([[  sg.Tab('Input Elements', input_layout),
                               sg.Tab('Asthetic Elements', asthetic_layout),
                               sg.Tab('Graphing', graphing_layout),
                               sg.Tab('Specialty', specalty_layout),
                               sg.Tab('Theming', theme_layout),
                               sg.Tab('Output', logging_layout)]], key='-TAB GROUP-')]]

    return sg.Window('All Elements Demo', layout, right_click_menu=right_click_menu_def)


def main():
    window = make_window(sg.theme())

    # This is an Event Loop
    while True:
        event, values = window.read(timeout=100)
        # keep an animation running so show things are happening
        window['-GIF-IMAGE-'].update_animation(sg.DEFAULT_BASE64_LOADING_GIF, time_between_frames=100)
        if event not in (sg.TIMEOUT_EVENT, sg.WIN_CLOSED):
            print('============ Event = ', event, ' ==============')
            print('-------- Values Dictionary (key=value) --------')
            for key in values:
                print(key, ' = ',values[key])
        if event in (None, 'Exit'):
            print("[LOG] Clicked Exit!")
            break
        elif event == 'About':
            print("[LOG] Clicked About!")
            sg.popup('PySimpleGUI Demo All Elements',
                     'Right click anywhere to see right click menu',
                     'Visit each of the tabs to see available elements',
                     'Output of event and values can be see in Output tab',
                     'The event and values dictionary is printed after every event')
        elif event == 'Popup':
            print("[LOG] Clicked Popup Button!")
            sg.popup("You pressed a button!")
            print("[LOG] Dismissing Popup!")
        elif event == 'Test Progress bar':
            print("[LOG] Clicked Test Progress Bar!")
            progress_bar = window['-PROGRESS BAR-']
            for i in range(1000):
                print("[LOG] Updating progress bar by 1 step ("+str(i)+")")
                progress_bar.UpdateBar(i + 1)
            print("[LOG] Progress bar complete!")
        elif event == "-GRAPH-":
            graph = window['-GRAPH-']       # type: sg.Graph
            graph.draw_circle(values['-GRAPH-'], fill_color='yellow', radius=20)
            print("[LOG] Circle drawn at: " + str(values['-GRAPH-']))
        elif event == "Open Folder":
            print("[LOG] Clicked Open Folder!")
            folder_or_file = sg.popup_get_folder('Choose your folder')
            sg.popup("You chose: " + str(folder_or_file))
            print("[LOG] User chose folder: " + str(folder_or_file))
        elif event == "Open File":
            print("[LOG] Clicked Open File!")
            folder_or_file = sg.popup_get_file('Choose your file')
            sg.popup("You chose: " + str(folder_or_file))
            print("[LOG] User chose file: " + str(folder_or_file))
        elif event == "Set Theme":
            print("[LOG] Clicked Set Theme!")
            theme_chosen = values['-THEME LISTBOX-'][0]
            print("[LOG] User Chose Theme: " + str(theme_chosen))
            window.close()
            window = make_window(theme_chosen)

    window.close()
    exit(0)

if __name__ == '__main__':
    main()
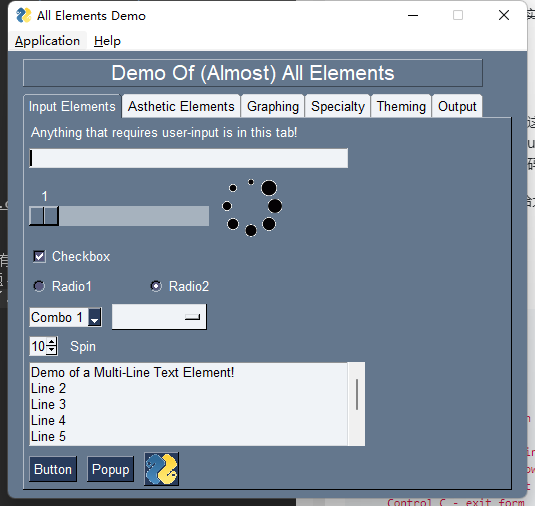
我们来看看运行之后的效果:

这个 demo 是 PySimpleGUI 所有组件的集合,每一个 tab 都是一个分类。这里面包括进度条、画布、主题、滚动条等等。如果你想要找界面组件,到这个 demo 的源码里面找就对了。
总结
这里面还有更多实例,大家就自己去探索吧!这里主要是给大家介绍一个快速开发 GUI 的方法,俗称CV大法。不过这只是一种快速开发方式,大家有时间还是去看看源码,了解一下原理比较好!
大家有什么需要探讨的,可以在评论区留言!
推荐阅读
