搭建完美的 Windows开发环境
搭建完美的 Windows开发环境
因工作原因,长期使用过 Ubuntu18.04、Windows7、Windows10 等系统用于程序开发,唯一的缺憾就是没有使用过 Mac。
本着 “工欲善其事必先利其器”、“颜值就是生产力” 的原则,我最偏爱的就是 Windows10(with WSL)。经常有朋友问我,哈,你这是什么操作?好秀!你这是什么软件?好棒!你这是什么鬼?还能跑 Linux?所以这里写下来作为记录,同时以飨读者。
究竟哪个环境最适合作为开发环境,仁者见仁吧,毕竟这个问题就像是 Android 和 IOS 的引战题一样,还是那句话,适合自己的最好。
下面我将详述自己的开发环境搭建过程,希望对大家有帮助。主要分为系统相关、终端、IDE、浏览器、文档编辑、版本控制、效率工具等。
一:系统相关
首先你要有一个 Windows10 操作系统。
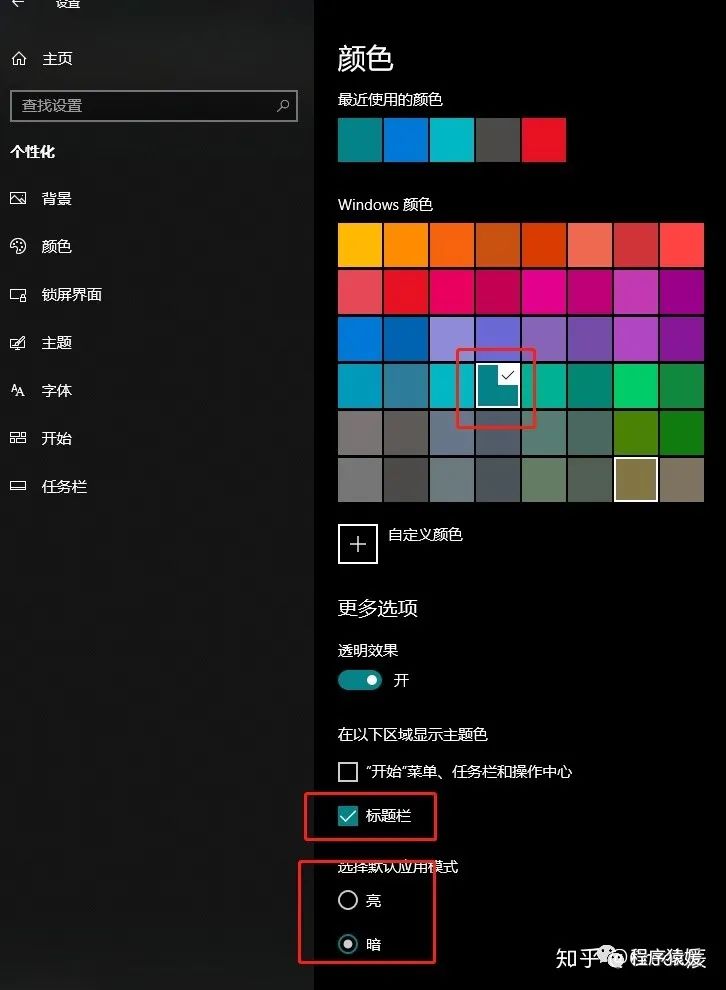
推荐更改下背景和颜色,狂拽炫酷 :)
Win+i - 个性化 - 颜色
Ⅰ、安装 WSL
之所以开篇提到 WSL,因为这是让我最终放弃 Ubuntu 的根本原因。
Q:Linux 最好的发行版是那个?A:WIndows 10 with WSL :)
1 介绍
1.1 What is WSL?
这里是百度的详细介绍:WSL 百度百科 简单的说,就是以软件的形式在 Win10 上运行原生的 Linux。
1.2 Features of WSL
经过近几天的使用,WSL 具有以下特点:
① Win10 和 Linux 文件共享,及可以相互操作彼此的文件;
② 基于上,可以在 Win10 运行 Linux 命令;
③ 基于上,可以在 Linux 运行 Win10 exe 程序;
1.3 Why use WSL?
基于上述 Features,我总结 WSL 有如下三个用处:
① 使用纯正的 Linux 模拟上线环境,运行测试我们的代码;
② 使用 Linux 的软件环境 + Win IDE(VS Code & PyCharm 等)进行开发(使用 Linux 的包管理工具,简直开心的不能行);
③ 使用 PowerShell + zsh(bash)的完美终端组合;
④ 一共才 220M,你想啥 :)
1.4 Why Donot I use VMware?
看了 1.3,相信你肯定不愿意用虚拟机了。
2 安装
安装很简单,这里简单说下(下文基于 WSL1)。
如果你的系统版本支持 WSL2(Windows 内部版本 19041 或更高版本),可直接安装 WSL2,官网教程如下:
关于 WSL1 和 WSL2 的区别,官网对比如下:
WSL2 安装 Docker 比较简单,直接下载 windows 版本,会自动提示你 Enable WSL2,勾选即可,可参考另一篇博文:
2.1 确保系统版本满足
首先确保你的系统是较新的 Win10,以 Ubuntu 为例,该软件仅支持 16237 及以上版本,如下图:
查看本机 Win10 版本方式: Win + i - 系统 - 关于 - Windows 规格,比如我的是 18363
如果不满足,更新即可。
2.2 启动 WSL 功能
按照如下操作:搜索框输入 “启用或关闭 Windows 功能”,点开即可(实际上,仅仅输入几个拼音即可),如下图:
勾选 适用于 Linux 的 Windows 子系统,系统会自动配置,然后重启即可。
2.3 安装
打开 Microsoft Store,输入 wsl,搜索。点击获取这些应用,如下图:
如下是列出的所有 WSL 应用,可以选择自己喜欢的系统,这里我选择的 Ubuntu。进去,点击安装即可。220M,很快就可以完成。
3 使用
安装完成之后,就是愉快而兴奋的使用环节了,首先在开始中点击 Ubuntu,经过几分钟的 install,配置 user 和 password 即可。
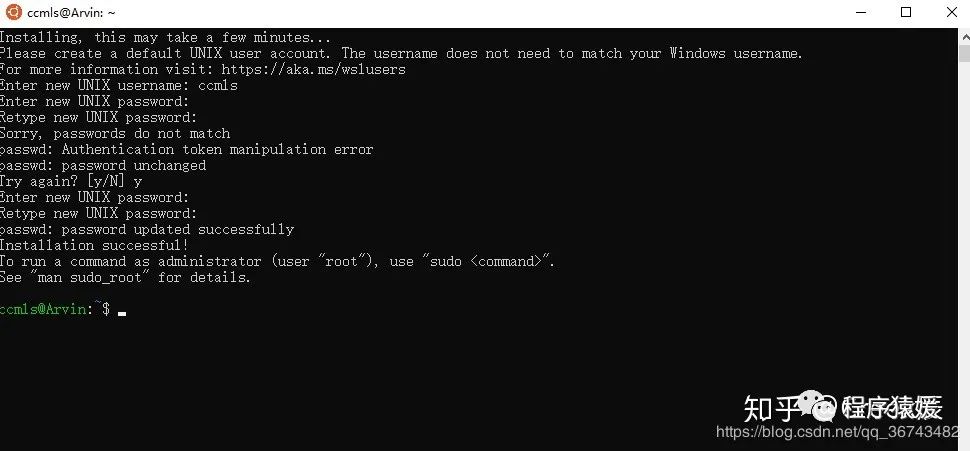
下面开始详细环境搭建。
3.1 更新源
熟悉的套路来了 。。。首先更换为阿里云的 apt 源。
sudo cp /etc/apt/sources.list  /etc/apt/sources.list.bak
sudo vim /etc/apt/sources.list
删除内容,并添加 20.04 源:
deb http://mirrors.aliyun.com/ubuntu/ focal main restricted universe multiverse
deb-src http://mirrors.aliyun.com/ubuntu/ focal main restricted universe multiverse
deb http://mirrors.aliyun.com/ubuntu/ focal-security main restricted universe multiverse
deb-src http://mirrors.aliyun.com/ubuntu/ focal-security main restricted universe multiverse
deb http://mirrors.aliyun.com/ubuntu/ focal-updates main restricted universe multiverse
deb-src http://mirrors.aliyun.com/ubuntu/ focal-updates main restricted universe multiverse
deb http://mirrors.aliyun.com/ubuntu/ focal-proposed main restricted universe multiverse
deb-src http://mirrors.aliyun.com/ubuntu/ focal-proposed main restricted universe multiverse
deb http://mirrors.aliyun.com/ubuntu/ focal-backports main restricted universe multiverse
deb-src http://mirrors.aliyun.com/ubuntu/ focal-backports main restricted universe multiverse
执行 update 和 upgrade
sudo apt update
sudo apt upgrade
3.2 安装 Nodejs、Mysql 等
这里扔两个链接,Python3、git、ssh 有自带的,就不说了。 Nodejs 安装 Ubuntu 安装 Mysql
3.3 安装 zsh&oh_my_zsh
bash 虽好,我用 zsh zsh 安装配置 oh_my_zsh 使用指南
4 使用 WSL 开发
4.1 VScode with WSL
安装完 WSL 之后,打开 VSCode,就会提示你安装 Remote WSL,安装即可。
安装完,左下角会有一个绿色的 WSL 标志。
点击绿色标志,选择 New Window,就会自动配置
我们尝试运行一个 js 文件(需要我们在 Ubuntu 中创建一个 test.js 文件):
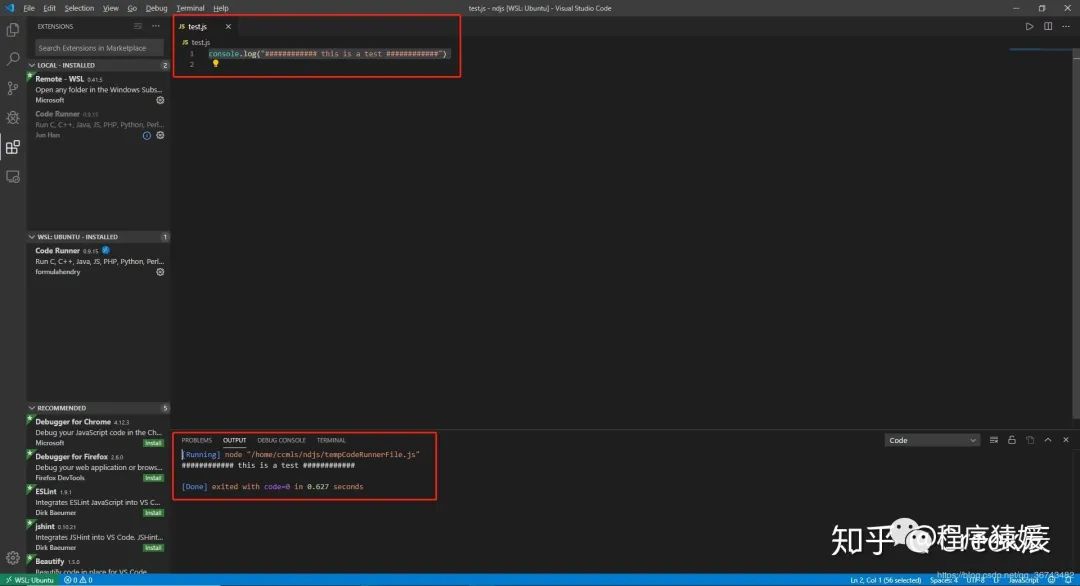
我们再看看 terminal,美滋滋啊~
4.2 Pycharm with WSL
虽然 VSCode 也可以运行 python,但还是觉得用 Pycharm 更爽。Pycharm 也可以使用 WSL 里的 python 环境进行开发,如下操作:setting - Project Interpreter - Add 修改为 WSL 即可,如下图:
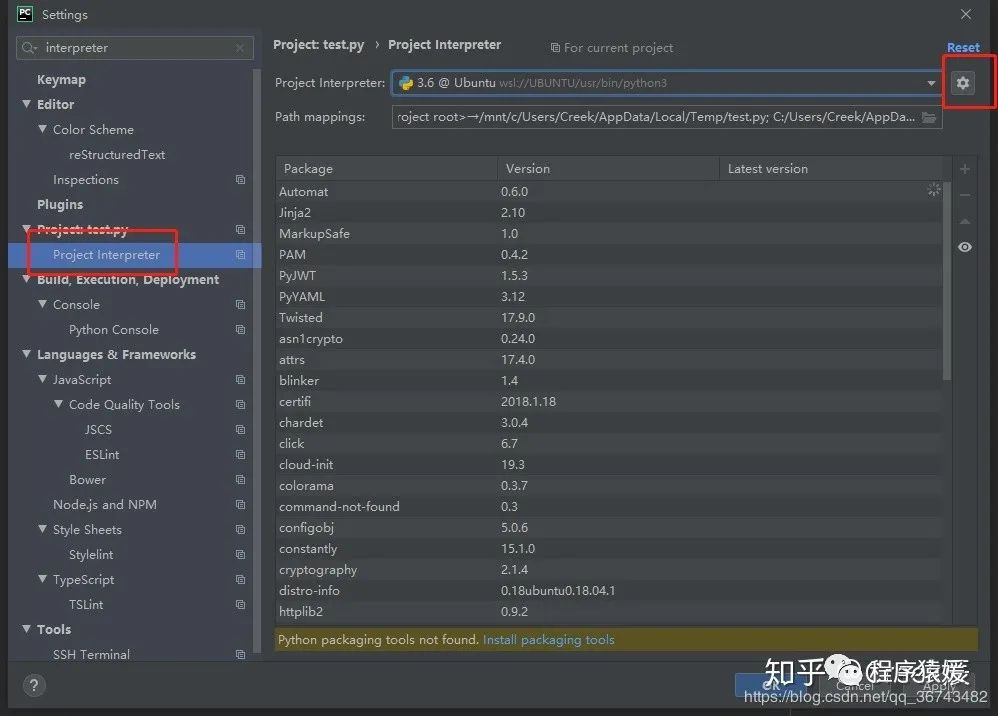
WSL - 选择 Ubuntu 的 python3 即可。
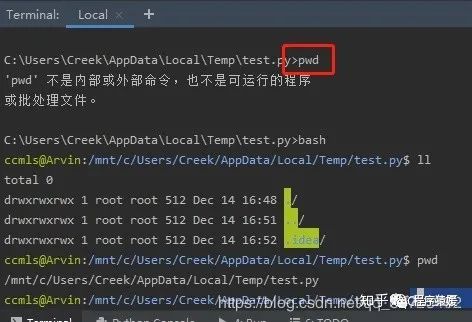
运行即可,哇,真的美滋滋啊,你甚至不需要在 Ubuntu 里去创建一个 py 文件。同样,我们看下 terminal,发现是 Windows 的命令行,没关系,一个 bash 命令,美滋滋。
Ⅱ Windows Terminal
Windows 自带的 CMD 实在是丑且不好用,Powershell 中规中矩,cmder 算是不错,但相信我,Windows Terminal 算得上我用过最舒服的 Windows 环境下的 terminal,而且安装简单。
在 Microsoft Store 中下载 Windows Terminal 即可。

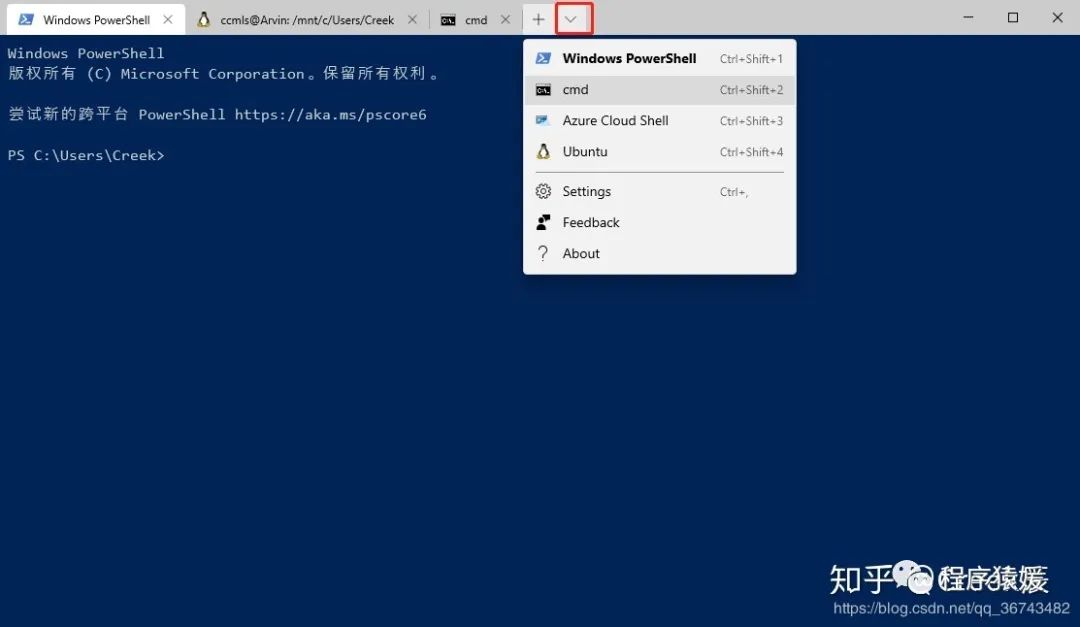
打开后,可以呼出自己想要的终端,当然,你在 Windows PS or cmd 中,直接输入 bash,也可以直接进入 bash。
另外,给大家推荐一款自己特别喜欢的字体:FiraCode.
该字体 l(L) 和 I(i) 区分很明显,大于等于等可以连在一起显示,且颜值很高,笔者的所有的 IDE、文本编辑器、Terminal 都是使用的这个字体,效果如图:
顺便贴下笔者的 Windows Terminal 配置:
// This file was initially generated by Windows Terminal 1.4.3243.0
// It should still be usable in newer versions, but newer versions might have additional
// settings, help text, or changes that you will not see unless you clear this file
// and let us generate a new one for you.

// To view the default settings, hold "alt" while clicking on the "Settings" button.
// For documentation on these settings, see: https://aka.ms/terminal-documentation
{
    "$schema": "https://aka.ms/terminal-profiles-schema",

    "defaultProfile": "{61c54bbd-c2c6-5271-96e7-009a87ff44bf}",

    // You can add more global application settings here.
    // To learn more about global settings, visit https://aka.ms/terminal-global-settings

    // If enabled, selections are automatically copied to your clipboard.
    "copyOnSelect": true,

    // If enabled, formatted data is also copied to your clipboard
    "copyFormatting": false,

    // A profile specifies a command to execute paired with information about how it should look and feel.
    // Each one of them will appear in the 'New Tab' dropdown,
    //   and can be invoked from the commandline with `wt.exe -p xxx`
    // To learn more about profiles, visit https://aka.ms/terminal-profile-settings
    "profiles":
    {
        "defaults":
        {
            // Put settings here that you want to apply to all profiles.
            "fontFace": "Fira Code",
            "fontSize": 11,
            "startingDirectory": "./"
        },
        "list":
        [
            {
                // Make changes here to the powershell.exe profile.
                "guid": "{61c54bbd-c2c6-5271-96e7-009a87ff44bf}",
                "name": "Windows PowerShell",
                "commandline": "powershell.exe",
                "hidden": false,
                "useAcrylic" : true,
                "acrylicOpacity" : 0.75,
                "colorScheme" : "Afterglow"
            },
            {
                // Make changes here to the cmd.exe profile.
                "guid": "{0caa0dad-35be-5f56-a8ff-afceeeaa6101}",
                "name": "Command Prompt",
                "commandline": "cmd.exe",
                "hidden": false,
                "useAcrylic" : true,
                "acrylicOpacity" : 0.75,
            },
            {
                "guid": "{b453ae62-4e3d-5e58-b989-0a998ec441b8}",
                // "hidden": false,
                "hidden": true,
                "name": "Azure Cloud Shell",
                "source": "Windows.Terminal.Azure"
            },
            {
                "guid": "{07b52e3e-de2c-5db4-bd2d-ba144ed6c273}",
                "hidden": false,
                "name": "Ubuntu-20.04",
                "source": "Windows.Terminal.Wsl"
            },
            {
                "guid": "{2c4de342-38b7-51cf-b940-2309a097f518}",
                "hidden": false,
                "name": "Ubuntu",
                "source": "Windows.Terminal.Wsl",
                "useAcrylic" : true,
                "acrylicOpacity" : 0.75,
                "colorScheme" : "ubt"
            }
        ]
    },

    // Add custom color schemes to this array.
    // To learn more about color schemes, visit https://aka.ms/terminal-color-schemes
    "schemes": [
          {
          "name": "Afterglow",
          "black": "#151515",
          "red": "#ac4142",
          "green": "#7e8e50",
          "yellow": "#e5b567",
          "blue": "#6c99bb",
          "purple": "#9f4e85",
          "cyan": "#7dd6cf",
          "white": "#d0d0d0",
          "brightBlack": "#505050",
          "brightRed": "#ac4142",
          "brightGreen": "#7e8e50",
          "brightYellow": "#e5b567",
          "brightBlue": "#6c99bb",
          "brightPurple": "#9f4e85",
          "brightCyan": "#7dd6cf",
          "brightWhite": "#f5f5f5",
          "background": "#001c33",
          // "background": "#212121",
          "foreground": "#d0d0d0"
         },

          {
          "name": "ubt",
          "black": "#151515",
          "red": "#ac4142",
          "green": "#7e8e50",
          "yellow": "#e5b567",
          "blue": "#6c99bb",
          "purple": "#9f4e85",
          "cyan": "#7dd6cf",
          "white": "#d0d0d0",
          "brightBlack": "#505050",
          "brightRed": "#ac4142",
          "brightGreen": "#7e8e50",
          "brightYellow": "#e5b567",
          "brightBlue": "#6c99bb",
          "brightPurple": "#9f4e85",
          "brightCyan": "#7dd6cf",
          "brightWhite": "#f5f5f5",
          //"background": "#2f0012",
          "background": "#212121",
          "foreground": "#d0d0d0"
         },
    ],

    // Add custom actions and keybindings to this array.
    // To unbind a key combination from your defaults.json, set the command to "unbound".
    // To learn more about actions and keybindings, visit https://aka.ms/terminal-keybindings
    "actions":
    [
        // Copy and paste are bound to Ctrl+Shift+C and Ctrl+Shift+V in your defaults.json.
        // These two lines additionally bind them to Ctrl+C and Ctrl+V.
        // To learn more about selection, visit https://aka.ms/terminal-selection
        { "command": {"action": "copy", "singleLine": false }, "keys": "ctrl+c" },
        { "command": "paste", "keys": "ctrl+v" },

        // Press Ctrl+Shift+F to open the search box
        { "command": "find", "keys": "ctrl+shift+f" },

        // Press Alt+Shift+D to open a new pane.
        // - "split": "auto" makes this pane open in the direction that provides the most surface area.
        // - "splitMode": "duplicate" makes the new pane use the focused pane's profile.
        // To learn more about panes, visit https://aka.ms/terminal-panes
        { "command": { "action": "splitPane", "split": "auto", "splitMode": "duplicate" }, "keys": "alt+shift+d" }
    ]
}
如果,你更习惯于使用 Windows PS,但是你又觉得界面丑陋,这里有美化教程。 WPS 美化 Windows Terminal 也是微软开发的,微软出品,必属精品啊。
微软镇贴
二:IDE 相关
Ⅰ IDEA 全家桶
IntelliJ IDEA、Pycharm 等不多说了,唯独是激活码的问题,建议支持正版,我不会告诉你淘宝有十块钱一年的激活码。
Ⅱ Anaconda
用于数据分析,简直不要太开心。
Ⅲ VS Code
微软出品,必属精品。
Ⅳ 数据库相关
4.1 Navicat Premium
Mysql 请认准 Navicat
4.3 PLSQL developer
Oracle 推荐使用 PLSQL,搭配自定义快捷输入,效率简直可以上天了。
三:浏览器
这里主要说下我用的浏览器和相关插件,Emm,莫得插件的浏览器莫得灵魂。
0 Edge
知友推荐的,同样基于 Chromium 内核,个人感觉比 Chrome 好用。体现在:
优点:
①启动速度极快;
②可以访问微软服务,书签和插件方便同步下载等;
③基于 Chromium 内核,插件通用;
④可直接安装 Chrome 官网插件:最近发现,Edge 直接访问 Chrome 的 Chrome 插件官网也可以直接安装插件。
缺点:
①Linux 版目前只是内测版,尚不支持数据同步。
ⅠChrome
这个不解释了,推荐大家科学上网,下载官网的版本,不然可能遇到无法正常升级的情况。
这里主要说下插件。
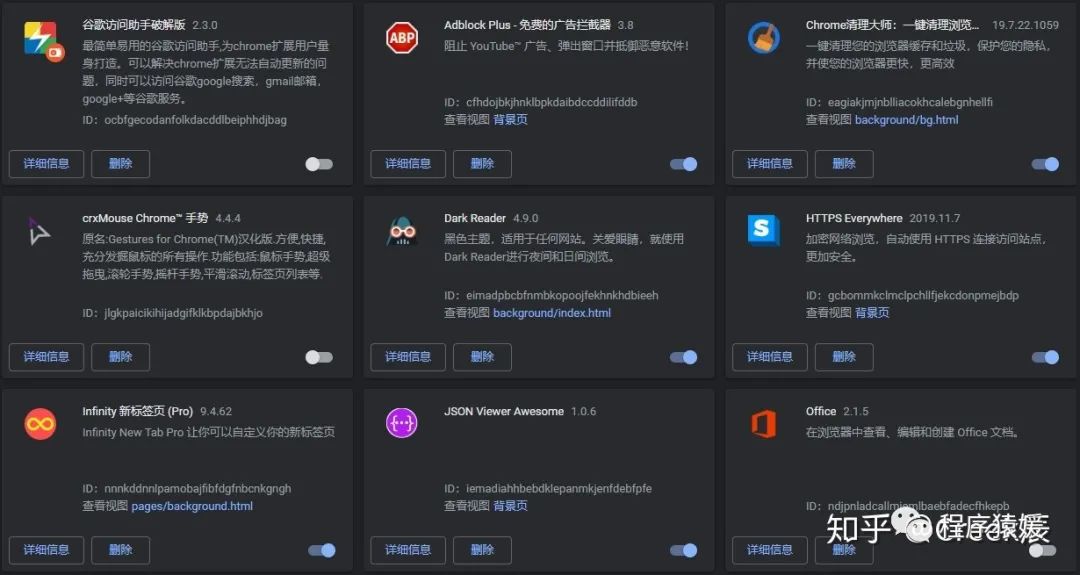
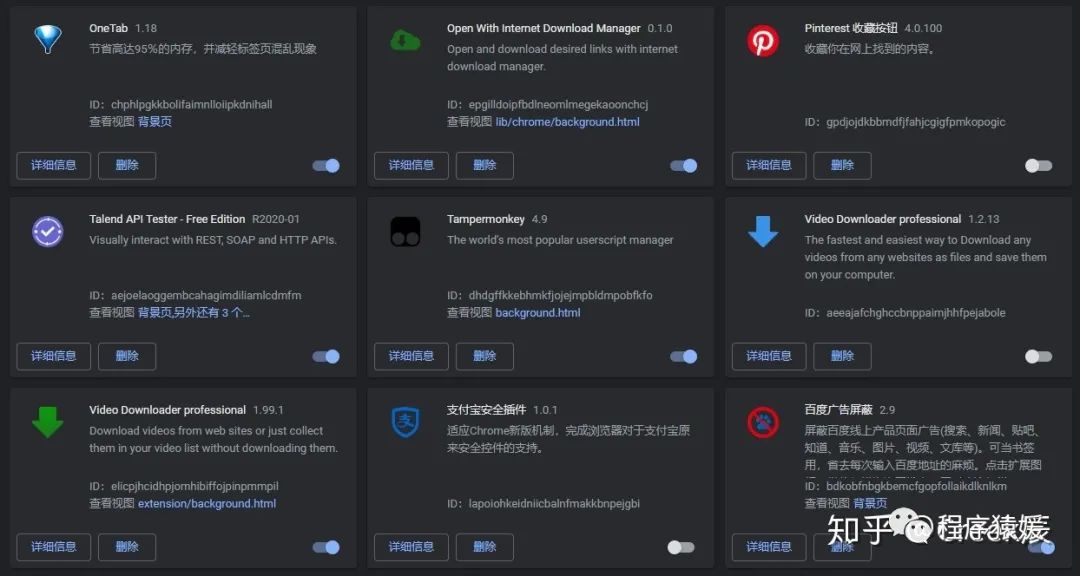
1.1 某插件
违反规定,不写了。
1.2 Dark Reader
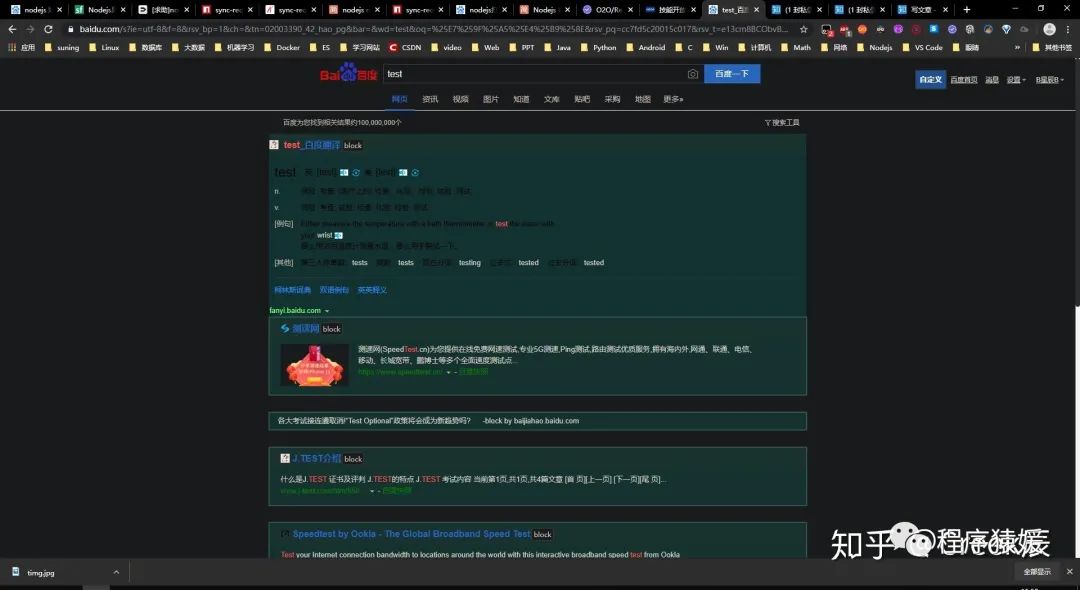
Dark Reader 可以全局黑色,同时配上 Chrome 黑色主题,完美!
1.3 Https Everywhere
使用 https 请求,保证数据隐私安全。
1.4 Infinity 新标签页 Pro
使用过最好用的浏览器首页,见上图。
1.4 JSON Viewer Pro
最好用的 json 格式化工具。


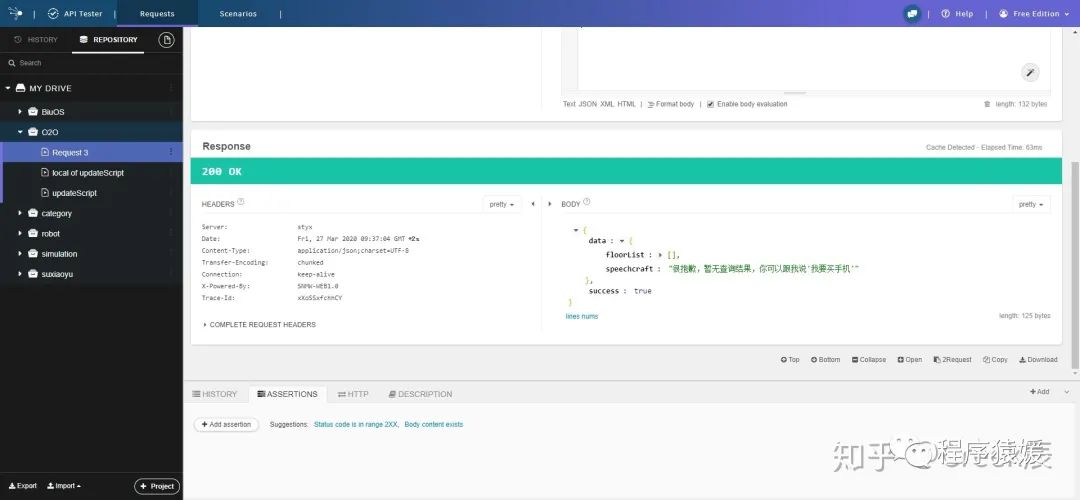
1.5 Talend API Tester
类似于 Postman 和 restclient,并且非常好用。
1.6 油猴 TamperMonkey
神器啊,必须要有,列下我常用的脚本:
值得注意的是,有些脚本可能会影响原本的网页功能,比如我使用的某些脚本会影响知乎的复制功能,所以大家不要盲目的添加脚本,要根据自己的需求来。
1.7 简悦 SimpRead - Reader View
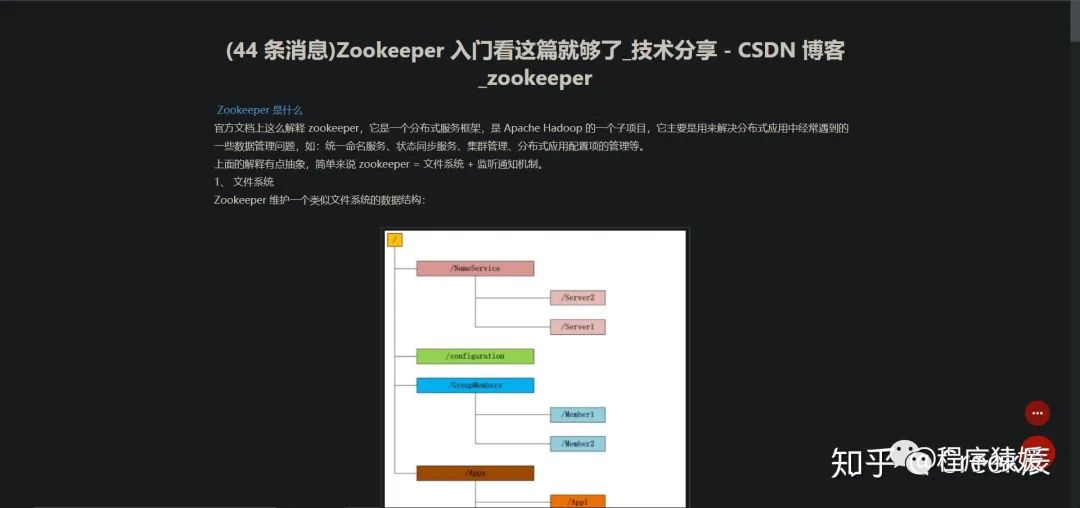
代码高亮、大图查看等等插件,使阅读真的成了一种享受。对 CSDN、博客园、简书等有很好的支持,放个比较图:
1.8 MathJax Plugin for Github
目前 Github 暂不支持 LaTex 数学公式的渲染,通过安装该公式可以在 Github 完美显示数学公式。
Ⅱ Firefox
开源的浏览器,尤其让人放心。但请不要下载国内广告版本,请使用国际版。
同样推荐下几款插件:
2.1 RestClient
2.2 LatexMathifyGitHub
作用同 Chrome 的 MathJax Plugin for Github,均是用于 LaTex 公式渲染。
2.3 VivaldiFox
相信我,这款插件可以让你的浏览器充满生气。
2.4 其余同 Chrome(如果 Firefox 有的话)
四 文档编辑类
Ⅰ 文本编辑器
1.1 sublime Text
这款编辑器应该是我用过最好用的编辑器,功能与颜值俱佳。
自定义快捷键
Ctrl+U 转化为大写
Ctrl+Shift+U 转化为小写
Preference - Key bindings
[
    { "keys": ["ctrl+u"], "command": "upper_case" },
    { "keys": ["ctrl+shift+u"], "command": "lower_case" },
]
自定义字体和样式、替换 Tab 为 4 个空格、显示编码等(需要安装 material theme)
{
    "always_show_minimap_viewport": true,
    "bold_folder_labels": true,
    "color_scheme": "Packages/Material Theme/schemes/Material-Theme-Darker.tmTheme",
    "dictionary": "Packages/Language - English/en_US.dic",
    "font_face": "Fira Code",
    "font_options":
    [
        "gray_antialias",
        "subpixel_antialias"
    ],
    "font_size": 11,
    "ignored_packages":
    [
        "Vintage"
    ],
    "indent_guide_options":
    [
        "draw_normal",
        "draw_active"
    ],
    "line_padding_bottom": 3,
    "line_padding_top": 3,
    "material_theme_accent_bright-teal": true,
    "material_theme_accent_scrollbars": true,
    "material_theme_bold_tab": true,
    "material_theme_small_tab": true,
    "material_theme_tabs_autowidth": true,
    "overlay_scroll_bars": "enabled",
    "show_encoding": true,
    "show_line_endings": true,
    "tab_size": 4,
    "theme": "Material-Theme-Darker.sublime-theme",
    "translate_tabs_to_spaces": true,
    "word_wrap": true
}
这里推荐一些插件:
CTags :可用于代码跳转,实现类似于 IDEA 的 Ctrl + 单击 的效果。
Sublimerge:顾名思义,文件比较。
Pretty JSON:顾名思义,快速格式化 JSON,快捷键为 Ctrl+Alt+J
Material Theme: 颜值即正义
主题推荐:
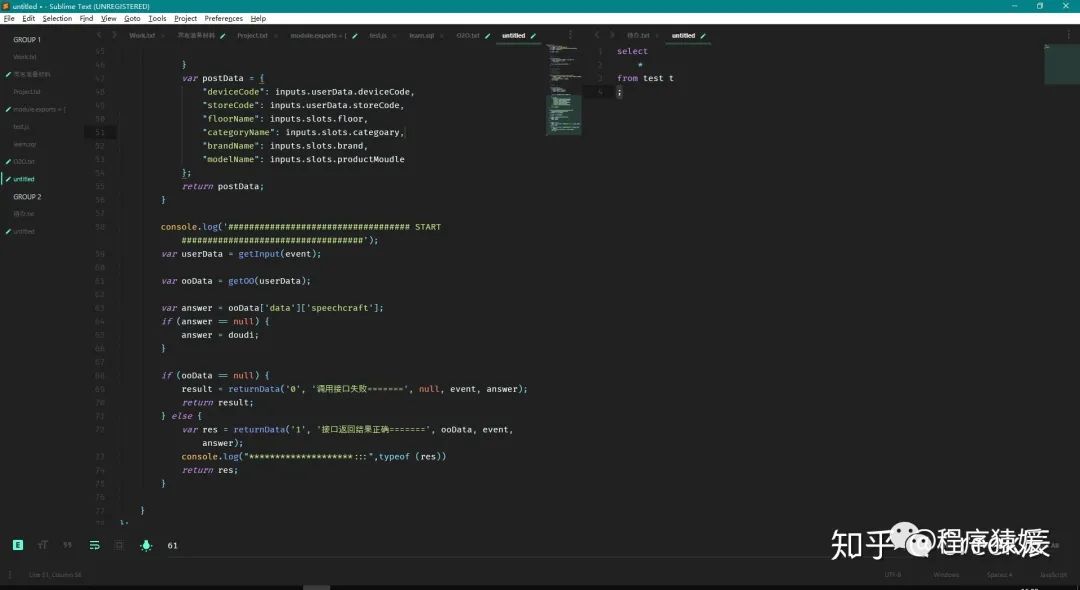
Material Theme:目前我的 sublime 界面如下:
该主题的配置文件为:
{
    "always_show_minimap_viewport": true,
    "bold_folder_labels": true,
    "color_scheme": "Packages/Material Theme/schemes/Material-Theme-Darker.tmTheme",
    "dictionary": "Packages/Language - English/en_US.dic",
    "font_face": "Fira Code",
    "font_options":
    [
        "gray_antialias",
        "subpixel_antialias"
    ],
    "font_size": 11,
    "ignored_packages":
    [
        "Vintage"
    ],
    "indent_guide_options":
    [
        "draw_normal",
        "draw_active"
    ],
    "line_padding_bottom": 3,
    "line_padding_top": 3,
    "material_theme_accent_bright-teal": true,
    "material_theme_accent_scrollbars": true,
    "material_theme_bold_tab": true,
    "material_theme_small_tab": true,
    "material_theme_tabs_autowidth": true,
    "overlay_scroll_bars": "enabled",
    "show_encoding": true,
    "show_line_endings": true,
    "tab_size": 4,
    "theme": "Material-Theme-Darker.sublime-theme",
    "translate_tabs_to_spaces": true,
    "word_wrap": true
}
Sublime 的快捷键及其多,可以自行百度。
Ⅱ Notepad ++
最好用的 SQL 编辑器,没有之一(前提是你要对快捷键很熟悉)。
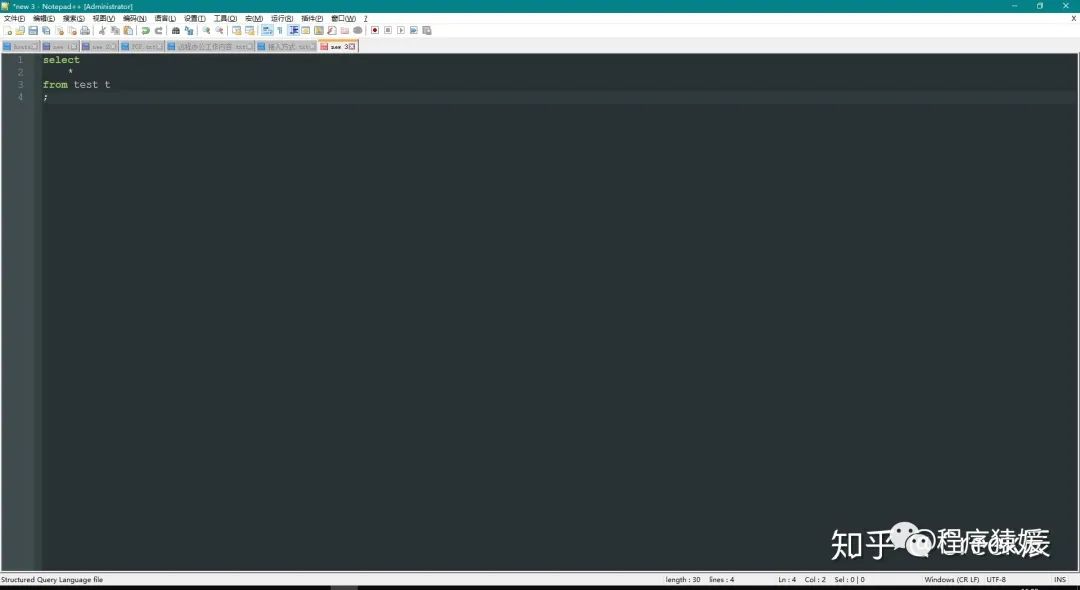
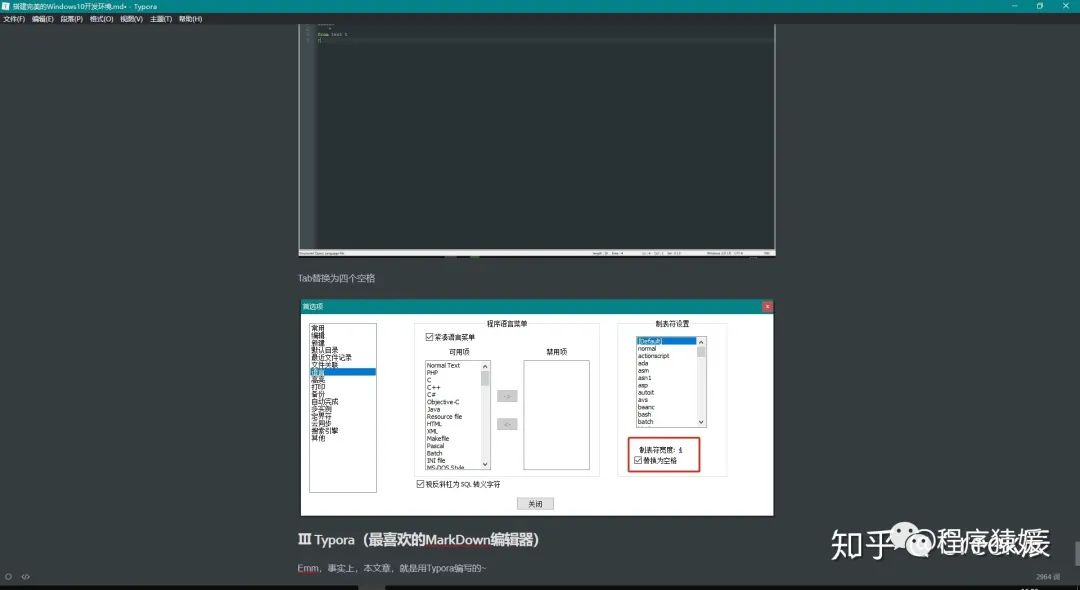
Tab 替换为四个空格
Ⅲ Typora(最喜欢的 MarkDown 编辑器)
Emm,事实上,本文章,就是用 Typora 编写的~
五 版本控制
我们没得选,GIt SVN 搞起来吧。
六 效率工具
Ⅰ everything
搜索神器。
Ⅱ Motrix
开源的下载工具。
Ⅲ FDM
也是开源的下载工具,类似于 IDM。
最后最后,一定要熟练使用快捷键,不会快捷键的程序员灵魂
